|
-
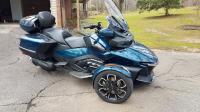
 TricLED 2020 RT rear run/brake and yellow turn signal TricLED 2020 RT rear run/brake and yellow turn signal
This post is more of a Review and How To than just a review.
Here a link to the product page. You can buy this from several places. Value Accessories currently has the best price and free shipping.
Installation instructions that come with the kit from the Slingmods website (an SL sponsor).
Video review and install guide by Slingmods.
Another install video from Value Accessories (an SL sponsor).
General video on rear electrical from Value Accessories- shows how to completely remove tupperware to gain better access to wiring.
__________________________________________________ _
Before I ordered this kit I read and watched all the above documents and I still had a couple of issues with the install. In summary though, the light itself works great and looks very cool. The electrical wiring and connection part were truly plug-and-play and I had no issues with that aspect.
The 2 issues that I had were removing the tupperware (specifically the 8 plastic push pins and 2 hidden clips for the large upper tupperware pieces) and getting the led strip to adhere properly to the channel in the bodywork - the led strip was slightly wider than the channel so it would not fit flat.
I chose to go ahead and remove all of the tupperware as shown in the general video from Value Accessories. I did this because I did not like having that new wiring harness flopping around back there in the body cavity so I wanted to open up the bodywork so that I could secure the harness with some zip ties.
Unlike the front tupperware which uses mostly friction spring clips and easy to remove plastic push pins, the rear tupperware around the saddlebags uses plastic push pins which have a philips head and are threaded. Any dummy should know that a philips head screw requires a philips head screwdriver to remove right? Wrong! No way to remove them with a screwdriver - they just spin. So, I tried removing them with picks with no luck. And since I have little patience with stuff like this, I went ahead and drilled them out like the Value Accessories video indicates.
Once I got all the fasteners out (8 total per side), it should have been a simple matter to remove the large upper piece but this thing is held together like a model airplace with tabs and slots and a hidden "tangs' in the back. I wound up breaking the hidden tang on both pieces and didn't realize I broke them until I heard the plastic fall to the floor. (Look in the videos - the Slingmods video shows that they broke the right side too. The Value Accessories video shows them intact.)
Once I got the upper tupperware off, there was access to the rear tail light assembly and it can be moved away easily be removing the 2 torx screws and the 2 small cap screws at the top (The Value Accessories video shows them to be 5.5mm head but I unscrewed mine with a 7/32" 1/4" drive socket). Once the 4 screws are removed, the entire rear end can be pulled away by gently pulling on each side towards the bottom - there are 2 friction spring clips per side - like are used on the front tupperware).
Once the rear is opened up, just test fit the harness and led strip to make sure it all works.
Then prep the area where the strip goes (alcohol swab and promoter) and lay the led strip in the channel. This is where I had a big issue because the led strip was wider than the channel at the top and in the curve. Not wanting to damage the delicate led strip, I was afraid to use too much force or play with it too long so I wound up laying the top part sort of sideways in the channel and friction fitting it in the curve and then laying it flat in the bottom (only part where it fit as it was supposed to). It is really only gripping well at the very top and the vertical part at the bottom so I don't know how long it will stay put. Time will tell.
I then adhered a zip tie mounting plate just below where the factory harness connector is fixed (below where HITCH is stamped) and zip tied everything nice and tidy so it wont flop around back there. Sorry but I didn't take any pictures of that.
Turned on the ignition and made sure it all worked and then buttoned everything up.
MY time to dis-assemble: 2 hours
MY time to actually install the kit: 30 minutes (includes time to mount zip tie mount and zip ties which are not part of the kit)
MY time to reassemble: 45 minutes
So, one afternoon in my garage in the winter time listening to music and drinking coffee.
Your mileage my vary!
Tips:
This thing is put together like a model airplane with tabs and slots etc. You break one you are screwed - Epoxy isn't going to work for a fix on these tiny tabs. Don't do as I did and break off that rear tab. It cannot be repaired without purchasing a complete new under- seat body pan. However, even if you do break them, it may not be that big a deal. Mine are both broken and although there is slight gap at the back, the panel seems to fit well and the gap is covered up by the painted body piece (on an LTD, it probably is covered up by the top case). See pictures I have posted. I will see if I can find a photo of the "boss" that fits into the tang; If not, I will try to make a sketch. I like to visualize how things come apart so I don't do well unless there are pictures. 
Spray silicone into antenna boot and into the bottom grooves of the rubber gaskets that fit around the bottom of the passenger handrails.
Don't worry about destroying the push pins by drilling them out - I found the exact same ones at my local Auto Zone (Advance Auto Parts has them too). They are a bit pricey ($3.99 pair) but you do not have to use the ones from BRP which may not be availabe from stock. See photos. I doubt replacing the plastic screws with aluminum screws will be any better - they will still spin and they will be harder to drill out once you get them in.
To remove upper strut connection - just take a small screwdriver and insert it into the spring clip and pry up slightly and the strut will come loose from the pivot ball.
top saddlebag tupperware.jpg
rear tail light lens tupperware - upper clips1.jpg
slingmods annotated.jpg
SlingMods video showing broken tab
not broken -annotated.jpg
Value Accessories video showing tab intact
tab gap.jpg
tab gap1.jpg
1.jpg
DSC_0001.jpg
DSC_0003.jpg
IMG_20210121_1446371.jpg
IMG_20210121_1445582.jpg
IMG_20210121_1446086.jpg
IMG_20210122_1621536.jpg
IMG_20210122_1621305.jpg
IMG_20210122_1621382.jpg
-
Very Active Member


Good job. Very detailed and useful for all wishing to do this.
Jack
All my life I wanted to be somebody, now I realize I should have been more specific.
2019 Specialized E-Bike COMO 2.0
2018 Jeep Grand Cherokee Overland
2018 Tiffin Phaeton 37BH Motorhome
2015 BMW R1200R LC
2014 RTL SE6 Pearl White
2012 RT-622 trailer viper red
2014 Look 7x12 motorcycle trailer silver and black
2011 Polaris Ranger green
2013 GMC Yukon Denali XL silver oak
2016 Can Am Maverick
-
Very Active Member


Thank you very much WilcoJunoHotel, very informative.
-

Thank you, sir! Your How To's are much better than mine. I'm going to send you all my info next time so you can format it like this! 
-

Thank you for such an informative post! I wish I would have seen your post before dissassembling my 2020 RTL to put the TRIC LED American flag LED, rear trim turn brake, and saddlebag LED's this weekend. I also broke the rear tab taking the right side panel off. I also had to drill out the screw push pins on each saddle bag as they just spun and would not come out. I went and purchased new ones like the ones you posted. How did you put them in? I completed my mods and am reassembling the bike, when I push them in and then try to screw them in, they just spin in place! I thought maybe these would be better quality, but I am at wits end and have spent two full days working on these mods. Thank you in advance for any help you can provide.
-
Active Member


I installed these about a month ago. I did not take both sides off. I was able to just remove the rear most fasteners on the side bags, pry the side out far enough for my hands to reach the left & right light harnesses (not very far in from the rear) Put a wedge in place to hold it open while I worked and plugged in the new harnesses. Much easier than screwing around with all those tabs, spin fasteners and such. Glad I viewed the Slingmods and Value Accessories videos first, that's what inspired me with the idea. Whoever at BRP came up with the idea for those spin fasteners needs to be shot. 
GLIDE-ON>>>>>>>>>>>>>>
"Blue Belle" 2021 RTL Chrome in Petrol Blue

-
Very Active Member


When I installed this same kit I took extra time to make sure that I didn't do any damage to the hidden clips shown above. Once I got to the clips I noticed that the panel was not installed correctly from the factory and yes one was broke and the other was folded in from improper installation, it broke when I straightened it back out. As stated above it's not a big deal and you cant see it when everything is put back together.
-

I wish I had seen this post earlier. A few attempts with those crazy screwed push pins and I changed my mind about installing the light for now.
 2020 Spyder RT base 
 Posting Permissions
- You may not post new threads
- You may not post replies
- You may not post attachments
- You may not edit your posts
-
Forum Rules
|


 Reply With Quote


 2020 Spyder RT base
