|
-
 Passenger backrest/rack, differently Passenger backrest/rack, differently
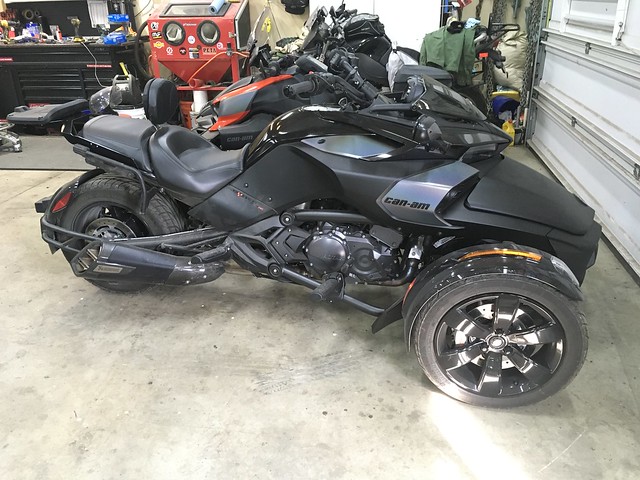
So after I made the driver backrest I was asked about a passenger backrest. They seem to run from $300 to $750, which is outright robbery in my book. Plus lots of designs won't work on my bike because of the mods I've made. So I set about making my own. I normally don't share projects that are still in progress, but I haven't decided which way I want to go with this one. I can make it a backrest only; I can make it a rear rack only; I can make it both; I can make it a trunk mount which would have a backrest on it; I could make any and all of those things interchange on the part I already built. Plus I'm bored and I figured you might be too.
Edit: normally I like to do these projects with only stuff laying around, but this time I dropped $28 on a 1 1/8” annular cutter, which is now one if my favorite tools.
First thing I did was turn some aluminum mounts to cover the hateful tapered bungs that the passenger grab handles used to mount to. These all had to be hand fitted to the bike because of the sloppy welding. The shiny area is 1.125" diameter by a spot over .250" wide, with a .125" lip.
 Untitled by Uncle Grr!, on Flickr Untitled by Uncle Grr!, on Flickr
And installed them on the bike. You can see how little room I have because of how tightly I have the bags mounted. There's even less room when the bags are on.
 Untitled by Uncle Grr!, on Flickr Untitled by Uncle Grr!, on Flickr
Then I made a bracket that slotted into those spools. This bracket took a long time, was built with an idea instead of a plan and almost zero measuring. There was some cleverness though. I made the whole thing from some scrap 1/4" steel a neighbor gave me that came off her exercise equipment under a recall. The front hook was welded on the bottom of the bar using fusion tig @200a, which was fun. The distance to the rear spool was critical and hard to measure, so I made the rear hook parts first then put them on the bike. Put a spot of superglue, then put the front hook and bar on and let them set. Then took the assembly off and tacked it in place, ground out the superglue and welded them solid. The rear cross bar is bent multiple directions in the heedraulic press and welded on to follow the curve of the seat. There was a lot of 'Well, it's only metal" and cutting apart to reweld differently. I ended up moving the crossbar back 2" and cutting the side bars to angle the rear crossbar down about 25*. I'm basing this on my considerable seating area, but I'm building this for the smaller bottomed and they're nowhere to be found so fitment is challenging.
 Untitled by Uncle Grr!, on Flickr Untitled by Uncle Grr!, on Flickr
In operation, you slip the front forks onto the front spools, then push the rear forks down onto the back spools.
 Untitled by Uncle Grr!, on Flickr Untitled by Uncle Grr!, on Flickr
 Untitled by Uncle Grr!, on Flickr Untitled by Uncle Grr!, on Flickr
 Untitled by Uncle Grr!, on Flickr Untitled by Uncle Grr!, on Flickr
So as usual my design criteria were to use (s)crap I had laying around, make zero mods to the actual bike, and make it easily removable/returnable to stock. I still need to add a latch to the rear hooks, and I'll probably weld some grab handles to it as well. As said above, I'm now trying to figure out whether to make this just a backrest, a rack, both, or a trunk mount. No hurry, so I'll cogitate on it for a while and check ebay to see what catches my eye for inspiration. As they say on the youtubes, like, comment and subscribe below.
-
Very Active Member

-
Active Member

-
So I found a smallish Shad top case with mount plate for $50 on eBay and ordered it. When it gets here I’ll mock it up and decide if I like it. If not I’ll knock out a quick mount to put it on the wife’s Ryker. If I do I may still move it to the ryker but get a bigger bag for the Spyder.
-
-
-
So I'm still bored, and I still have metal. I added the rack part to it. Same 1/4"x1.5" steel, cut to some random angle that looked nice, then beveled on the bottom and welded. Then I ground out the top and welded from the top as well. No kill like overkill, I grabbed some 1/8" plate and plasma'd out some braces that got welded on the bottom. I very carefully constrained the part so there was no distortion in the rack part, but I put so much weld into it it both warped the sides and used all of my .023 wire so I had to switch back to .030. To make it fit again I had to put the whole thing in the press and mash it a few times to get it back to right. Once again I am able to hang off the back of it with little to no discernible deflection so I'm happy.
 Untitled by Uncle Grr!, on Flickr Untitled by Uncle Grr!, on Flickr
 Untitled by Uncle Grr!, on Flickr Untitled by Uncle Grr!, on Flickr
 Untitled by Uncle Grr!, on Flickr Untitled by Uncle Grr!, on Flickr
I threw a spare trunk from a different bike onto it to see how I like it. Not too bad really. I'm currently trying to decide between a shad SH58X and any other bag. I don't need that much space, but it's pretty nice looking, just very expensive.
 Untitled by Uncle Grr!, on Flickr Untitled by Uncle Grr!, on Flickr
Still have to make the latch (I found a chunk of .100" stainless I'll use for that) decide whether or not I'm putting handles on it, paint, etc. Oh yeah, another option that I may do regardless is make it compatible with the BRP quick release stuff from the ryker so my wife and I can share accessories.
Edit: Broke down and bought the SH58X $300 shipped. Ouch. Plus $60 for the backrest.
-
Active Member

Keep these posts coming! I'm following most of your threads as these are outside the box ideas. I have zero skills and can't fab anything but I'm really enjoying seeing what you've been able to do!
-
Thanks! Best way to learn something is to do it. I taught myself welding from books before youtube, and if I can do it anyone can. Best thing about metal is that if you don't like it, cut it up and do it again. I've gone through a lot of revisions, modifications, and redo's on this already, some of which I've shared and some that I changed too fast to photograph. Seriously, if you're at all interested in fabbing, take a welding class or pick up a cheap welder and go to it. Youtube is an invaluable resource, everything from Blondihacks to Abom79 to This old Tony and Forme Industrious teach me stuff every time I watch. Sometimes the best thing they teach me is that some of this is just hard work that you have to power through instead of having fancy tools or new materials.
Anyway, back on topic; I'll probably buy another of the $40 backrests I made the front rest out of and knock up a lamonster style rear backrest mount so I have the option of having the rack, the rack and trunk, the rack and backrest, or the backrest by itself. Project creep; the struggle is real.
-
Very Active Member

That is a nice job you got there!!!Got a friend that wants a back rest on his f3!! May have to hack a few ideas from your set up!!
-
So I figured I'd make the latches. First I started out by laying them out in CAD.
 Untitled by Uncle Grr!, on Flickr Untitled by Uncle Grr!, on Flickr
I made a quick jig of 1/4" steel tapped to 1/4-20 with a stack of washers on the back side to mill the stainless mount bolts to length. Then I made another jig to hold them in the lathe to file the end over a bit so it's not so sharp.
 Untitled by Uncle Grr!, on Flickr Untitled by Uncle Grr!, on Flickr
Then I figured, stainless is hard. Aluminum is easy. Besides, I had a narrow aluminum blade on the bandsaw and I hate changing blades on that. So I grabbed part of an old skidplate from some past dirtbike and cut it in parts, then superglued two parts together, and superglued my CAD template to it. Cut it out on the bandsaw, test fit it, drilled some holes, transferred those holes to the rack, drilled and tapped the rack 1/4-20, and installed them. Once I made sure they fit, I sandblasted the parts and installed them again.
 Untitled by Uncle Grr!, on Flickr Untitled by Uncle Grr!, on Flickr
 Untitled by Uncle Grr!, on Flickr Untitled by Uncle Grr!, on Flickr
But I thought to myself that aluminum is soft. And can be weak. And if the previously mentioned requirement to lift the bike from a helicopter by the rack, the aluminum just wouldn't be strong enough. By which I meant that when I lifted the back of the bike off the ground they bent slightly. And I was lazy, and trying to be cute. If you met me, you'd realize that cute doesn't work well on me. Grr. Stainless it is. For those who haven't worked with it, stainless is hateful, angry, sticky metal that work hardens a lot. It requires a lot of tool pressure. It's generally a pain to work with. So I welded up a new blade for the bandsaw, slowed it down to 100fpm from 1200 that I had it set for aluminum. Cut the stainless into chunks, welded the parts together, and bandsawed them out in general. Then I laid everything in the vise, drilled through, and bolted one of the aluminum brackets to the stainless blanks and cut them out.
 Untitled by Uncle Grr!, on Flickr Untitled by Uncle Grr!, on Flickr
Then I decided to paint the rack. Because nothing says a major change coming like painting.
 Untitled by Uncle Grr!, on Flickr Untitled by Uncle Grr!, on Flickr
I hate painting. Finally (for today) I sandblasted the stainless and then wire wheeled them to a dull sheen. They're not truly 'quick release' since i have to remove one screw and loosen another. Still, I can remove the rack with nothing but my swiss army knife. Remove the rearmost screw, loosen the front one, the tabs fall free and the rack comes off. I put the screws to the inside so I have to remove the rear seat to get to the screws, which acts as a vague anti-theft mechanism.
Final pic shows the mostly finished stainless latches, one sandblasted and one wire wheeled after.
 Untitled by Uncle Grr!, on Flickr Untitled by Uncle Grr!, on Flickr
-
So I hated the way it looked. The only thing I hate more than painting (or drywall) is stripping paint. I stripped it down to bare metal, hit it with bondo, cleaned up all the parts, etc. and repainted it. Looks very slightly better now. A girlfriend of mine calls me a perfectionist. I counter that I'm a goodenoughist, but my goodenough standards are pretty high. Regardless, I spent a full day correcting the paint and now it looks better. The trunk should be here in a day or two so most of it will be covered up anyhow. While I was waiting I sandblasted the stainless latches and painted them so they didn't stick out visually so much, and lathed off a chunk of the top of the securing screws so they were more low profile and didn't stick out so much.
Also the astute among you will note that one latch has one hole oblong. I rather screwed up on drilling one hole in the rack so I had to modify the hole in the latch to match. It happens. If I could have fit the whole rack in my mill they would have been perfect, but... Anyway, if I ever make another one i know all the dimensions so I can make it right the first time.
-
My bag arrived, and didn't even kind of fit. I built the rack expecting a trunk mount like this:
 Untitled by Uncle Grr!, on Flickr Untitled by Uncle Grr!, on Flickr
Blue tape under to show where the holes match up with the rack. Unfortunately the Shad mount looks like this:
 Untitled by Uncle Grr!, on Flickr Untitled by Uncle Grr!, on Flickr
Only a few holes line up. So I need an adapter plate. Grabbed some scrap 1/8" plate and plasma'd out a chunk that looked like the right size, and knocked the corners off to make kind of a rough octagon because it looked cooler than a rectangle. I marked where the rack was underneath it, measured to center and drilled and countersunk some holes for some stainless M6 bolts. Then I drilled and tapped the rack to match.
 Untitled by Uncle Grr!, on Flickr Untitled by Uncle Grr!, on Flickr
Once the adapter plate was made I marked it for center, installed the backrest pads on the new trunk, and had my daughter (primary passenger) come out and try it on to see where she wanted the bag mounted. Once she decided, I marked and drilled the adapter plate to match the trunk mount. Because I could I drilled and tapped for another position an inch and a half further back. I have enough room to move it forward by the same amount as well. Painted it up, left it in the sun to dry, and installed it.
 Untitled by Uncle Grr!, on Flickr Untitled by Uncle Grr!, on Flickr
Done. I installed the trunk and took a couple pics to share. At it's smallest the trunk doesn't look too bad. At it's largest it looks enormous, but if I have it that big then I'm probably carrying enough stuff I don't care what it looks like. In it's mid position it's large enough to hold two full face XL helmets.
 Untitled by Uncle Grr!, on Flickr Untitled by Uncle Grr!, on Flickr
Bolted on
 Untitled by Uncle Grr!, on Flickr Untitled by Uncle Grr!, on Flickr
Cover installed
 Untitled by Uncle Grr!, on Flickr Untitled by Uncle Grr!, on Flickr
Stripped down but with the rear rack
 Untitled by Uncle Grr!, on Flickr Untitled by Uncle Grr!, on Flickr
Smallest
 Untitled by Uncle Grr!, on Flickr Untitled by Uncle Grr!, on Flickr
Most embiggened
 Untitled by Uncle Grr!, on Flickr Untitled by Uncle Grr!, on Flickr
Petitest
 Untitled by Uncle Grr!, on Flickr Untitled by Uncle Grr!, on Flickr
Maxmially larged
 Untitled by Uncle Grr!, on Flickr Untitled by Uncle Grr!, on Flickr
I'm pretty happy so far. I'll leave it on the bike for a while to see how I like it installed, but I expect that normally it and the rack will be on the shelf next to all my other bike luggage and I'll only install this when I need it.
-
Another point. The side bags came with a spare lock cylinder so I took apart the trunk latch to see if I could install it. Nope, entirely different kind of key and cylinder. I emailed shad to see if they had some workaround so I don't have to carry one key for the trunk and another for the side bags. Oh yeah, with the trunk on it's biggest, I have more storage space than the F3 limited, but I also have the ability to strip it all off in about a minute for sportbike type fun.
-
 Posting Permissions
- You may not post new threads
- You may not post replies
- You may not post attachments
- You may not edit your posts
-
Forum Rules
|


 Reply With Quote


