|
-
Active Member
 Top Front Shock bolts?? Top Front Shock bolts??
Hello to all,
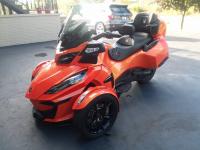
I have a 2019 RTL that I'm thinking about ordering a set of M2 shocks for......
My question is.....for those who have already installed aftermarket shocks on a RT. Do you have to remove the whole frunk to get the top two shock bolts out? Doesn't look like an easy job....any input is appreciated.
Thanks for your time and help!!
P.W.
-
Ozzie Ozzie Ozzie
-
Active Member


Thanks Peter for the heads up!
I see you have a 13.......Have you ever done the top shock bolts on a 14-19?
Not trying to be a smart ash in anyway.
Thanks for your time and help!
P.W.
-
Ozzie Ozzie Ozzie


I have....and if anything, I reckon the newer models are a tad easier.  There's just a little more space up there! There's just a little more space up there! 
2013 RT Ltd Pearl White
Ryde More, Worry Less!
-
Active Member


looks like i'm up for a job!
Now to tell the wife....how much the shocks cost.....LOL
-
Very Active Member

I've done it a couple of times. Never took ANY Tupperware off. Small hands help. I enlisted my former wife for help with that. You need to make sure you have the right size socket and box end wrench. From the factory, the bolts go in from front to rear with the nuts in the rear. You will need to use a bike jack to eliminate all the tension on the bolt to get it out. Then you will need to use the jack to raise the bike to get the shock out. (Up-Down-Up-Down etc). When reinstalling, put the bolt in from the rear. There is an easy way to do it. Before installing the shock, put some double sticky tape on the NUT with a hole in the tape for the bolt to go through. Install the bolt (without the shock) and screw the nut on. Remove the bolt leaving the nut in place stuck to the shock bracket with the tape. Then install the shock (UP-Down-Up-Down) and slide the bolt in easily threading it as it will line up with your previously stuck on nut. Be careful to not push the nut off. Once you get the threads started you can get a box wrench on the nut and socket on the bolt to tighten it up. Be patient. The first time seems almost impossible. After you get the system down it is a piece of cake. Good luck..... Jim
2005 Windveil Blue Premium Mustang Convertible
2008 Honda GL1800/California Sidecar Trike, SOLD
2014 Platinum Silver Satin Spyder RTL, SOLD
Semper Fi

-
Active Member


Thanks for your time and write up!
P.W.
-

I got a set of ratcheting offset wrenches that made it easy to get at. Need to take the weight off the front wheel which makes it more accessible. I put the bolt/nut back in the other way around which is easier.
-
Active Member


Okay, now that I know how to do the job and how the bolt/shocks come off.....is it really worth it??
I mean.... I'm sure they are a LOT better shocks and all, but for those who have changed to aftermarket shocks..... Can you really tell the difference in ride and handling?
-
Very Active Member

In my opinion the (BajaRon) sway bar and better springs makes more of a difference than the shocks.
David C
2016 F3T
DIY Garage Door Opener & GPS Mount
Battery tender cable
Rear IPS Pack Rack

-
SpyderLovers Sponsor


Okay, now that I know how to do the job and how the bolt/shocks come off.....is it really worth it??
I mean.... I'm sure they are a LOT better shocks and all, but for those who have changed to aftermarket shocks..... Can you really tell the difference in ride and handling?
when you order aftermarket shocks,the questionnaire asks for your riding weight....combined or otherwise
with this they assign the correct springs for your ride
the shockabsorber is a hydraulic damper and the spring keeps it in the zone
so maybe the shock absorber cant be appreciated by the casual rider,but having the correct weight spring is pure gold
too weak a spring causes the bike to compress/relieve on bumps and the compression gives increased toe out
so when the bike is bouncing then the toe is changing from in to out.....bump steer is then confused eg the wheel doing the steering, is changing from pointing left,to pointing right....you are now continually compensating with steering changes in direction(wandering?)
so correct spring weight would give a much more predictable ride imho
not so much the shockie itself
big guys would prob suffer this more than lesser guys
im not a suspension guru,just my observations
perhaps this is why aftermarket suspension buyers have such positive reactions( i no i did....elkas)
russ
pres ride
2014 RT-S
bike is WIP
bike has endured elect spike (was jump started incorrectly)
still a WIP but bike is now running and registered....swapped out 5 modules mostly sourced from Canadian wrecker
-
Very Active Member

Just my observations. I went a different route, didn't want to lose any ride comfort as I am busted up. I installed the BajaRon front spring adjusters along with the BajaRon sway bar. His stuff pretty much sells itself. The preload adjusters regain the ride height and clearance lost when you load the front box, but don't stiffen the ride quality. The sway bar stops the wallowing. A good laser alignment and tire replacement to something not Kenda makes my 2018 run like it's on rails. Note- I firmly believe that a custom set of shocks all the way around will absolutely handle better, but if I wanted a faster Spyder I would have bought the F3. My RT is a luxury barge, and I wanted to keep the cushy ride and simply mitigate the wallowing and wandering. Custom shocks usually have higher spring rates, which can make them a little harsh in my opinion.
There are a few threads that explain how to install the adjusters (and consequently the front shocks), and BajaRon has a set of instructions with his kit that make very good sense of the job. I used a breaker bar, offset box wrench, some tape and I think some weatherstripping glue to get my bolts back in the original orientation front to back with the nut at the rear, all without removing the frunk. BajaRon would probably send you the instructions if you contact him, he's a heck of a nice guy.
https://www.spyderlovers.com/forums/...ferrerid=34189
https://www.spyderlovers.com/forums/...ferrerid=34189
h0gr1der
2018 RT Limited Blue/Chrome SE6 *Tri-Axis Bars*Adjustable Driver Backrest*175/55R15 Vredestein Front, 205/60R15 Vredestein Rear Tires*Baja Ron Front Spring Pre-Load Adjusters*Misty Mountain Sheepskin seat cover*Centramatic balancers *Garmin Zumo 595LM GPS*KOTT Grills*BajaRon swaybar*SpyderPops Alignment*Missing Belt guard*Magnetic Mirrors*Custom Rear Adjustable Shock*360° LED Headlights & Foglights*Progressive front fender turn signals
States Visited on Less than 4 wheels.

-
Very Active Member


In regards to removing and reinstalling the upper shock mounting bolts, yes, they can be removed and replaced without removing any bodywork. The task is a bit challenging but doable.
To accomplish a correct reassembly, regardless of how the bolts are oriented, the Spyder should be lowered until sufficient weight is rested into all the shock mounting bolts, and at that point they will be tightened.
In regards to the value of replacing shocks, simply it depends. For solo riders that are fairly light, in most cases oem is adequate. When riders are larger, heavily load the frunk, or spend most time riding two up that is when the benefit is noticed. Realize that when designed, the engineers utilized a theoretical rider to build the Spyder for in regards to height and weight.
We have a 2014 RTS. I purchased the BRP / Can Am accessory Fox Shox and installed those. Prior to this, I had installed a BajaRon Swaybar. So I have ridden with stock shocks and upgraded swaybar, and upgraded shocks / upgraded swaybar, but never upgraded shocks with a stock swaybar.
For us, and we are not large rider / passenger, each made a noticed difference.
-

I have done it both way frunk on and off. Got it to where I use a 15mm offset wrench and ratchet with 15mm socket to get the top nut off.
Now I did use wire ties to keep the shock compressed for easy removal.
I have a 2014 RTL
-
SpyderLovers Sponsor

Removing the lower shock bolt first takes tension off of the upper shock bolt and makes the process easier. Installing the top bolt first during re-assembly is also a help, as is reversing the bolt direction. Here is how I recommend attaching the top assembly (taken from my Shock Adjuster Install Instructions). With a bit of patience, this can be done without too much grief. We also found that an offset box end wrench can be a big help.
Basically, you Pre-Install the Nut/Bolt onto the mounting bracket without the shock. Having the shock in the way is what makes it difficult. By using the double sided sticky tape on the nut, and pre-installing the nut bolt. It aligns the nut perfectly over the mounting bracket hole and sticks it there pretty tightly. When you remove the bolt, the nut stays in place so that you can mount the top of the shock and start threads without having to hold the nut in place. You can turn the bolt by hand to engage the threads. Once this is accomplished. The rest is fairly easy to do.
If BRP had welded this nut to the bracket. We would not even be having this discussion. My double sided sticky tape trick basically does exactly this.
Offset Box Wrench.jpg
Adj Tape -1.jpgAdj Tape -2.jpgAdj Tape -3.jpg
21. Installing the Shock onto the Spyder - It can be difficult to get the nut started onto the upper Shock Mount bolt once the Shock is installed. The following steps are to be completed BEFORE re-installing the shock onto the Spyder.
Be sure that the flange surface of the nut and the mating surface on the FRONT SIDE of the frame where the TOP eye of the Shock mounts are clean and dry.
22. Cut a square from the strip of Double Sided Sticky Tape a bit larger than the flanged end of the Shock Mount Nut.
23. Expose one side of the sticky tape and apply it to the flange. Pic-1 & Pic-2. Press hard to get good adhesion.
24. Using a razorblade or sharp box cutter trim the Sticky Tape around the inner and outer edges of the bolt flange. Pic-3 Be sure NO Sticky Tape is in or blocking the threads.
25. Insert the upper shock mount bolt all the way into the upper shock mount from the rear of the bracket. This is OPPOSITE of the Factory orientation. This makes installation much easier and makes no difference to the Spyder.
26. Expose the Sticky Tape and thread the nut a few turns onto the bolt, (nut on the front side of the frame).
27. Push the nut against the frame pressing FIRMLY. You can also pull on the bolt head to apply more pressure to the nut against the frame. This process will allow you to install the bolt without having to hold and align the nut, which is very difficult to do once the shock is in place.
28. Unscrew the bolt while pressing the nut against the frame. Do not disturb the Sticky Tape or allow the nut to spin!
NOTE: As an alternative to this procedure, some have used the sticky tape on a finger to hold the nut in place. Others have used the sticky tape on the offset box end wrench to hold the nut in place.
29. Return the shock to its general mounting position in the same manner as it was removed.
30. Align the top Shock Mount Eye with the mounting hole in the frame bracket. While holding the shock so there is no friction on the mounting bolt, gently push the bolt through until it contacts the nut. Turn the bolt clockwise with gentle pressure on the nut to engage the threads. Be careful not to push the nut away from the frame.
You can use the Offset Box End Wrench to hold the nut. But if you do, be careful not to disturb the Sticky Tape until you are sure you have good thread engagement with the bolt. Once the threads engage you no longer need to be careful.
Overall, this job is not that hard. As with many things in life. Patience and a little help when needed are the keys.
Last edited by BajaRon; 04-25-2020 at 02:41 PM.
Shop Ph: 423-609-7588 (M-F, 8-5, Eastern Time)
Only SLOW people have to leave on time...


-

For me, Elka shocks made a significant difference on my 2015 RTL. I consider shocks, seat, and bars my best investment.
Rob
 Originally Posted by P.W.

Okay, now that I know how to do the job and how the bolt/shocks come off.....is it really worth it??
I mean.... I'm sure they are a LOT better shocks and all, but for those who have changed to aftermarket shocks..... Can you really tell the difference in ride and handling?
-
Very Active Member


As always, Mr. BajaRon is always the consummate professional!
h0gr1der
2018 RT Limited Blue/Chrome SE6 *Tri-Axis Bars*Adjustable Driver Backrest*175/55R15 Vredestein Front, 205/60R15 Vredestein Rear Tires*Baja Ron Front Spring Pre-Load Adjusters*Misty Mountain Sheepskin seat cover*Centramatic balancers *Garmin Zumo 595LM GPS*KOTT Grills*BajaRon swaybar*SpyderPops Alignment*Missing Belt guard*Magnetic Mirrors*Custom Rear Adjustable Shock*360° LED Headlights & Foglights*Progressive front fender turn signals
States Visited on Less than 4 wheels.

-
Very Active Member


 Originally Posted by h0gr1der

As always, Mr. BajaRon is always the consummate professional!
Often yes, but it seems he is leaving the tape in place between the nut and frame. Forgot how I accessed mine, but I reinstalled the bolts with heads forward as oem was. Certainly made installing the nuts easier and was able to tighten the nut vs spinning the bolt. Do know the Spyder had weight on wheels when tightened.
-

I put Elka's on my 2014 RTS when new...One shock started leaking oil shortly there after...put stock shocks back on...sent both shocks back, took Elka 3 weeks to repair 1 shock, and return both in prime riding season...Two years later both Elka's were leaking...Put BaJaRon's adjustable shock kit on my stock shocks...I COULD NOT TELL THE DIFFERENCE BETWEEN THEM AND MY ELKA'S...Many riders here are using Elka's trouble free...There is a new shock player here with many fine reviews...For me, if I had it to do over knowing what I know now, I'd be putting BajaRon's shock kit on and saving a bundle of money $$$...larryd
PS...I can change my front shock in about 20 minutes per side without removing anything except the top and bottom bolts...But I do have a automotive lift in my garage with home made adapters for the Spyder...
I'm to old and fat to be rolling around the floor anymore...
And besides, its just the kids inheritance...
larryd
-
Very Active Member


 Originally Posted by h0gr1der

As always, Mr. BajaRon is always the consummate professional!
His procedure is what I was trying to explain in my post (#6). BajaRon Helped me a few years ago and educated me on how to make that pesky top bolt behave. It REALLY is not that hard to do. Remember, the lower shock bolt comes out FIRST and goes back in LAST. I removed Elka shocks to have them rebuilt. While they were out, I put the stock shocks back in so I could keep riding. After I got the Elkas back, I took to stock shocks out and put the Elkas back in. The ride difference was very noticeable to me. It took me a bit to get the Elkas fine tuned to my riding preference. But once that was done, I would never go back to stock..... Jim
2005 Windveil Blue Premium Mustang Convertible
2008 Honda GL1800/California Sidecar Trike, SOLD
2014 Platinum Silver Satin Spyder RTL, SOLD
Semper Fi

-
SpyderLovers Sponsor


 Originally Posted by PMK

Often yes, but it seems he is leaving the tape in place between the nut and frame. Forgot how I accessed mine, but I reinstalled the bolts with heads forward as oem was. Certainly made installing the nuts easier and was able to tighten the nut vs spinning the bolt. Do know the Spyder had weight on wheels when tightened.
Yes, the tape stays. But it is very soft. It will crush and you can still turn the nut easily. It's just a temporary aid that really makes no difference after it does the initial job.
Of course, any way that works for you is great. I tried this install many different ways and found this to be the best for me. That's the only reason I recommend it.
Shop Ph: 423-609-7588 (M-F, 8-5, Eastern Time)
Only SLOW people have to leave on time...


-

I was hoping a BajaRon would respond as his method is great!
2017 F3T-SM6 Squared Away Mirror Wedgies & Alignment
2014 RTS-SM6 123,600 miles Sold 11/2017
2014 RTL-SE6 8,600 miles
2011 RTS-SM5 5,000 miles
2013 RTS-SM5 burned up with 13,200 miles in 13 weeks
2010 RTS-SM5 59,148 miles
2010 RT- 622
-

 Originally Posted by Peter Aawen

You shouldn't have to take the frunk off!!  IIRC, getting that top bolt off and out isn't really all that hard; it's getting it back IN & DONE UP that's the trick!  And to do that, it's easiest if you put the bolt in 'the other way' - but it's been waay too long and I can't remember which way that is!! 
Still, there are a few people here in the know who might help?!  IIRC, BajaRon had a pretty good set of instructions re that top bolt that go with his 'pre-load adjusters'  & there are other members here who've had those bolts out & back in again probably more times than I've had hot dinners!!  So hopefully, one of them will post up..... but you certainly don't need to take the frunk off - unless you want to, of course! 
Been there, done that, twice. I put Elkas on my 13 STL and the front end looks much the same. As others have said, take the weight off the wheel, the bolt comes out fairly easy if you don't have huge hands and put the bolt back in from the opposite direction. Not hard at all. Would suggest you send the wife to the store as getting that nut back ON can create a little tension . .
-
Active Member


Again thanks to all for your time and help with my question!
Now I just have to tell the wife my idea about new shocks and see what happens.....LOL
-

 Originally Posted by P.W.

Again thanks to all for your time and help with my question!
Now I just have to tell the wife my idea about new shocks and see what happens.....LOL
Does she ryde with you? In my case, the ryde had gotten so bad my wife was pushing me to get "something better". No argument when it came time to buy.
 Posting Permissions
- You may not post new threads
- You may not post replies
- You may not post attachments
- You may not edit your posts
-
Forum Rules
|


 Reply With Quote
 IIRC, getting that top bolt off and out isn't really all that hard; it's getting it back IN & DONE UP that's the trick!
  And to do that, it's easiest if you put the bolt in 'the other way' - but it's been waay too long and I can't remember which way that is!!
 IIRC, BajaRon had a pretty good set of instructions re that top bolt that go with his 'pre-load adjusters'
  & there are other members here who've had those bolts out & back in again probably more times than I've had hot dinners!!
  So hopefully, one of them will post up..... but you certainly don't need to take the frunk off - unless you want to, of course!


 .
.

