|
-
Very Active Member

 2019 F3-S Rear Tire Change 2019 F3-S Rear Tire Change
I found several different tire change videos on U-Tube and some instructions on this forum, but none specifically for the F3-S. Some things are different and the newer models also have some differences. I have step by step pictures. There is no way I could hold a camera to make a video and the videos are often not very clear on what is required. This will be still pictures and the steps required.
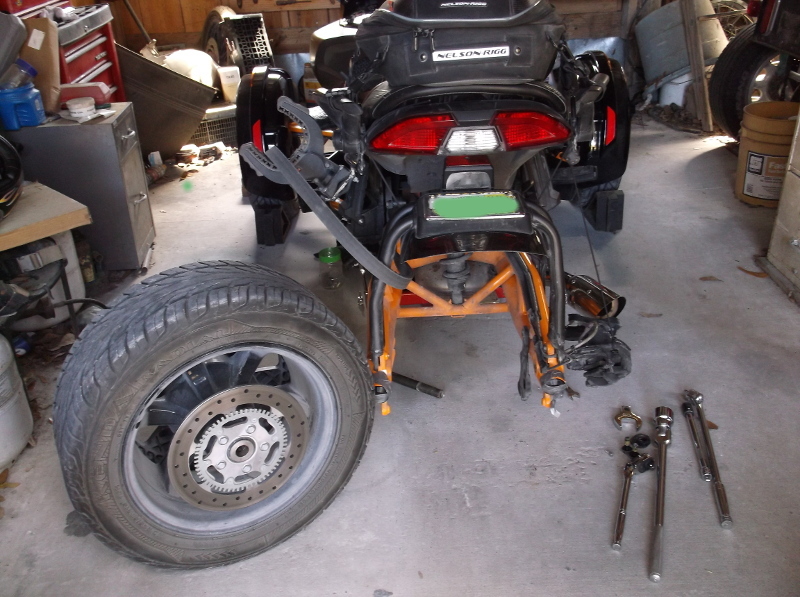
Changing the stock Kenda rear tire that came on the Spyder. It has about 8,400 miles on it. The center is wore down. The tire was always run with the recommended pressure.
This is intended to be a general outline of the procedure to change the rear tire on a 2019 F3-S and other year models that are the same. It is not meant to supersede anything in the Can Am Service Manuals. If anything is found to conflict with the service manuals, you should use the procedure in the service manual.
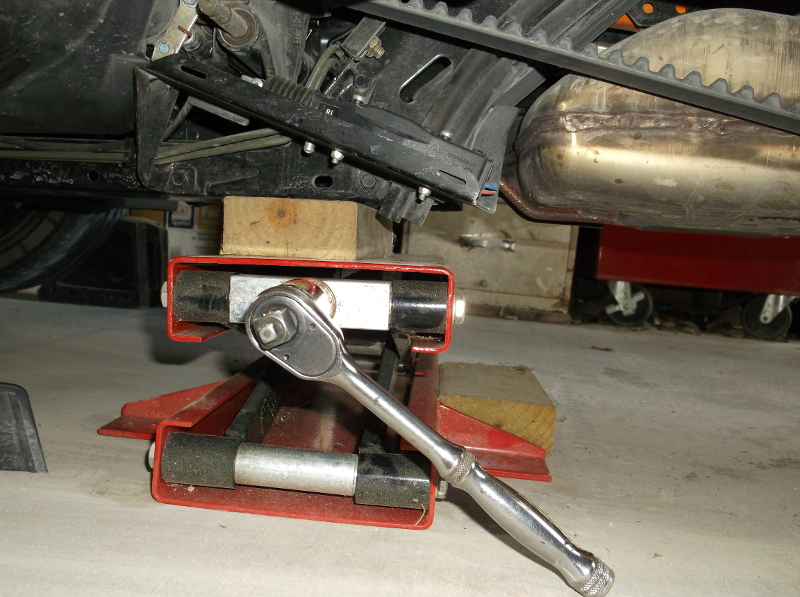
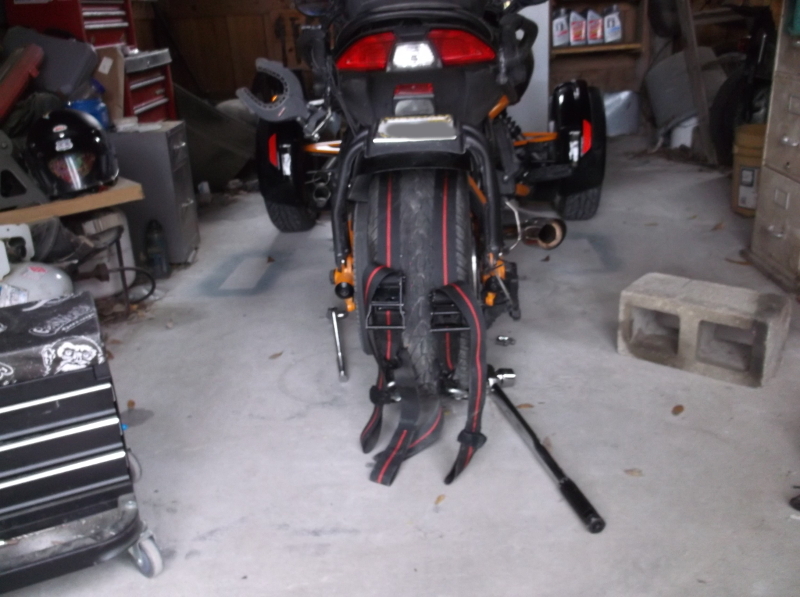
Step (1.) Easiest to do this in a shop on a concrete floor. It is possible to do it in the yard, but the ground is not so solid for jacking the Spyder up and you are more likely to lose nuts, bolts, and small parts. You also need a good MP3 player with some Bob Seger, CCR, etc. to get started.
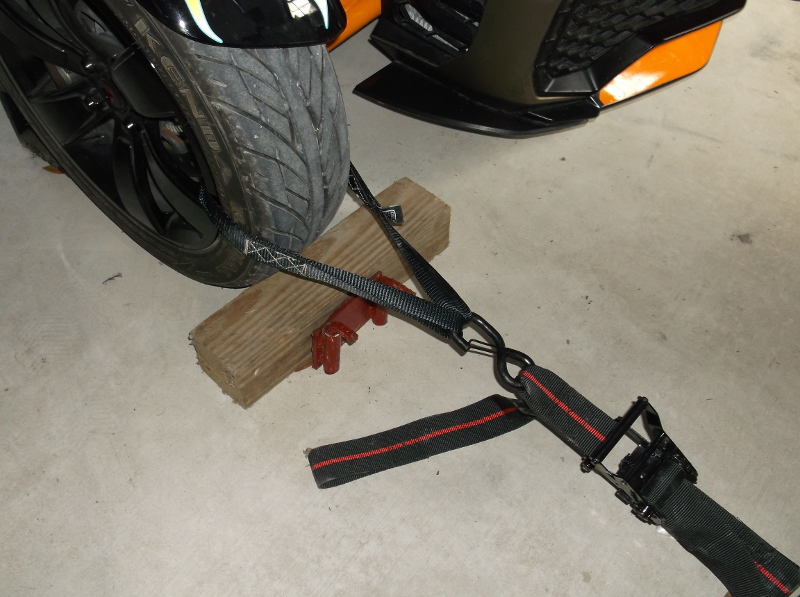
Secure the front tires so they can't roll. As the job progresses, you will have to release the parking brake with the rear jacked up. Chocking the front tires will work. I always work alone and it may seem like over-kill, but I secure the front tires with blocks and straps to D-rings in the shop floor.
In Neutral, Parking Brake On, Front tires secured so they can't roll.
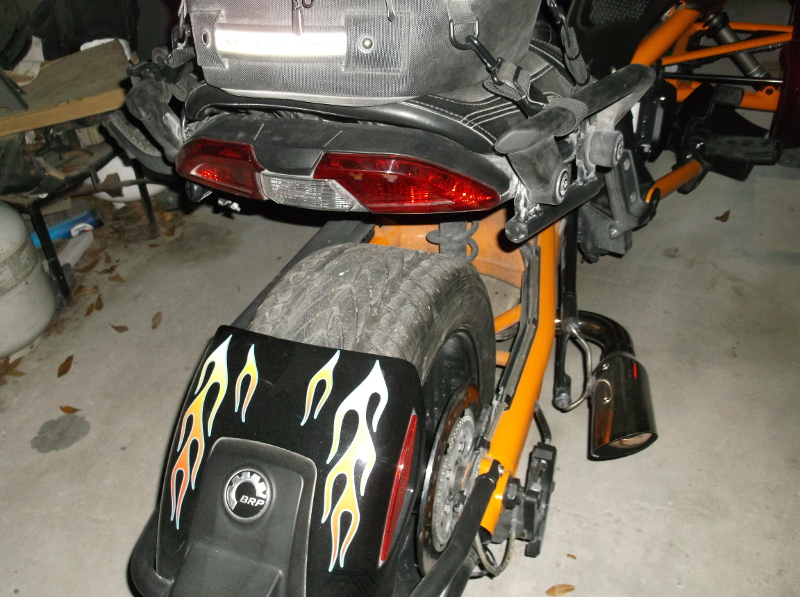
Step (2.) Remove the lower rear fender mounting bolts and back the upper bolts off about a half turn. Pivot the rear fender up and tie it off to the passenger grab rails or rack.
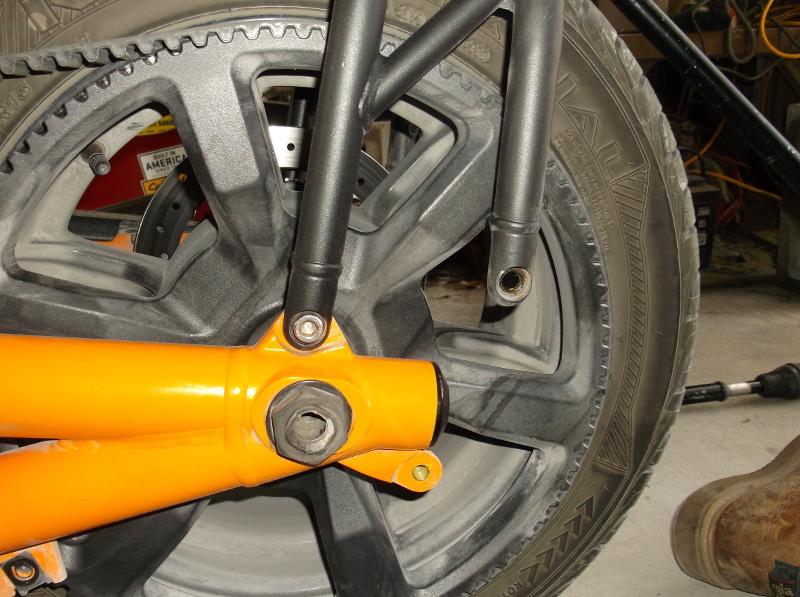

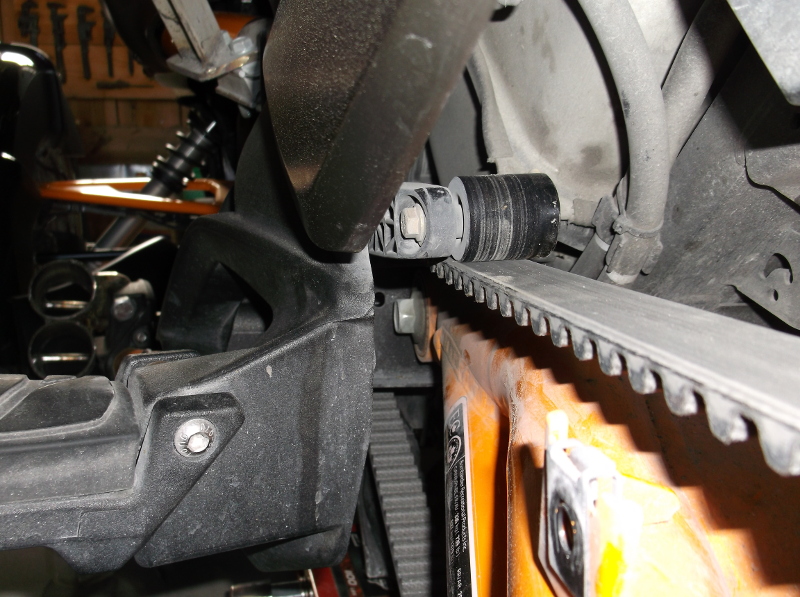
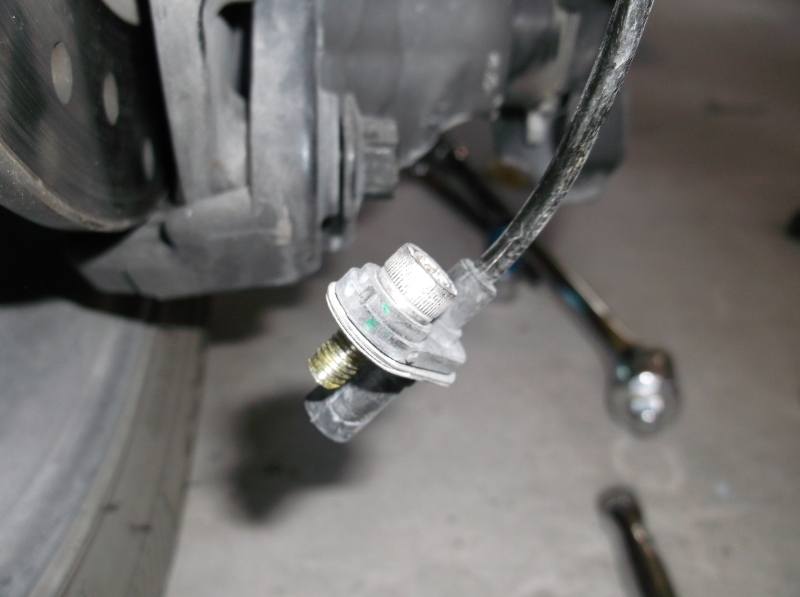
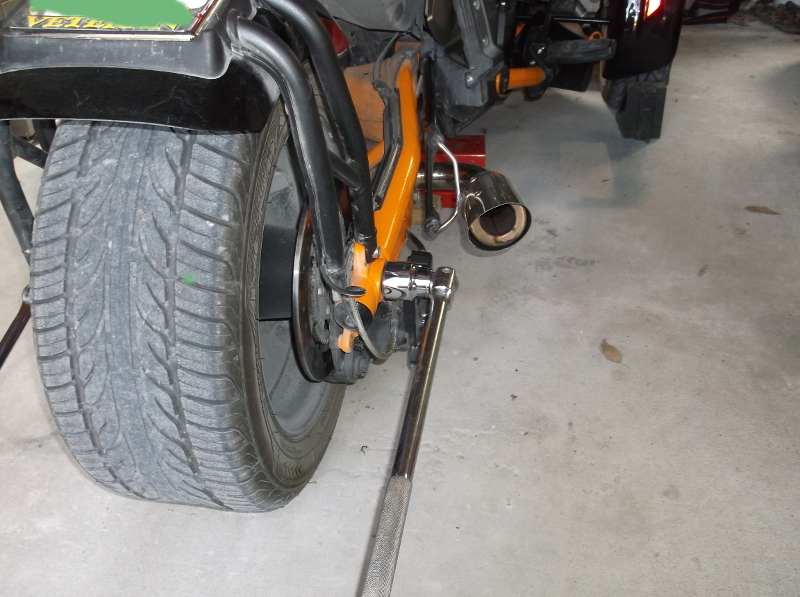
Step (3.) With the tire still sitting on the floor and parking brake set, break the bolts loose on the rear axle, and the brake caliper. Don't take them out yet, just break them loose. Rear axle is 36 MM on both sides. Brake caliper is 16 MM.
-
Very Active Member
-
Very Active Member
-
Very Active Member

I'll be doing this soon.. Thank you ! I was gonna use the Greatrydes video as a reference, but nice to see your thread on the F3-S 
https://www.youtube.com/watch?v=fuRgt7bt5PI

2022 RT Sea To Sky
--------------------------------
-
Very Active Member
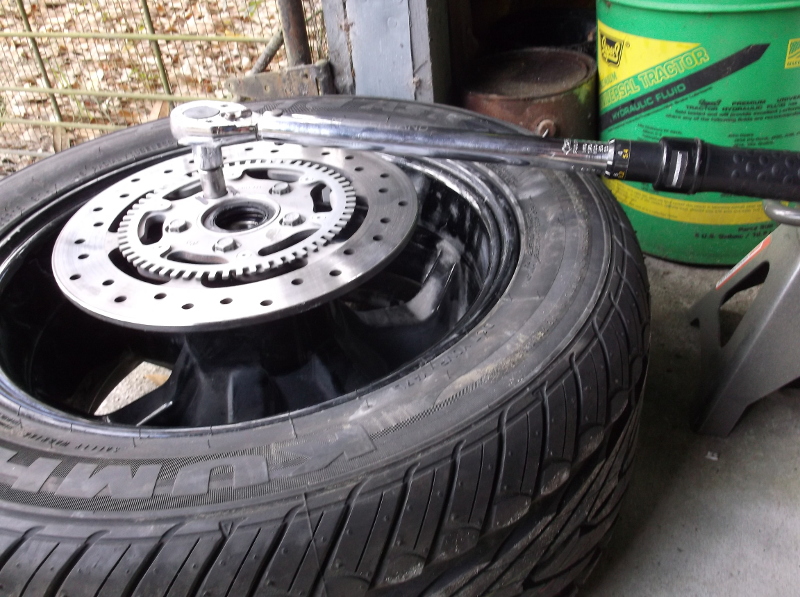
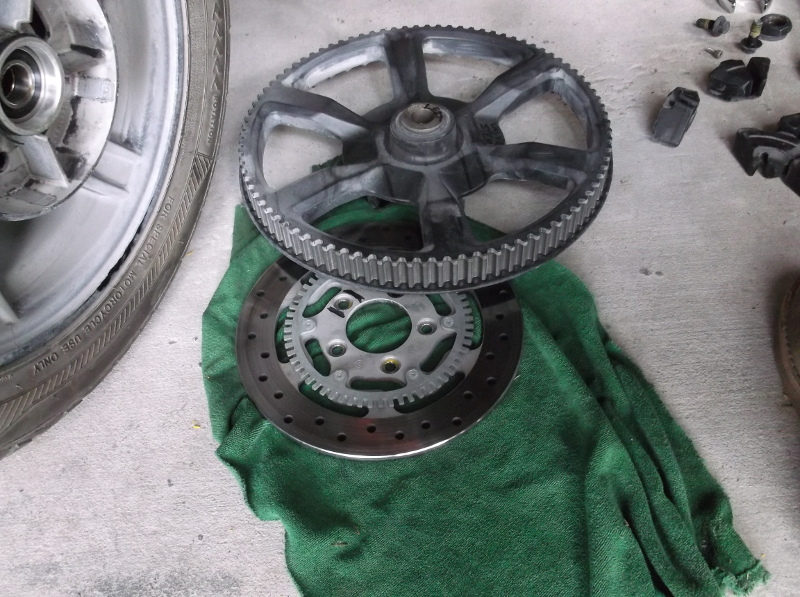
Step (6.) Use a 13 MM or SAE half inch to remove the brake disk and belt pulley from the rear wheel. The disk was left on until the tire was off the Spyder to avoid damaging the brake lines or other parts that are in the way of removing it while the wheel is still on the bike.
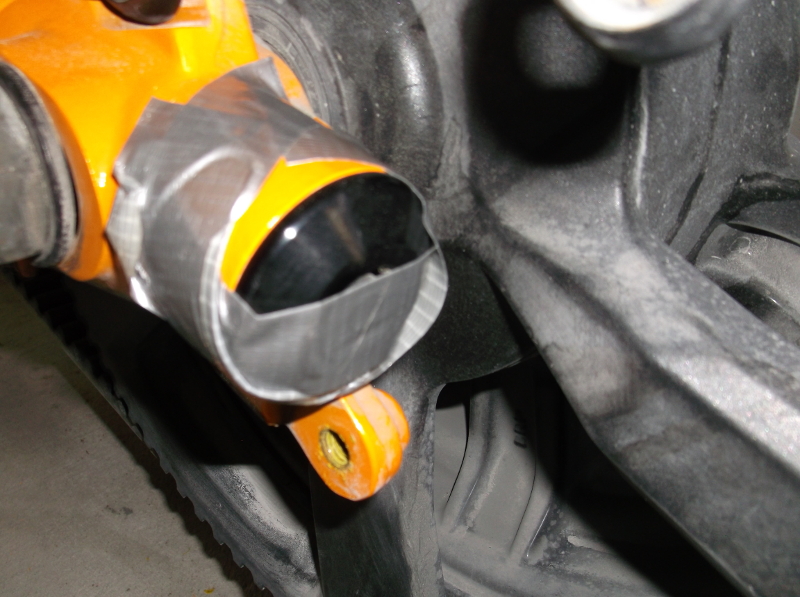
The space with the valve stem is marked on all the pieces with a black marker for now. Might put a stamp mark on it later to make it more permanent. It may not matter if all the parts go back indexed or not, if the spokes are aligned, but there was no vibration before, so it is all going back on indexed exactly like it was. The spacers are marked for left and right side also. The brake disk, bearings, seals, and everything else checks out OK. There is a little dust from the rubber shock bumpers, but no real wear. Clean the bolt holes and threads up and get it ready to go back together. There is a spacer / adapter, about 3 inches long, inside the rear pulley that may or may not fall out. Piece of tape over the opening will fix that until you are ready to put it back together.
-
Very Active Member

Gwolf
Those disc bolts are 13mm which is the same as 1/2". I also notice the uneven wear on your belt idler pulley. Now would be a great time to replace it with the one from Lamonster as it is larger with two larger bearings.
2021 Sea To Sky, 2020 RTL
Isn't it weird that in AMERICA our flag and our culture offend so many people......
but our benefits don't?
-
Very Active Member
 Originally Posted by PW2013STL

Gwolf
Those disc bolts are 13mm which is the same as 1/2". I also notice the uneven wear on your belt idler pulley. Now would be a great time to replace it with the one from Lamonster as it is larger with two larger bearings.
13 MM was a little bit loose on the bolt heads. The 1/2 inch socket was a perfect, tight fit, so it is the one I used. The threads may be metric. I did not check them.
The bearings in the idler are fine. I can replace it at any time. There is only 2 bolts to get the upper belt guard off. That is the OEM idler. It does not hold a lot of pressure on the belt. I will put a straight edge on the idler, with the belt off out of the way, before I close it up. F3-S does not have a lot of luggage or tupperware to remove to get to the idler.
Thanks for the information. I edited the instructions to include your information.
-
Very Active Member
-
Very Active Member
-
Very Active Member
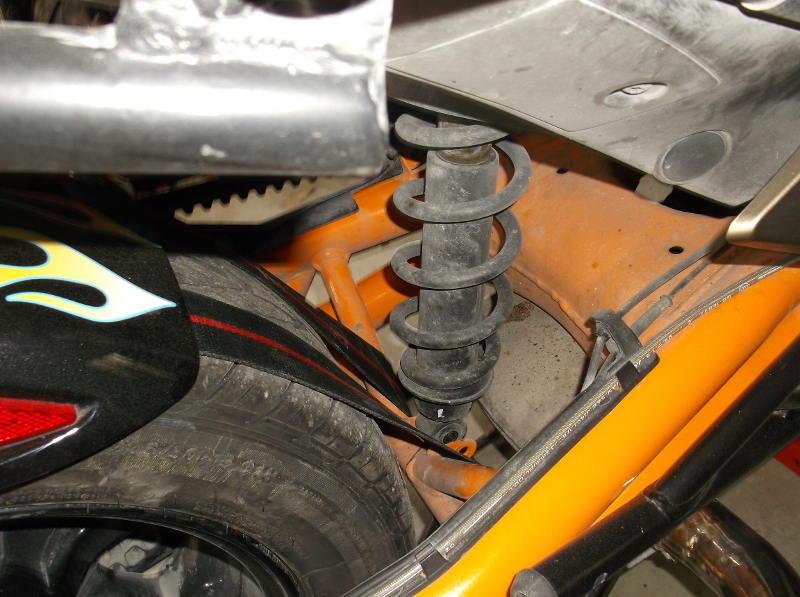
Step (9.) Parking brake is still off. There should not be any pressure on the brake pads. The wheel should roll easily if it is off the floor. Snug the caliper bolts down and then torque them moving back and forth, to 77 Ft Lbs. Make sure all the shims that were on the ABS speed pickup are on it and put it back on the caliper. All the bolts need Loctite. Lower the rear fender back down and put the bolts back in it. Tighten all 4 bolts. Raise or lower the jack to get the lower shock bolt aligned. Loctite it and tighten it.
At this point, leave the belt guards off for now. Turn the key on, try the parking brake. You can watch the lever move as the parking brake engages. Try the foot brake. With the tire off the floor, check to be sure the tire turns freely when the parking brake and the foot brake are released. If the Spyder is properly secured and the rear wheel is off the floor, it can be started up and run in first gear. No need to rev it up. With the tire off the floor it will turn with the engine idling. Check the belt alignment with it in motion. Check it again after you stop the engine and lower the tire to the floor. If the belt is properly aligned, put the belt guards back on. Remove the wheel blocks, lower the jack and move it out.
If everything is back on it and tight, tire pressure is good, and all the work has been double checked. Take it out for a short ride. Check the belt alignment again after you return. The belt should be running 1 MM to 5 MM off the pulley flange. If it is not aligned properly, it will have to be readjusted. Belt adjustment is on page 626 of the service manual. Also check tire pressure again.
Remember to back the torque settings back down to zero before putting the torque wrenches away. Never put them away with the torque set above zero.
 Posting Permissions
- You may not post new threads
- You may not post replies
- You may not post attachments
- You may not edit your posts
-
Forum Rules
|


 Reply With Quote