|
-
Active Member
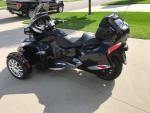
 Seat Removal Seat Removal
Hello out there, question what are the steps to remove the seat from my 2015 RTL. I knoww that I have to unplug it and disconnect the shock but what bolts do I remove at the back of the seat. Thanks

2015 RT Limited
-
Very Active Member


You are going to have fun with this. I had to take my seat off to install the module for towing a trailer. Pretty much just remove the bolts that are used as hinge pins. I recommend taking some pictures first. I also remember that the nuts are loose in a slot too. Don't loose them. A magnet will come in handy. Good luck.
AKA Jud Smales, Four Year Spyder Ryder!
"Quando Omni Flunkus, Moritati"
The Critter 2016 RT-S
Cat Bypass from Lamonster
BajaRon Sway Bar
Hella dual horns with relay
BRP Hitch with trailer module
Foam Grips
Adjustable Air Deflectors
Driver & Passenger Gel Pads in Seat
Shorty antenna
Ultraguard half cover
Gremlin bell from my son
Break Stripe Kit from Wrap My Spyder

-
Very Active Member

Artillery lends dignity to what would
otherwise be a vulgar brawl.
******************************
Cognac 2014 RT-S
-
Very Active Member

It helps a little bit to remove the passenger backrest first. It gives a little more access and visibility to the bolts. It's only 3 bolts that are very accessible from inside the trunk. As others mentioned, don't drop the bolts and/or spacers. It helps to stuff a rag down into the black hole at the back end of the seat just in case. It really isn't difficult at all. A 1/4" drive ratchet and swivel extension would also help to get to the 2 bolts. It's just the 2 bolts that create the hinge. It'll be obvious when you look back in there with the seat up. Remove the strut first, then you can prop the
seat open farther to reach back to the bolts
2021 RT Limited
-
Very Active Member

2011 RTS (Sold to a very nice lady)
1998 Honda Valkyrie
2006 Mustang GT. Varooooom!
US Navy Veteran
SC Law Enforcement Boat Captain
CNC Machine Service Technician
President: Rolling Thunder SC1
Member: Disabled American Veterans, Rock Hill, SC
Member: American Legion
Experience is recognizing the same mistake every time you make it!  
-
SpyderLovers Sponsor


1. Open trunk
2. Remove 5 screws holding passenger backrest on. Remove backrest
3. Remove retaining clip from gas support strut. Lift seat as high as it will go, after unplugging sensor
4. Using blue painters tape, cover all the openings below the seat. Put tape on the captured nuts that hold the seat bolts.
5. Close seat, remove bolts that act as a hinge pin.
6. Turn key, remove seat. Beware of the metal inserts in the seat that the bolts pass thru. Nothing holds them in; they fall out and hide. Or roll away. Or, if you skipped step 4, they dive directly into the black hole, with pin point accuracy
Take your time, step by step. Call if you get stuck. Joe
Joe Meyer

Dealer for the Outlaw/ROLO laser Alignment system
-
Active Member


I got the seat off,but there was not any metal inserts in there at all. I did stick rags under the seat but one of the bolts did find a opening but I was lucky to be able to retrieve it close call. I think it is going to be a pain in the back side to get it back together.

2015 RT Limited
-
SpyderLovers Sponsor


There were. They slip out. Like instantly. If they are gone, you need new ones.
Joe Meyer

Dealer for the Outlaw/ROLO laser Alignment system
-
Very Active Member

You will need to replace the spacers. Be sure to remove the back rest. It really makes the whole process much easier. Remove the hinge bolts with the seat closed. When you replace the back rest put a little Loctite on the three bolts that go into the back. You will not want to tighten them too much as they can slip their (hidden) nuts. Take your time, be careful, and all will go well.

Happy TRAils/NSD
Paul
2012 RT L
AMA 25 years Life Member
TRA
PGR
Rhino Riders Plate #83
Venturers #78
TOI

-
Very Active Member

-
Very Active Member


Might try looking at this video of a seat removal https://www.bing.com/videos/search?q...7DB9&FORM=VIRE If you remove the back you can see better when you disconnect the bottom seat bolts.
-
Very Active Member

I just checked...that spacer costs $4.99 each from BuRP. Oops, I meant BRP.
-
SpyderLovers Sponsor


Hi Dave here,
You know , I am sure, very sure, that some individuals who have never had to wrench on anything
let alone a Spyder are responsible for the design and mounting apparatus that holds the seat on the
RT models. Only some one with little or NO mechanical ability could come up with that design.
It takes more time to remove the seat and reinstall it than to do a full modification / custom to the seat.
go figure.....
It reminds me of the placement of the starter on a Lexus V8 engine.....What the hell were they thinking
anyone here know what I Mean ? it could only be to increase the bottom line of the service department.
Last edited by Motorcycledave; 04-19-2019 at 06:17 PM.
-
Very Active Member


 Originally Posted by Rookiespyder

I got the seat off,but there was not any metal inserts in there at all. I did stick rags under the seat but one of the bolts did find a opening but I was lucky to be able to retrieve it close call. I think it is going to be a pain in the back side to get it back together.
When I installed the arm rests I posted about it and someone suggested that I drill two small holes in the front of each of the square bolt slides and put in a screw to keep the bolts from sliding out. I did and it works great. Also, a 6", 1/4" drive extension with a universal joint makes loosening/tightening the bolts a breeze.
-
Very Active Member


What I did was to slide a plastic zip tie into the opening where the squire nut is to hold it in place. I would then take the bolt out. This held the nut in place making it easy to reattach the seat in the same spot so no adjustment of the seat position was required.
Of course I also did the blue tape over all holes as Joe started. The first time I removed the seat I did none of those and expeareance all the fun of retreavel, and getting the seat in the correct spot!
2021 Sea To Sky, 2020 RTL
Isn't it weird that in AMERICA our flag and our culture offend so many people......
but our benefits don't?
 Posting Permissions
- You may not post new threads
- You may not post replies
- You may not post attachments
- You may not edit your posts
-
Forum Rules
|

