|
-
 Does 2018 RT have GPS connector under seat? Does 2018 RT have GPS connector under seat?
Hello,
The wiring diagram for the 2108 RT shows the GPS power connectors under the seat. It also shows the DC accessory connectors up front. Are they really there and I can't find them, or are the not really there? 
Trying to find keyed power for my GPS and electric vest. The vest takes about 5A max.
Also is it possible to tap into the right fuse box with an addafuse without destroying the water tight seal of the fuse box cover?
Thanks for your help,
Gridley
-
Active Member


I'd be interested to know about the GPS power under the seat. I, too, haven't been able to find them.
I power our GPS from a USB rocker switch port just below the handlebars or a lighter port on a Lamonster Cuff on the left handlebar, depending on where I mount the GPS.
The DC power connectors in the frunk on our 2018 RTL are behind the liner behind a rubber plug to the left side of the battery cover/owners manual holder. (Shifter side is left) I can't remember what is + and -, you can figure that out with a simple multimeter or a DC polarity tester. I used the accessory connectors in the frunk to power a solenoid triggered power distribution box which in turn powers 2 heated gear ports for driver and passenger, a double USB rocker switch on the panel below the handlebars and a lighter style electrical outlet on the Lamonster Cuff at the left handlebar.
Link to the post: https://www.spyderlovers.com/forums/...ribution-block The accessory connectors are behind the rubber plug where the wires are going through the frunk wall in the picture. The rider heated gear line just runs up and lays under the seat when not used. I made it long enough to just come out by the glovebox when I do use it so I can plug the controller in without raising the saddle.
2018 Can Am Spyder RT Limited, 2013 Triumph Bonneville T100
Motorcycle Rights: AMA Charter Life Member, MRF, FORR Life Member Local 11 Southwest Missouri, Mid-South MILE organizing committee member
2018 RT Limited , Got one, on, then off then on until Gloria decides if she likes it or not. blue
-
Very Active Member
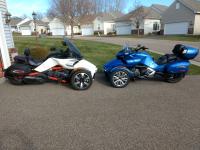

The GPS connections are behind the left panel below the seat about midway on the seat. You do have to remove the panel to find them and maybe zip tied to the wire harness running along the gas tank. There is also accessory wires that are in front of the gas tank on the same side for your heated gear. These will not have connectors on them and will be tied to the harness so you have to really look to find them.
The nice thing about the GPS wires is that they are live once you turn on the key where as the other ones are live once the Spyder is running.
Remember that left and right are determined from the position of driving (sitting as you drive).
2021 Sea To Sky, 2020 RTL
Isn't it weird that in AMERICA our flag and our culture offend so many people......
but our benefits don't?
-

Unless moved from 2016 they are zip tied near the rear of the gas tank, right side. Had black caps on them, easy to miss. Power is a standard 2-pin connector, audio is an 1/8th stereo female jack. That's were they were on my 2016 RT-S.
-

Eureka, I found it!
Thank you PW2013STL, it was right where you said it would be. 
Now all I need to do if find where I can get a plug that will plug into that pigtail.
Thank you again for your help,
Gridley
-
Active Member


is this different than the 2 usb ports in the rear trunk ?
-
Very Active Member


 Originally Posted by Gridley

Eureka, I found it!
Thank you PW2013STL, it was right where you said it would be. 
Now all I need to do if find where I can get a plug that will plug into that pigtail.
Thank you again for your help,
Gridley
It will be likely this type. https://www.amazon.com/dp/B014IU2EE2..._t1_B01A6LTK44
But there is another type BRP uses.
PS also available as a pigtail if you prefer.
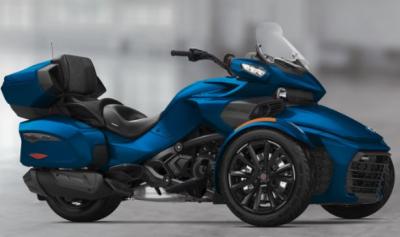
2018 F3 LIMITED
-

Hmm. For some reason I can't find the connection. I pulled the left side panel and also the panel covering the wire harness (the one that holds the passenger seat control). The attached image shows that all the cables are connected with no loose ends. It's pretty hard to nose around in there so I may have missed a pigtail, but I sure can't find anything. Hopefully I'm in the right place (left side, under passenger seat, about 8-9" aft of the end of the gas tank). This is a 2018 RTL, so I'm hoping the reference post still applies. OTOH, I may be missing the obvious...
IMG_8426.jpg
- Ken
-
Very Active Member

 Originally Posted by macbates

Hmm. For some reason I can't find the connection. I pulled the left side panel and also the panel covering the wire harness (the one that holds the passenger seat control). The attached image shows that all the cables are connected with no loose ends. It's pretty hard to nose around in there so I may have missed a pigtail, but I sure can't find anything. Hopefully I'm in the right place (left side, under passenger seat, about 8-9" aft of the end of the gas tank). This is a 2018 RTL, so I'm hoping the reference post still applies. OTOH, I may be missing the obvious...
IMG_8426.jpg
- Ken
Mr. Macbates,
On my 2018 RTL I found the GPs switched wiring on the right side, right behind the gas tank. Here's the thread. If you want to go full Monty, there's an additional plug around the back of the right saddlebag, but I never used it. That's to integrate with the Spyder system.
 Originally Posted by h0gr1der

After burrowing through many threads after this info, I got a mix of folks saying left side midway down the seat, some said right side. The drawing shows the GPS2 connection as the end of the rear harness, right side. After finishing my GPS install, I thought I'd post a pic showing the connector. . It's on the right side, near the gas tank ground bolt, towards the middle. This picture has my GPS harness attached, the connector is just to the side of the BRP on the visible label.
So I'm using an old Zumo 550 until I can afford a new one, all I needed was 12 volts keyed. The BRP plug was a AMP Superseal 1.5. I bought a bag of pigtails here; https://www.ebay.com/itm/5-Kit-2-Pin...72.m2749.l2649 . The only problem I had was the black and red were crossed on the pigtail, when plugged in to the Spyder the black was hot. Heat shrink covered that up, so no big deal.
So that's another one for the books. Maybe it'll help someone else at some point in time.
h0gr1der
2018 RT Limited Blue/Chrome SE6 *Tri-Axis Bars*Adjustable Driver Backrest*175/55R15 Vredestein Front, 205/60R15 Vredestein Rear Tires*Baja Ron Front Spring Pre-Load Adjusters*Misty Mountain Sheepskin seat cover*Centramatic balancers *Garmin Zumo 595LM GPS*KOTT Grills*BajaRon swaybar*SpyderPops Alignment*Missing Belt guard*Magnetic Mirrors*Custom Rear Adjustable Shock*360° LED Headlights & Foglights*Progressive front fender turn signals
States Visited on Less than 4 wheels.

-

Thanks h0gr1der! I'll yank the panels on the right side and take a look. Since there didn't seem to be anything on the left side I'm hopeful I can find the connection this time. At least I'm getting lots of practice taking all the tupperware off...
- Ken
-
Very Active Member


 Originally Posted by macbates

Thanks h0gr1der! I'll yank the panels on the right side and take a look. Since there didn't seem to be anything on the left side I'm hopeful I can find the connection this time. At least I'm getting lots of practice taking all the tupperware off...
- Ken
Mr. macbates,
These things really aren't that hard to do once you get through the first time. Takes more time to write about it than actually do it. Be aware on this forum a lot of people (me included) read the "what's new" filter, and miss that it is posted in the RT or F3 forum. When someone responds, always check their ride to see if it matches your question. Some things like tires and such cross over, but the locations on wiring is different on the F3.
h0gr1der
2018 RT Limited Blue/Chrome SE6 *Tri-Axis Bars*Adjustable Driver Backrest*175/55R15 Vredestein Front, 205/60R15 Vredestein Rear Tires*Baja Ron Front Spring Pre-Load Adjusters*Misty Mountain Sheepskin seat cover*Centramatic balancers *Garmin Zumo 595LM GPS*KOTT Grills*BajaRon swaybar*SpyderPops Alignment*Missing Belt guard*Magnetic Mirrors*Custom Rear Adjustable Shock*360° LED Headlights & Foglights*Progressive front fender turn signals
States Visited on Less than 4 wheels.

-

Found it exactly where you said it should be. Thanks again for all the help with this; quite easy once you know how to do it (as are most things). Any you're right; the first time taking off the panels is a bit worrisome about breaking things, but it gets easier each time. Now to snake the wiring through and get things hooked up...
- Ken
-
Very Active Member


 Originally Posted by macbates

Found it exactly where you said it should be. Thanks again for all the help with this; quite easy once you know how to do it (as are most things). Any you're right; the first time taking off the panels is a bit worrisome about breaking things, but it gets easier each time. Now to snake the wiring through and get things hooked up...
- Ken
Did you get the installation instructions? I mounted a Garmin 590, and snaking the wiring with that huge connector in the middle was pretty tough. Instructions can be found here; http://instructions.brp.com/content/...ion.html#tab=1
h0gr1der
2018 RT Limited Blue/Chrome SE6 *Tri-Axis Bars*Adjustable Driver Backrest*175/55R15 Vredestein Front, 205/60R15 Vredestein Rear Tires*Baja Ron Front Spring Pre-Load Adjusters*Misty Mountain Sheepskin seat cover*Centramatic balancers *Garmin Zumo 595LM GPS*KOTT Grills*BajaRon swaybar*SpyderPops Alignment*Missing Belt guard*Magnetic Mirrors*Custom Rear Adjustable Shock*360° LED Headlights & Foglights*Progressive front fender turn signals
States Visited on Less than 4 wheels.

-

Thanks for the link to the instructions; I wasn't aware of them. The GPS mount shown in the instructions apparently isn't available anymore, so I ordered something similar from LaMonster. I'm waiting for that and the Amp connector plug now. In the interim I routed the cable through the space at the bottom of the steering column, which looks to have sufficient clearance (albeit a bit ugly). I do like the idea of routing the cable through the center cap, although I don't think that BRP sells those anymore. I suppose I could modify the existing one by cutting out a round section for the cable, but I'm not sure where the cable would come out once I push it through the popout hole (and does that popout cap just "pop out"?). I've got a couple of days before the parts arrive, so I'll dig around some more and see if I can figure out where the center cap hole comes out.
-

I would think it's much easier to learn how to use the new BRP Connect system than to try and install old GPS. Sit in a nice comfy chair and play with your smartphone, read the 2019 owners manual and play with it while connected. Then you won't have to deal with external gadgets all ofer the bike.
-

 Originally Posted by Flamewinger

I would think it's much easier to learn how to use the new BRP Connect system than to try and install old GPS. Sit in a nice comfy chair and play with your smartphone, read the 2019 owners manual and play with it while connected. Then you won't have to deal with external gadgets all ofer the bike.
I've used both Genius Maps and Sygic for over a year, and disregarding the small screen size and inability to do complex routing, the real problem is not with them; it's with BRP Connect. I'm tired of always having to start the bike and stand by waiting to see if BRP Connect will really connect, or if I get a message just saying "Connecting" with nothing ever happening. Even going through the steps of starting the bike, opening the frunk, waiting 1-2 minutes, and then plugging in the phone only has a 75% or so success rate. Worse yet is when I get a message saying "Application not found". In that case the entire display freezes and I can't switch back to anything, such as Stats/trip or other embedded functions. The solution is to pull over to the side of the road, open the frunk, and disconnect and reconnect the phone.
I really like the BRP Connect concept, but there are too many bugs and problems with the software at present. I didn't get the GPS unit when I bought the bike last year since I would rather use the free Genius Maps app, but it just didn't work. I do use the Genius and Sygic apps with CarPlay in my car and they work great with no issues at all (Sygic is wonderful). No problems with either app on CarPlay, but many significant problems with BRP Connect makes the decision to switch to Garmin easy (plus it has better phone and audio support together with much easier routing options).
- Ken
-

 Originally Posted by h0gr1der

OK, I finally got the wiring installed (or at least the cable run and ready to connect). All in all, I think poking myself in the eye with a sharp stick would have been more fun, but it’s now a nice looking and clean installation. Since it took quite a bit more than expected, I thought I would post the instructions so anyone else crazy enough to try this will have a somewhat easier time.
This is for a 2018 Spyder RTL with standard (not Triaxial) handlebars. The GPS is a Garmin Zumo 595, although the 590 may be the same.
1: Once the tupperware is off, pop out the rectangular plug in the center of the steering column. A small screwdriver inserted at the top (forward) point of the plug will pop it out. Do not pry from the side or bottom or you may damage the plug.
2: Pop off the cap on the inline fuse in the GPS cable . This will make is somewhat smaller and marginally easier to thread through the hole.
3: Push the red and black (power) wires through the pop-out hole on the steering column. There’s a lower hole inside the column towards the aft part of the column, and the wire should go through there. Looking from the right side of the bike you should see the wire, which is (of course) just out of reach. You’ll need some sort of ‘grabber’ to snatch the wire and pull it through.
4: Remove the rubber cap from the USB cable, which will make is somewhat easier to thread through. Insert it in the hole and through. Once the end is through the first hole you may/will need to rotate the cable 90 degrees since the pop-out hole is rectangular front to back, while the lower hole is rectangular left to right (how nice!). Pull the USB cable all the way through.
5: Pull the red and black power cable almost all the way back out the pop-out hole. Make sure not to pull it all the way; leave a short amount sticking out the right side of the bike. This will give you about 8” of red and black wire sticking out of the pop-out hole.
6: Take one of the audio plugs and tape it to the power wires, right next to the pop-out hole. Push the taped audio/power cables through the pop-out hole while at the same time gently pulling the red/black cable outwards from the right side of the bike. This should result in the audio cable coming out the right side with the power cables (unless the tape rips, in which case you go back to step 5 and start over.
7: Repeat steps 5 and 6 for the remaining two audio cables.
8: Last but not least is the big rubber contraption that merges all 6 leads into one cable. This has to be inserted into the pop-out hole and pulled through also. Unfortunately, the pop-out size is 1.14”, while the rubber thing is 1.16”, so it won’t fit. My solution was to take a Dremel tool and grind down the rubber. Be careful not to hit the wires when you do this, of course.
9: Once you have mangled the rubber thing so that it fits through the pop-out, you’ll find that it’s a bit too long to allow you to rotate it and push it though the bottom hole (remember, you have to rotate it 90 degrees to get it through the lower hole).
10: Loosen the handlebar bolts. Top bolts just a little, and bottom bolts a fair amount. No need to take the handlebars off, but you do want to be able to lift the bars a bit. The bolts are VERY tight; probably held in with red Lock-Tite, but they will (eventually) turn.
11: Rotate the rubber thing 90 degrees and push it and the remaining cable all the way through, re-tighten the handlebar bolts, and the cable is now ready to be connected.
12: The pop-out cover no longer fits, so you can either leave it off or cut out a U-shaped section to fit over the cable. I haven’t done that yet, but how hard could it be (and what could go wrong?  ). ).
Still have to route and dress the cable, as well as putting a connector on the power leads and hooking it up to bike power. That’s for another day though; it’s now time for a beer.
Hope this helps someone who is considering installing a Zumo 590/595 on a 2018 RTL and wants it to look good. Many (many!) thanks are due to h0gr1der for all the suggestions on this task. Without his help I would have just routed the cable though the space at the bottom of the steering column, which is not really a good solution since it looks bad and may be subject to chafing.
- Ken
-
Very Active Member


 Originally Posted by macbates

OK, I finally got the wiring installed (or at least the cable run and ready to connect). All in all, I think poking myself in the eye with a sharp stick would have been more fun, but it’s now a nice looking and clean installation. Since it took quite a bit more than expected, I thought I would post the instructions so anyone else crazy enough to try this will have a somewhat easier time.
This is for a 2018 Spyder RTL with standard (not Triaxial) handlebars. The GPS is a Garmin Zumo 595, although the 590 may be the same.
1: Once the tupperware is off, pop out the rectangular plug in the center of the steering column. A small screwdriver inserted at the top (forward) point of the plug will pop it out. Do not pry from the side or bottom or you may damage the plug.
2: Pop off the cap on the inline fuse in the GPS cable . This will make is somewhat smaller and marginally easier to thread through the hole.
3: Push the red and black (power) wires through the pop-out hole on the steering column. There’s a lower hole inside the column towards the aft part of the column, and the wire should go through there. Looking from the right side of the bike you should see the wire, which is (of course) just out of reach. You’ll need some sort of ‘grabber’ to snatch the wire and pull it through.
4: Remove the rubber cap from the USB cable, which will make is somewhat easier to thread through. Insert it in the hole and through. Once the end is through the first hole you may/will need to rotate the cable 90 degrees since the pop-out hole is rectangular front to back, while the lower hole is rectangular left to right (how nice!). Pull the USB cable all the way through.
5: Pull the red and black power cable almost all the way back out the pop-out hole. Make sure not to pull it all the way; leave a short amount sticking out the right side of the bike. This will give you about 8” of red and black wire sticking out of the pop-out hole.
6: Take one of the audio plugs and tape it to the power wires, right next to the pop-out hole. Push the taped audio/power cables through the pop-out hole while at the same time gently pulling the red/black cable outwards from the right side of the bike. This should result in the audio cable coming out the right side with the power cables (unless the tape rips, in which case you go back to step 5 and start over.
7: Repeat steps 5 and 6 for the remaining two audio cables.
8: Last but not least is the big rubber contraption that merges all 6 leads into one cable. This has to be inserted into the pop-out hole and pulled through also. Unfortunately, the pop-out size is 1.14”, while the rubber thing is 1.16”, so it won’t fit. My solution was to take a Dremel tool and grind down the rubber. Be careful not to hit the wires when you do this, of course.
9: Once you have mangled the rubber thing so that it fits through the pop-out, you’ll find that it’s a bit too long to allow you to rotate it and push it though the bottom hole (remember, you have to rotate it 90 degrees to get it through the lower hole).
10: Loosen the handlebar bolts. Top bolts just a little, and bottom bolts a fair amount. No need to take the handlebars off, but you do want to be able to lift the bars a bit. The bolts are VERY tight; probably held in with red Lock-Tite, but they will (eventually) turn.
11: Rotate the rubber thing 90 degrees and push it and the remaining cable all the way through, re-tighten the handlebar bolts, and the cable is now ready to be connected.
12: The pop-out cover no longer fits, so you can either leave it off or cut out a U-shaped section to fit over the cable. I haven’t done that yet, but how hard could it be (and what could go wrong?  ).
Still have to route and dress the cable, as well as putting a connector on the power leads and hooking it up to bike power. That’s for another day though; it’s now time for a beer.
Hope this helps someone who is considering installing a Zumo 590/595 on a 2018 RTL and wants it to look good. Many (many!) thanks are due to h0gr1der for all the suggestions on this task. Without his help I would have just routed the cable though the space at the bottom of the steering column, which is not really a good solution since it looks bad and may be subject to chafing.
- Ken
Great post. Pics would have been nice. When I'm standing on my head trying to fish that awful mid-wire connector and sweating/cussing I didn't think of the camera!
h0gr1der
2018 RT Limited Blue/Chrome SE6 *Tri-Axis Bars*Adjustable Driver Backrest*175/55R15 Vredestein Front, 205/60R15 Vredestein Rear Tires*Baja Ron Front Spring Pre-Load Adjusters*Misty Mountain Sheepskin seat cover*Centramatic balancers *Garmin Zumo 595LM GPS*KOTT Grills*BajaRon swaybar*SpyderPops Alignment*Missing Belt guard*Magnetic Mirrors*Custom Rear Adjustable Shock*360° LED Headlights & Foglights*Progressive front fender turn signals
States Visited on Less than 4 wheels.

-

I am with Flamewinger....BRP system is not that problematic. I do not have connectivity issues...works every-time for me. It must be a personal thing by why do people want complex routes? I pick a destination and go. I have never put multiple stops in any GPS , car , bike etc.
-

Good morning,
I have a 2015 RT-L and have removed the built in Garmin Zumo GPS and Docking Station. What else can I plug into that GPS2 male plug behind the seat? Is there anything else I can use that plug for ?? Thanks in advance!
-
Ozzie Ozzie Ozzie

 Originally Posted by Amputeez

Good morning,
I have a 2015 RT-L and have removed the built in Garmin Zumo GPS and Docking Station. What else can I plug into that GPS2 male plug behind the seat? Is there anything else I can use that plug for ?? Thanks in advance!
Once you've discarded the GPS, it's effectively just a power circuit, so I'd reckon you can pretty much use it for anything you want that needs ign initiated power... just so long as it's not likely to draw anything more than the circuit & fuse can handle. 
2013 RT Ltd Pearl White
Ryde More, Worry Less!
-
Very Active Member


 Originally Posted by Amputeez

Good morning,
I have a 2015 RT-L and have removed the built in Garmin Zumo GPS and Docking Station. What else can I plug into that GPS2 male plug behind the seat? Is there anything else I can use that plug for ?? Thanks in advance!
The GPS power plug is powered from the radio. I don't know if there is a separate fuse for it but I doubt it. Be careful how much of a load you connect to it. I'd be hesitant to put more than 1 or 2 amps on it.
2014 Copper RTS
Tri-Axis bars, CB, BajaRon sway bar & shock adjusters, SpyderPop's Bumpskid, NBV peg brackets, LED headlights and modulator, Wolo trumpet air horns, trailer hitch, custom trailer harness, high mount turn signals, Custom Dynamics brake light, LED turn signal lights on mirrors, LED strip light for a dash light, garage door opener, LED lights in frunk, trunk, and saddlebags, RAM mounts and cradles for tablet (for GPS) and phone (for music), and Smooth Spyder belt tensioner.
 Posting Permissions
- You may not post new threads
- You may not post replies
- You may not post attachments
- You may not edit your posts
-
Forum Rules
|


 Reply With Quote


 ).
).


