|
-

20190109_155646~2.jpg
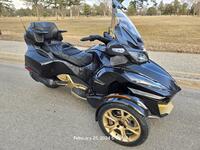
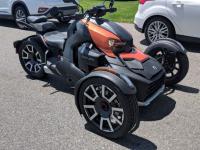
A picture of my Rally with the cable hold downs pointed forward after performing the steps mentioned at the beginning of this thread. The difference may be the amount of rotation after inverting??? Not sure. Used the original holes for the grip guards as well.
-
Very Active Member

CTAC, Thanks for being courageous enough to tackle this and post it as well.
NM Wrench, visit your local body shop and you should be able to find some small rubber plugs used to plug autobody holes.
Safe Rides,
David and Sharon Goebel
Both Retired USAF Veterans
2018 Anniversary Edition RT Limited
Baja Ron ultimate swaybar. Vredestein tires, Baja Ron Front Shock Pre-load adjusters, Pedal Box, See my Spyder Garage
IBA 70020 |
 |
-

From the start, my objective is to take this roadster type platform and make it closer to a cruiser. People can make fun of me that I have added a cup holder, GPS, gel seat pad, backrest mounted storage, etc.... but, not to over-dramatize it, the handlebar modification and adding lumbar support has made all the difference in the world for ergonomics. Two-up trips of more than 150 miles are now practical for us.
-
Active Member

 Originally Posted by CTAC

From the start, my objective is to take this roadster type platform and make it closer to a cruiser. People can make fun of me that I have added a cup holder, GPS, gel seat pad, backrest mounted storage, etc.... but, not to over-dramatize it, the handlebar modification and adding lumbar support has made all the difference in the world for ergonomics. Two-up trips of more than 150 miles are now practical for us.
Nobody can make fun of you, because most of us have done all those things to our F3's and Rt's to make them more comfortable! This is no different.
Way to go CTAC! Ignore the naysayers that say the Ryker can't be used for long distance touring.
-
Very Active Member

When I get mine I will be driving it to work during the summer months and I will want a cup holder for my coffee and probably a lumbar support. So, thank you for being one of the pioneers for the Ryker.

-
Very Active Member
-
Active Member

 Originally Posted by CTAC

From the start, my objective is to take this roadster type platform and make it closer to a cruiser. People can make fun of me that I have added a cup holder, GPS, gel seat pad, backrest mounted storage, etc..............
I say it's your bike......so do as you like. Making it your own and being comfortable is the way to go.
-

 Originally Posted by CTAC

It was a DIY project. And responding to an earlier post, they were not originally installed incorrectly... Just not to my liking. By rotating them approximately 180 degrees after flipping them, they sit taller and a bit closer to me. It took me a couple hours but others might be able to do it faster. I was being very careful.
The details of what I did:
- Removed the mirrors (one Torx screw per side)
- Removed the hand guards (four socket head cap screws per side)
- Loosened and seperated the throttle casing halves and the throttle grip itself (three Torx screws)
- Loosened and seperated the turn signal/horn/lights casing halves (two Torx screws)
- Removed cables from cable holders (carefully)
- Removed bar clamps and screws (four socket head cap screws)
- Flipped handlebar end-for-end and ensured I slid the throttle housing over handlebar end before placing into the adjustment cradle.
- Replaced the bar clamps and screws. Test fit preferred angle then fully tighten the four socket head screws.
- Inserted a thin screwdriver between grip and handlebar; prying outward to form a gap... then sprayed isopropyl alcohol in the void.
- Twisted and remove grip
- Sprayed isopropyl alcohol inside of grip and slide it on the other end of the bar to the same distance as before
- Marked, center punched, and drilled holes for the pins for both end casings.
- Reassembled the handguards . Note: Since my preferred riding position was about a hundred 180 degrees from where it was, I could utilize the same pin holes for the hand guards after it was flipped end-for-end.
- Reassembled the throttle casing, ensuring the throttle grip was properly seated in the casing halves.
- Reassembled the turn signal/horn/lights casing halves
- Placed the cables inside the cable holders
- Installed the mirrors
I pulled the throttle and turn signal clusters off and thought I could just completely flip the bars but have them at basically the same level, that would raise them some, but noted the holes for the clusters are at two different distances from the end of the bars so I will need to do a bit of drilling. I do not need to rotate the bars upwards, so i thought this would give me a bit of a higher bar and not have to do any drilling.
-

 Originally Posted by Gcclubs

I pulled the throttle and turn signal clusters off and thought I could just completely flip the bars but have them at basically the same level, that would raise them some, but noted the holes for the clusters are at two different distances from the end of the bars so I will need to do a bit of drilling. I do not need to rotate the bars upwards, so i thought this would give me a bit of a higher bar and not have to do any drilling.
Here's what I have. I have mine tilted back towards me slightly less than 45 degrees. Be aware it's much better to move bars forward for refueling.
https://www.amazon.com/Rox-Speed-FX-...s%2C172&sr=8-3
And here's a couple youtube Videos on the same risers:https:
https://www.youtube.com/watch?v=bMPLhplv6BE
https://www.youtube.com/watch?v=iwRbzKmuNHE
-

Rather than removing all the controls to achieve a more comfortable riding position i added ROX risers to my Rally. I used the 3.5" risers. I now have the ability to adjust fore and aft as well as up and down for a customized riding position. The bike is now easier to manuver and feels more settled. Added bonus is my elbows are naturally bent and i am not placing all my upper body weight on my hands and arms.
Current: 2022 CAN AM F3S SS. Manta Green, Route 129 windscreen.
Previous:CAN AM Ryker Rally. Intense black, side case , comfort drivers seat, comfort passenger seat with back r test, wind screen, LED auxiliary lighting.
 Posting Permissions
- You may not post new threads
- You may not post replies
- You may not post attachments
- You may not edit your posts
-
Forum Rules
|


 Reply With Quote


 you go big dog, good job!! As long as it works for you, to heck with the rest!

