|
-
Very Active Member

 Received BRP Saddle Bags & Rack ! - Updated PICS Received BRP Saddle Bags & Rack ! - Updated PICS
Well, the magic brown truck showed up today - with my BRP Givi cases and rack system.
Will probably install tonight.
Both the cases AND the racks are quick-release.
The Racks are the Monokey style - and come off the bike with a simple 1/4 turn of 3 screws using a special supplied tool. 
So maybe 60 seconds to remove the whole setup!
Exactly what I had hoped for !
Will post pics later.
Last edited by Firefly; 06-02-2009 at 09:05 AM.
-
Very Active Member

 oh boy! oh boy!
Can't wait to see the pics Firefly. Hope the install goes smoothly for you. Jerry

Previous owner of a 2008 Spyder SM5.
Current owner of a 2007 Yamaha Royal Star Venture
-
Alignment Specialist


 Originally Posted by Firefly

Well, the magic brown truck showed up today - with my BRP Givi cases and rack system.
Will probably install tonight.
Both the cases AND the racks are quick-release.
The Racks are the Monokey style - and come off the bike with a simple 1/4 turn of 3 screws using a special supplied tool. 
So maybe 60 seconds to remove the whole setup!
Exactly what I had hoped for !
Will post pics later.
Is this an easy install? No drilling, welding, or anything that will cost me my life??
Bone Crusher 
If you work to make money, you'll never be happy, as there's never enough money...if you work to take good care of people, the money will always be there....Sean O'Connell, 1999
-
Very Active Member


 Originally Posted by bone crusher

Is this an easy install? No drilling, welding, or anything that will cost me my life??
Looks really easy---- will let you know in about an hour......
-
Very Helpful Member

-
Active Member


 good luck on the install. good luck on the install.
-
Very Active Member


Well - got them installed - as per usual---- what should have been 1.5 hours took 3 !
Some of that was due to a couple minor mistakes - and that I have some electronic junk installed that was a bit in the way.
I'll post pics and tips sometime tomorrow so hopefully I can save others some time and trouble.
The install is not difficult - but as with anything on the Spyder - small hands would help!
Now with everything back together - it looks SHARP!
The RACKS come off really easy - maybe 20 seconds per side. The bags click on and off in about 5 seconds. With the racks off you would never know there was a bag system on the bike.
The whole operation is about as slick as you can get.
The way they did the rear turn signals looks pretty good - I doubt anyone would notice it was not 'normal'.
Too dark for good pics tonight - so I'll shoot some tomorrow.
The only real problem I see is that it makes it more difficult to access the battery - but other than that I give these a solid 10 !
-

 Originally Posted by Firefly

Well - got them installed - as per usual---- what should have been 1.5 hours took 3 !
Some of that was due to a couple minor mistakes - and that I have some electronic junk installed that was a bit in the way.
I'll post pics and tips sometime tomorrow so hopefully I can save others some time and trouble.
The install is not difficult - but as with anything on the Spyder - small hands would help!
Now with everything back together - it looks SHARP!
The RACKS come off really easy - maybe 20 seconds per side. The bags click on and off in about 5 seconds. With the racks off you would never know there was a bag system on the bike.
The whole operation is about as slick as you can get.
The way they did the rear turn signals looks pretty good - I doubt anyone would notice it was not 'normal'.
Too dark for good pics tonight - so I'll shoot some tomorrow.
The only real problem I see is that it makes it more difficult to access the battery - but other than that I give these a solid 10 ! 
Thanks, Firefly. Looking forward to the photo essay!
-
Very Active Member


I'm looking forward to your install post. My bags were shipped today, so I'm already planning my weekend.
-

Can't wait to see the pictures. Thanks!
-
Very Active Member

 Here are the bags installed. Here are the bags installed.
-
Very Active Member

 More pics..... More pics.....
And some more....
Bags on----- bags off!
-
Very Active Member

 Racks on - Racks off ! Racks on - Racks off !
-
Very Active Member

 No Racks ! No Racks !
-
Very Active Member

 This is it for now. This is it for now.
I'll post install pics and tips later tonight in the tech thread.
Overall I really like these !
-
Registered Users

-
SpyderLovers Founder

-

Looks great how difficult was the initial instalation?
Happy SE5 Owner!!!
Silver/Black SE5 - Trunk Liner, 1" riser, 12v, Kuryakyn ISO Grips, 5" Kewlmetal Pullback Bars, Kewlmetal Console, Zumo 450, Ipod, Kewlmetal Highway brackets with Wing pegs, Triple Play, Wizard Light LED's, Corbin front/rear saddle with Backrest, Nelson Rigg CL950 Saddlebags with CL800 Tote Bag, CalSci Medium Windshield.

-
Mod Maniac


Have you thought about turn signals built into the bags? Seems like a fairly easy deal... with quick-disconnect electrical connections?
ata = allergic to asphalt
My mods: https://www.spyderlovers.com/forums/...ead.php?t=5753
.
There are two kinds of people: (1) those who can read, reason and apply the experiences of others; and (2) those who just have to pee on the electric fence. ataDude, 2009
My Spyder:

-
Very Active Member


Kewl video--- that helps show how they work a lot-- and I don't do video!
On a scale of 1-5 with 5 being the most difficult and 1 being the easiest - I would put this install at a 2.
Very easy install - but time consuming due to removing all the panels.
NOTE: The BRP instructions are pretty bad - they left a complete step out and don't make some other things clear---- but I'll post pics and make them clear .
If you can use a ratchet and open end wrenches - this is a breeze. I could do it in an hour now. I wish I had some of those open-end ratchets - would have made it even easier.
The muffler mount was easy with the Hindle - it lowers your pipe about 1" at the mounting point. If mounting with a stock pipe they show something about aligning the clamp - so that part I wouldn't know about - but I think you have to loosen the stock clamp and turn it a bit.
The only downside I see is getting to the battery will require more work since you will have to remove the turn signal on that side now.
-

 Originally Posted by Firefly

Kewl video--- that helps show how they work a lot-- and I don't do video!
On a scale of 1-5 with 5 being the most difficult and 1 being the easiest - I would put this install at a 2.
Very easy install - but time consuming due to removing all the panels.
NOTE: The BRP instructions are pretty bad - they left a complete step out and don't make some other things clear---- but I'll post pics and make them clear .
If you can use a ratchet and open end wrenches - this is a breeze. I could do it in an hour now. I wish I had some of those open-end ratchets - would have made it even easier.
The muffler mount was easy with the Hindle - it lowers your pipe about 1" at the mounting point. If mounting with a stock pipe they show something about aligning the clamp - so that part I wouldn't know about - but I think you have to loosen the stock clamp and turn it a bit.
The only downside I see is getting to the battery will require more work since you will have to remove the turn signal on that side now.
so no drilling right? or permanent changes to any panels?
do they give a new air vent piece for the rear black panels?
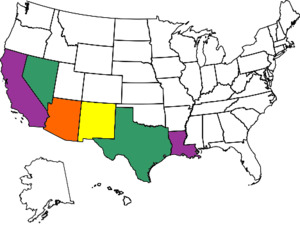
 6 states down 42 states to go 
-
Very Active Member


No drilling or permanent modifications to bike at all. Just swapping parts. Yes, they give you new rear vent panels with the holes cut in them.
Also, while the color panels are a separate item that you buy - they are REQUIRED - other wise the rear reflector is not held in place and you would have 7 small screw holes wide open to the elements. (the color panels screw on from the inside of the case using 7 small screws).
Not sure why they don't mention this - but you gotta have a set.
-
Very Active Member


Thanks for the pics.
Do you have NMN triple play? If so, how did that effect the moving of the turn signals?
 HAPPY SPYDER OWNER HAPPY SPYDER OWNER  GULF COAST SPYDERRYDERS
-
Last edited by aka1004; 06-02-2009 at 10:21 AM.
 6 states down 42 states to go 
-
Very Active Member


They certainly won't hold as much as the Corbin setup - but being able to pop them off and carry in as actual luggage is what I was after!
I don't have the Triple Play - I have the Evoluzione version which is similar.
You won't have any problems using this with the triple play or any other light mods - all you're doing is extending the wires going to the turn signals - all plug and pray ! !
 Posting Permissions
- You may not post new threads
- You may not post replies
- You may not post attachments
- You may not edit your posts
-
Forum Rules
|


 Reply With Quote


 6 states down 42 states to go
 i been waiting to get corbin bags but think i will get just these now.
 !
!

