Well I tried to put wheel wrap on RTS wheels. The wrap is to thin wanted to curl and stick. Got one on but looks awful. Bubbles and crease. I would think you would wet down the wrap like I've seen others do so you can slide in place. Then it dries and sticks. Here is a couple pics. I quit after this.
Well I tried to put wheel wrap on RTS wheels. The wrap is to thin wanted to curl and stick. Got one on but looks awful. Bubbles and crease. I would think you would wet down the wrap like I've seen others do so you can slide in place. Then it dries and sticks. Here is a couple pics. I quit after this.
Was the wheel and your hands clean ? I just wrapped my last week , did not use water. I just got mine positioned working from the center to the outside. If I didn't like it I just picked it up and started over . He sends a couple extra , bubbles will push out the crease will not .
I wish i could could help you further
2016 RT-S Pearl White
BRP Driver Backrest
Lamonster Spyderdock, (2) Spydercuffs
Magic Mirror w/Doc Humphreys tethers
(2) Rokform phone mounts
FOBO
SpyderPops Bumpskid,missing belt guard,Rear strobe LEDs
Lamonster LED headlights & foglights
Spyder Pockets
LED front fender kit -running & turn signals
Custom Back off mudflap
Vinyl nameplate & 1330 triple decals by New Image Signs
Custom RLS exhaust
Hogtunes speakers 5 1/4 front and back
Memphis Powersports Amp
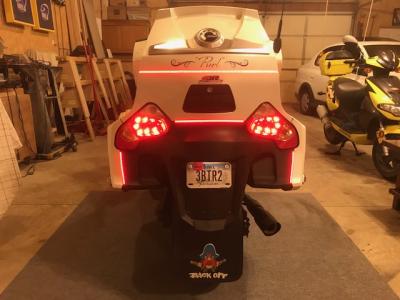
Her name is "Purl"
Was the wheel and your hands clean ? I just wrapped my last week , did not use water. I just got mine positioned working from the center to the outside. If I didn't like it I just picked it up and started over . He sends a couple extra , bubbles will push out the crease will not .
I wish i could could help you further
Yes both clean. Where in Iowa do you live. I'm southern WI.
The wrap stuff looks great when professionally applied. The problem is that application is not nearly as easy as it looks. Hey, I had successfully applied some tape stripe and I watched all the videos and it seemed so simple, how hard could it be? I bought a frunk decal and the wheel wrap. I thought I'd do the install myself and start on the frunk decal, which looked pretty simple. I waited until I had a nice warm day, plenty of time and all the materials shown in the video. Even watched the video two or three more times. On my first attempt, I managed to mis-align it, ruining the left half. I stopped until I got a new piece and aligned the decal well enough to go through with the install. Everything went great until I tried pushing it down into place, but nevertheless I was about to put it down. The alignment, however, was still off, "too high" on the Spyder, leading to wrinkles I couldn't avoid. There were also about a hundred bubbles, apparently because I didn't push hard enough even though (I thought) I was following instructions. Obviously I wasn't but I really didn't know what to do differently. "Push harder" is easy to say, harder to do because too hard would also be a problem. This is a SKILL and after making a second mess I realized I just did not have that skill. That was hard to admit because honestly it looks so easy in the videos. Anyway, I still liked the decal so I got an entirely new one and took it to a professional to apply it for me. The pro did a nice job and the decal looks great now. However, even with a pro doing it, there are still a couple of small bubbles and I'll need to take it back to see if they can work those out for me.
Meanwhile, I still had that wheel wrap sitting there, waiting to be installed. Seeing how much trouble I had with the frunk decal, I totally chickened out on the wheel wrap and decided just to have my wheels painted. FYI, if anybody wants to try to install the red reflective wheel wrap in perfect condition, PM me. $10 and I'll pay the postage (U.S. only) -- otherwise I'll just throw it away. Maybe you will be better at this than I, or maybe you can have a pro put it on for you. Painting the wheels cost a lot more than the wheel wrap, but didn't involve any headaches at all, and maybe was cheaper in the long run if I'd ruined several sets of wheel decals and ended up hiring a pro to install them. (the painted wheels look great, but the wheel wrap would have looked great, too).
I am sure I could learn to apply wrap with practice, but I can't afford enough ruined decals and damage to my sanity to learn to do this stuff properly. All total, I spent almost $250 on one $115 decal and even though it looks good, it's a pretty expensive decal and not even that big. However, do NOT take this as a complaint against Pete. The situation is entirely MY fault, not his. His products are well-made, shipped quickly and look good when properly applied -- and Pete was also extremely helpful in my hour of need and discounted my "repair" pieces substantially, which he didn't really have to do (but I appreciated). It's also my fault because Pete told me the red reflective might be hard to apply and I didn't listen. However, I have to say that unless you have the experience and skills to do this, buy Pete's wrap but leave the installation to the pros.
Yes both clean. Where in Iowa do you live. I'm southern WI.
LaPorte city, 10 mile south of Waterloo
2016 RT-S Pearl White
BRP Driver Backrest
Lamonster Spyderdock, (2) Spydercuffs
Magic Mirror w/Doc Humphreys tethers
(2) Rokform phone mounts
FOBO
SpyderPops Bumpskid,missing belt guard,Rear strobe LEDs
Lamonster LED headlights & foglights
Spyder Pockets
LED front fender kit -running & turn signals
Custom Back off mudflap
Vinyl nameplate & 1330 triple decals by New Image Signs
Custom RLS exhaust
Hogtunes speakers 5 1/4 front and back
Memphis Powersports Amp
Her name is "Purl"
The wrap stuff looks great when professionally applied. The problem is that application is not nearly as easy as it looks. Hey, I had successfully applied some tape stripe and I watched all the videos and it seemed so simple, how hard could it be? I bought a frunk decal and the wheel wrap. I thought I'd do the install myself and start on the frunk decal, which looked pretty simple. I waited until I had a nice warm day, plenty of time and all the materials shown in the video. Even watched the video two or three more times. On my first attempt, I managed to mis-align it, ruining the left half. I stopped until I got a new piece and aligned the decal well enough to go through with the install. Everything went great until I tried pushing it down into place, but nevertheless I was about to put it down. The alignment, however, was still off, "too high" on the Spyder, leading to wrinkles I couldn't avoid. There were also about a hundred bubbles, apparently because I didn't push hard enough even though (I thought) I was following instructions. Obviously I wasn't but I really didn't know what to do differently. "Push harder" is easy to say, harder to do because too hard would also be a problem. This is a SKILL and after making a second mess I realized I just did not have that skill. That was hard to admit because honestly it looks so easy in the videos. Anyway, I still liked the decal so I got an entirely new one and took it to a professional to apply it for me. The pro did a nice job and the decal looks great now. However, even with a pro doing it, there are still a couple of small bubbles and I'll need to take it back to see if they can work those out for me.
Meanwhile, I still had that wheel wrap sitting there, waiting to be installed. Seeing how much trouble I had with the frunk decal, I totally chickened out on the wheel wrap and decided just to have my wheels painted. FYI, if anybody wants to try to install the red reflective wheel wrap in perfect condition, PM me. $10 and I'll pay the postage (U.S. only) -- otherwise I'll just throw it away. Maybe you will be better at this than I, or maybe you can have a pro put it on for you. Painting the wheels cost a lot more than the wheel wrap, but didn't involve any headaches at all, and maybe was cheaper in the long run if I'd ruined several sets of wheel decals and ended up hiring a pro to install them. (the painted wheels look great, but the wheel wrap would have looked great, too).
I am sure I could learn to apply wrap with practice, but I can't afford enough ruined decals and damage to my sanity to learn to do this stuff properly. All total, I spent almost $250 on one $115 decal and even though it looks good, it's a pretty expensive decal and not even that big. However, do NOT take this as a complaint against Pete. The situation is entirely MY fault, not his. His products are well-made, shipped quickly and look good when properly applied -- and Pete was also extremely helpful in my hour of need and discounted my "repair" pieces substantially, which he didn't really have to do (but I appreciated). It's also my fault because Pete told me the red reflective might be hard to apply and I didn't listen. However, I have to say that unless you have the experience and skills to do this, buy Pete's wrap but leave the installation to the pros.
Sorry, you didn't have a good experience.
Well I didn't have any issues with the wheel wrap, I do have a little experience with wrap as I have built cornhole boards that have wrap on them. I once put a big wrap on a door at work and did screw it up, luckily I knew the lady that made it and she came and help me with the second one.
I was going to try and wrap the wheels on the Spyder, Pete said it would be nearly impossible, so I listened to him. I took my time , cleaned everything, and cleaned it again, position the wrap on the rim , when I was happy with it I took the hair dryer to it
It can be done
2016 RT-S Pearl White
BRP Driver Backrest
Lamonster Spyderdock, (2) Spydercuffs
Magic Mirror w/Doc Humphreys tethers
(2) Rokform phone mounts
FOBO
SpyderPops Bumpskid,missing belt guard,Rear strobe LEDs
Lamonster LED headlights & foglights
Spyder Pockets
LED front fender kit -running & turn signals
Custom Back off mudflap
Vinyl nameplate & 1330 triple decals by New Image Signs
Custom RLS exhaust
Hogtunes speakers 5 1/4 front and back
Memphis Powersports Amp
Her name is "Purl"
How do you find a professional that does that? Is that a body shop?
I had one of Pete's wraps put on my frunk. I took it to a paint protection company (Protex) and paid them to do it. It is perfect.
2017 RT-S
Bump Skid - Spyderpops
Wrap - Wrapmyspyder
swaybar - Bajaron
Sena 20D & SM10
3 PC Mesh Zippered Lid Net Set - TricLED
A arm LED's - Safety LED's - TricLED
Mirror Sequential turn signals
Glo-riders
LED rear turn signals and reverse lights
Front Grills
Third Brake light
Larson Scanner
Light Up - Sue Hopper
How do you find a professional that does that? Is that a body shop?
Any place that does wraps should be able to do it. What Pete sells are, essentially, wraps. There are at least half a dozen wrap shops here in Las Vegas. I used Yelp to find one with good reviews, then called the owner to discuss it. I paid $75 for them to put on my frunk decal. Maybe expensive for an hour's work but cheaper than buying decal after decal and screwing them up.
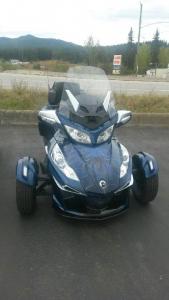
These didn't come out too bad They are the Ultra Blue Metallic. I tried wet method first and wasted one of the extras as they would not stick at all, so I did the dry method doing the centerline and all as was suggested in the instructions. I also did my wifes cognac ones on her bike. The regular decal kits on the bike itself were a piece of cake, these not so much and I did take the wheels off as suggested.
Greetings from Idaho
2014 RT-S,
Barjaron swaybar, chome luggage rack, Ram Mount GPS, 12 volt dash outlet, spyderflap mudflap, Rivco flag mounts, drink2go and custom handlebar drink holders,Driver Backrest,Tri-Axis Handlebars, TRICLed turn signal lights. Custon Dynamic Magic Strobe Brake Modulator, Triple Dash Pouches, "Squared Away" Laser Alignment, Spyderpops Bumpskid, TricLed "Knightrider" LED
The instructions say: thoroughly clean surface area with 70% Rubbing alcohol and paper towel,
Position design to your liking on the surface.
Peel backing from backing paper.
Squeegee in overlapping strokes from the center of the panel to the outsides.
Once applied, warm surface area with hair dryer or heat gun.
Allow 24hrs. for the film to cure.
I did not take the wheels off.
Deanna
Last edited by Deanna777; 05-02-2018 at 06:11 PM.
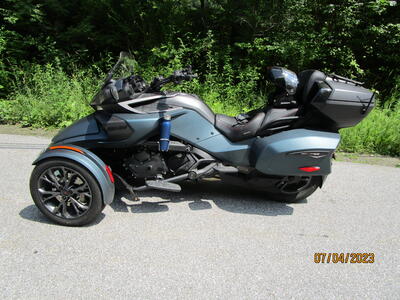
Current Spyder - 2023 F3 LTD Special Mineral Blue
Red LED NANO Saddlebag Marker Lights with Full Illumination
Sequential Fender LED'S (Amber/Red) with Safety Reflector
Dual Power Plate (12 V & USB ports)
Gremlin Bell
Rear Trunk Organizer (4 holders, 2 Elastic Holders)
Lamonster "Top Cuff" with adjustable drink Holder
SpyderPops Missing Guard Belt
Console Accent Trim (Carbon Fiber Domed Black)
Ultimate F3 Floorboards
Front Fairing Service Access Door Covers (Carbon Fiber Doomed Black)
Sway Bar with Links
Rolo Laser Alignment
Half Cover
A-Arm Daytime Dual Color LED Running Lights with Blinker Module
Hi-Viz DRL and Sequential Mirrors lights
These didn't come out too bad They are the Ultra Blue Metallic. I tried wet method first and wasted one of the extras as they would not stick at all, so I did the dry method doing the centerline and all as was suggested in the instructions. I also did my wifes cognac ones on her bike. The regular decal kits on the bike itself were a piece of cake, these not so much and I did take the wheels off as suggested.
I did mine last night and did not take the wheels off. Deanna
Current Spyder - 2023 F3 LTD Special Mineral Blue
Red LED NANO Saddlebag Marker Lights with Full Illumination
Sequential Fender LED'S (Amber/Red) with Safety Reflector
Dual Power Plate (12 V & USB ports)
Gremlin Bell
Rear Trunk Organizer (4 holders, 2 Elastic Holders)
Lamonster "Top Cuff" with adjustable drink Holder
SpyderPops Missing Guard Belt
Console Accent Trim (Carbon Fiber Domed Black)
Ultimate F3 Floorboards
Front Fairing Service Access Door Covers (Carbon Fiber Doomed Black)
Sway Bar with Links
Rolo Laser Alignment
Half Cover
A-Arm Daytime Dual Color LED Running Lights with Blinker Module
Hi-Viz DRL and Sequential Mirrors lights
Well a co worker helped me with the wrap. Not overly thrilled with the color. They recomended burgandy to match my helmet but my helmet is more candy apple color.


 Reply With Quote
 Not what you had in mind for sure.
  check and see if you can get a replacement for those...


 Tri-Axis Handlebars, TRICLed turn signal lights. Custon Dynamic Magic Strobe Brake Modulator, Triple Dash Pouches, "Squared Away" Laser Alignment, Spyderpops Bumpskid, TricLed "Knightrider" LED