|
-
Active Member
 Thinking about TricLED lights Thinking about TricLED lights
...but there are no installation instructions that I can find on their website. I don't want to take on more that I can handle, and even if people say "It's easy, you'll do fine", I want to read it for myself before I guy to see what is involved. Any ideas?
Thanks
-
-
Active Member


 Originally Posted by Bob Denman

TricLEDs offers some of the most complete, and easy to understand instructions...
As well as the BEST LED lights for your Spyder! 
What is that that you want to add to your bike? Perhaps someone in here can email you a .pdf file of the instructions... 
FOR THE RECORD: I also like to get the instructions a bit early, so that I can plan things out...
Im looking at the RT stop and tail light package.
-
 Tricled Tricled
 Originally Posted by Spider-man

Im looking at the RT stop and tail light package.
Value axceriores .com has video on head light ang fog lights a many other led install visions and they try it before the sell it
-
-
-
Very Active Member

 Originally Posted by Spider-man

...but there are no installation instructions that I can find on their website. I don't want to take on more that I can handle, and even if people say "It's easy, you'll do fine", I want to read it for myself before I guy to see what is involved. Any ideas?
Thanks
I just installed these on my 2012 RT..If you pm me your email,I will scan them and email the instructions to you...Basically,remove Tupperware,unplug harness and the harness they supply to you plugs in series...
-
Active Member

 Originally Posted by Spider-man

...but there are no installation instructions that I can find on their website. I don't want to take on more that I can handle, and even if people say "It's easy, you'll do fine", I want to read it for myself before I guy to see what is involved. Any ideas?
Thanks
The easiest install and I think best Rear LED's for the money to start with is the RT Rear LED Saddlebag Run/Brake/Turn from TricLED.
I am going to make an install video, just been busy and have not gotten around to it.
If you can take your rear trim off and then remove 3 bolts to pull out your tail light you can do this. It is all plug and play.

-
Active Member


 Originally Posted by Bob Denman

Is it just the 3rd and 4th brakelights?
a36d46_01ea79642bac444783cb82de0860d0b3.jpg
Or is there more to it?
(I'm unfamiliar with their packages...  )
I have all of the mechanical aptitude of a hamster, yet I was able to install these, (and many, many more!), on my RT Limited. 
In fact I just ordered the running lights/Brakelights that fit into the rear of the saddlebags! 
yeah, that's the one. Thanks! I'll take a look.
-
Very Active Member

 Originally Posted by Spider-man

...but there are no installation instructions that I can find on their website. I don't want to take on more that I can handle, and even if people say "It's easy, you'll do fine", I want to read it for myself before I guy to see what is involved. Any ideas?
Thanks
If you contact Reggy at TricLED, I'm sure he'd email you a set of instructions to see what you're getting yourself into.
2020 Chalk, RT Limited, Dark and matching RT622 trailer and BRP hitch. BRP Drivers Backrest, Auxiliary Light, Garmin Zumo XT, GPS Support, RT Rear Panel and Travel Cover. Spyderpops LEDs on fenders, mirrors, saddlebags, top case and RT rear panel. Spyderpops Rock Guard. BajaRon Swaybar, Wolo Bad Boy horn, Freedom Windshield, Elka Shocks.

-
Very Active Member
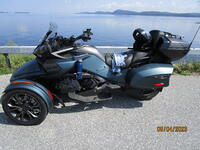

 Originally Posted by Bob Denman

Is it just the 3rd and 4th brakelights?
a36d46_01ea79642bac444783cb82de0860d0b3.jpg
Or is there more to it?
(I'm unfamiliar with their packages...  )
I have all of the mechanical aptitude of a hamster, yet I was able to install these, (and many, many more!), on my RT Limited. 
In fact I just ordered the running lights/Brakelights that fit into the rear of the saddlebags! 
Bob, I have the running/turning/brake lights on the rear of the RT that fit into the rear of the saddlebags, and under the trunk lid, , and between the brake lights.
Here are some pictures of the LED'S that I have: Rear LED lights+ turning signals 003.jpg these are on the right side/ turn/running/brake.
Here is a picture of the same lights on the left side: Rear LED lights+ turning signals 004.jpg These are on the left side/turn/running/brake. Also, they are bright, and they fit into the rear of the saddlebags.
I bought them from Spyderpops. Deanna
Last edited by Deanna777; 03-12-2017 at 04:38 PM.
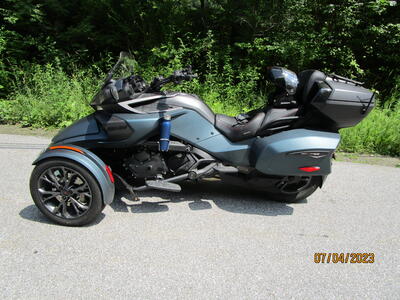
 Current Spyder
 - 2023 F3 LTD Special Mineral Blue
Red LED NANO Saddlebag Marker Lights with Full Illumination
Sequential Fender LED'S (Amber/Red) with Safety Reflector
Dual Power Plate (12 V & USB ports)
Gremlin Bell
Rear Trunk Organizer (4 holders, 2 Elastic Holders)
Lamonster "Top Cuff" with adjustable drink Holder
SpyderPops Missing Guard Belt
Console Accent Trim (Carbon Fiber Domed Black)
Ultimate F3 Floorboards
Front Fairing Service Access Door Covers (Carbon Fiber Doomed Black)
Sway Bar with Links
Rolo Laser Alignment
Half Cover
A-Arm Daytime Dual Color LED Running Lights with Blinker Module
Hi-Viz DRL and Sequential Mirrors lights
Marinco 12Volt Power Receptacle with polarized leads & slide lock
Show chrome Trunk Shock
Former Spyder - 2014 RTS SE6 Cognac SOLD
-
-
Very Active Member


 Current Spyder
 - 2023 F3 LTD Special Mineral Blue
Red LED NANO Saddlebag Marker Lights with Full Illumination
Sequential Fender LED'S (Amber/Red) with Safety Reflector
Dual Power Plate (12 V & USB ports)
Gremlin Bell
Rear Trunk Organizer (4 holders, 2 Elastic Holders)
Lamonster "Top Cuff" with adjustable drink Holder
SpyderPops Missing Guard Belt
Console Accent Trim (Carbon Fiber Domed Black)
Ultimate F3 Floorboards
Front Fairing Service Access Door Covers (Carbon Fiber Doomed Black)
Sway Bar with Links
Rolo Laser Alignment
Half Cover
A-Arm Daytime Dual Color LED Running Lights with Blinker Module
Hi-Viz DRL and Sequential Mirrors lights
Marinco 12Volt Power Receptacle with polarized leads & slide lock
Show chrome Trunk Shock
Former Spyder - 2014 RTS SE6 Cognac SOLD
-
-
Active Member
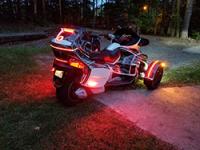

To install TricLED's 3rd and 4th brake light, you need to remove the part of the tupperware that covers the rear trunk. Instructions included with the lights is good. I'll add to Mr Denman's advice with one WORD OF CAUTION..maybe two.. when you remove that tupperware part, remember to tilt it a bit back and then lift STRAIGHT UP. Remember there are four tabs that extend into the black plastic. These four screws are what holds the tupperware in place. Do NOT break one of those tabs. It would be best if you had a helper to remove the plastic, someone to help lift and as it is lifted, press in lightly on the tabs so the metal clears the slot. Also remember to note that there are three tabs that need to be put back in the same place. Kinda easy to not do that. Again, ah helper would be good. Two tabs at the bottom that go over the upper lip of the black plastic and one that fits into a slot just below the trunk lock. If your trunk won't close, that's the reason. If you DO manage to break one of the tabs, not a disaster. There is a product, "Q Bond" (most likely found at an auto paint supply store), that will repair gray plastic and make it stronger than original. You only have 10 seconds to work as it is cyanacrilate OK crazy glue, hence the need for a third hand to hold the broken piece exactly in place. Build up powder layers around the break for strength. If you break a tab, you'll need three hands to repair it. But it's easy. Be careful where you position the wires that go behind the tupperware. And how you replace it. It is a bit fragile. Experience is a great teacher. Thanks for Reggie's support.
Last edited by ricford; 03-13-2017 at 12:26 PM.
-
-
Active Member


Thanks everyone for the help. Now, just because I can't go home with the first pretty face in the joint, has anyone tried the Spyderpops Brake/Run/Turn with Strobe? It seems like it may provide more bang for the buck for my needs.
http://spyderpops.com/rt-brt-rear-li...g-n-play-easy/
-
Very Active Member


 Originally Posted by Spider-man

Thanks everyone for the help. Now, just because I can't go home with the first pretty face in the joint, has anyone tried the Spyderpops Brake/Run/Turn with Strobe? It seems like it may provide more bang for the buck for my needs.
http://spyderpops.com/rt-brt-rear-li...g-n-play-easy/
I have the Spyderpops Rt-brt-rear- lighting kit - 4 sections brake/run/turning ( SPY184) on my 2014RTS-SE6. Here are some pictures:Rear LED lights+ turning signals 004.jpg left side turning Rear LED lights+ turning signals 003.jpg right side turning Rear LED lights+ turning signals 001.jpg under trunk lip/below trunk lock. These are bright They come with easy instructions to install. I have a 2014RTS-SE6 Deanna

 Current Spyder
 - 2023 F3 LTD Special Mineral Blue
Red LED NANO Saddlebag Marker Lights with Full Illumination
Sequential Fender LED'S (Amber/Red) with Safety Reflector
Dual Power Plate (12 V & USB ports)
Gremlin Bell
Rear Trunk Organizer (4 holders, 2 Elastic Holders)
Lamonster "Top Cuff" with adjustable drink Holder
SpyderPops Missing Guard Belt
Console Accent Trim (Carbon Fiber Domed Black)
Ultimate F3 Floorboards
Front Fairing Service Access Door Covers (Carbon Fiber Doomed Black)
Sway Bar with Links
Rolo Laser Alignment
Half Cover
A-Arm Daytime Dual Color LED Running Lights with Blinker Module
Hi-Viz DRL and Sequential Mirrors lights
Marinco 12Volt Power Receptacle with polarized leads & slide lock
Show chrome Trunk Shock
Former Spyder - 2014 RTS SE6 Cognac SOLD
-
Very Active Member
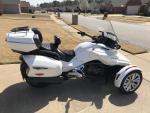

The Spyderpops Brake/Run/Turn/Flash set is what i have on my F3 Limited and i love them, i also had them on my RTs and they looked good and were very dependable and less expensive than most other vendors, plus the support goes on way past the sale. I highly recommend SPYDERPOPS for LED lighting, the prices are better and the service is great.
When you get the Spyderpops set, it is complete.
Cruzr Joe
2018 F3 Limited, BRP Driver Backrest, Spyderpops Lighted Bump Skid, Dual Spyclops Light, Mirror Turn Signals, Laser Alignment, Engine LEDs, Fog Lights With Halo's, Cushion Handgrips, BRT LEDs, and Under Lighting, Lamonster IPS, (with Clock), F4 25" Vented Windshield with Wings, Airhawk "R" Cushions. Position 4 Brake setting, Short reach Handlebars, Dash Mounted Voltmeter and 12 Volt Plug. Set of 3rd pegs. Extended Passenger Seat. Exterior BRP Connect setup, Ultimate Trailer
-
Very Active Member
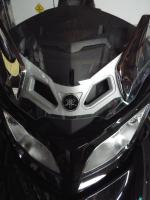

Timely thread 
Printing out Bob's and Ric's instructions on panel removal as I type.
Thanks.
-
Member
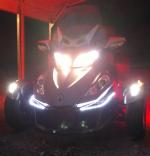

I have run brake turn set from spyderpops very good instructions , tricleds instruction were not as thorough as spyderpops
-
Very Active Member

-
Active Member
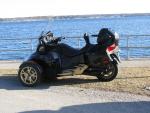

I,m thinking of adding the extra brake and tail lights that are plug and play.Since i plan on buying a trailer in the future will the wiring thats plug and play for the trailer wiring all plug together?Since it,s apart i would like to do it all at the same time.
Bill
-

 There's eight of them... There's eight of them...
Four up around the edge of the top trunk.
(Two in the center only hold the latch in place: leave them alone...)
And two more hidden down in the top rear corners of the saddlebags.
-
Very Active Member


 Originally Posted by Bob Denman

 There's eight of them...
Four up around the edge of the top trunk.
(Two in the center only hold the latch in place: leave them alone...)
And two more hidden down in the top rear corners of the saddlebags.
Thanks Bob,
My bad - I typed 6 instead of 8 (post edited)
The center two -- I already figured to leave alone but only after I'd loosened them 
Looks like it's going to require more force and finagling than I've been willing to apply. 
I'll give it another try this weekend. I'll keep you updated with the positive result.
Last edited by HayRog; 03-16-2017 at 10:18 AM.
 Posting Permissions
- You may not post new threads
- You may not post replies
- You may not post attachments
- You may not edit your posts
-
Forum Rules
|


 Reply With Quote


 )
)


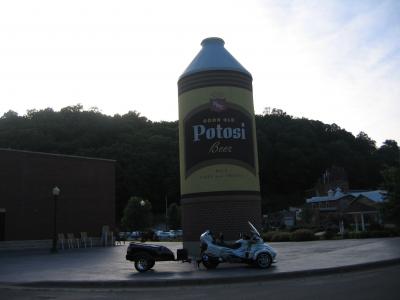


 They do a nice job of providing more proof of what you're doing, when you're braking...
  Deanna



 There's eight of them...


