|
-
Active Member
 Replacing windshield arm Replacing windshield arm
Hello Spyder Friends,
Meg and I are heading to Valcourt this year, as many of you are. And we hope to meet many of you there.
I am the type that is always concerned about what issues with the Spyder can ruin a trip like this. Our Spyder has been flawless and has never let us down, but doo doo happens!  The one flaw I keep coming back to is the windshield arm. The one flaw I keep coming back to is the windshield arm.
Many of you have had that arm break as many as 2 times, and it would really suck if it were to break on a trip like this. I had purchased the windshield arm from noboot (Ron), just to have in case mine ever broke. Then I started thinking of the interstate speeds we will be traveling at, and the stress on that arm. The thought of Spydering down the road with a windshield on my lap did not appeal to either one of us. And we always ride with it fully up, so mine has been stressed since new. With that thought in mind, we decided to change it yesterday, and have one less thing to worry about.
Ron provides great written instructions with the arm, but has an excellent video here
Followed all the steps in the video and all went well until it came time to remove that little screw from the end of the gear. Being a electronics guy, I have every type and size of screwdriver imaginable. A pozidriv Philips seemed to fit the screw well without slipping. The issue I experienced was that the screw was starting to break apart before loosening. No doubt caused by the copious amounts of Loctite BRP uses on all their screws. Could not use heat to free the Loctite, as the plastic gear would melt. Rather then break the head off of the screw, decided to remove the magnet end. We marked the magnet well so after reassembly it would still be in the proper place. No doubt caused by the copious amounts of Loctite BRP uses on all their screws. Could not use heat to free the Loctite, as the plastic gear would melt. Rather then break the head off of the screw, decided to remove the magnet end. We marked the magnet well so after reassembly it would still be in the proper place.
We used a bearing separator from harbor freight, and placed it under the magnet.

We then flipped it over and used 2 screw drivers to pry the old arm and shaft up out of the magnet.

We would up using larger screwdrivers then shown, it initially was really stuck on there. Meg was holding the gear on top as I pried. I expected it to come off slowly, but it let go and moved quickly when free.
You can see from the paint marks, the plastic is engaged rather deeply on the shaft.

Installed the new arm following the steps in the video. Installed the magnet back in the bearing separator like this.

Gently used a rubber mallet tapping the gear and shaft back into the magnet.

Everything went back together well and worked fine. I would recommend using some tef-gel http://www.tefgel.com/contain.php?param=tefgel_infor as I did on the bushings that are in the aluminum windshield frame. The bushings are brass and the frame is aluminum and they were a little tough to get out due to corrosion from dissimilar metals.
Hope this is helpful, Take Care, Louie and Meg 
-
Very Active Member

Outstanding information!
2021 Sea To Sky, 2020 RTL
Isn't it weird that in AMERICA our flag and our culture offend so many people......
but our benefits don't?
-
Very Active Member

-
Very Active Member

Mike I think the screw he was on about was the one in the end of the shaft which helps secure the gear wheel to the shaft
You can see the screw in his 2nd photo
It is a good suggestion to take the magnet end off instead of the gear end
When I did mine the magnet fell out and to get it back I had to put the magnet into the freezer for a couple of hours and once out I fitted straight into the holder I have not had any problems with the operation of the new arm and it's been in use for over 4 years now
Eddie Sheppard
Poole Dorset UK
Get a Spyder - See the World

-
SpyderLovers Sponsor


Windshield arm
I'm doing one tomorrow. Perfect timing for this thread! I saw the video. If the gear is stubborn, I'll do the magnet!
Last edited by Peter Aawen; 07-08-2023 at 02:10 AM.
Reason: Moved Post title into text - many only see Thread titles, and post titles mess with Searching! ;-)
Joe Meyer

Dealer for the Outlaw/ROLO laser Alignment system
-
Very Active Member

Last edited by Peter Aawen; 07-08-2023 at 02:13 AM.
Reason: Moved Post title into text - many only see Thread titles, and post titles mess with Searching! ;-)
-
Very Active Member

SpyderCruiser,
Thank you for a timely post. noboot/Ron shipped mine out yesterday so I'll be doing this very soon.
Like you I'm traveling to Valcourt for the Homecoming event. But our ryde will be much further. I recently changed over to a F4 Tall and Wide windscreen and although my oem bracket does not show any cracks I was concerned about the extra weight and size of the new windscreen and having the arm let go along the way. We've done some pretty long trips previously but didn't want to press my luck.
I'm hoping everything cooperates in the change over but historically Murphy's law always seems to through me a curve. Your information just might help make the process go a little smoother.
I have to say that dealing with noboot was a smooth and enjoyable process.
Cheer,
Gary
 States visited by Bike
-
Very Active Member


it looks like major surgery but once you get started, it's not that hard! I totally agree that taking the magnet off is MUCH easier.
2015 RT Limited Intense Red Pearl
-
Active Member
Silver RT Limited SE5 2013
BAJARON Anti-Sway Bar, BAJARON Heim Joints, SPYDERPOPS Bumpskid, SMOOTHSPYDER Belt Tensioner, SENA SM10 Dongle, CORBIN Passenger Armrest w. cupholder, UTOPIA Driver Backrest, SPYDERFLAP Mud Flap, STEBEL Nautilus Air Horn, TRICLED Rear Top LED Bar, TRICLED, 3rd & 4th Brake LED, TRICLED Mirror Turn Signal, TRICLED Tricfenderz LED Strip, CUSTOM DYNAMICS Front Mud Flap LED, CUSTOM DYNAMICS Amber Brightsides, CUSTOM DYNAMICS Red Brightsides, CUSTOM DYNAMICS Fender Tips ...
-
formerly pman2011

Thanks for this thread, I have had my replacement arm for a couple of months and I'm getting ready to replace it soon.
Good timing
Last edited by Peter Aawen; 07-08-2023 at 02:14 AM.
Reason: not just 'this post', the whole thread! ;-)
[B]  2018 Intense Red F3T
 (See About Me under My Profile for mods)
2010 Timeless Black RT-622 Trailer
2014 Timeless Black RTS-SE6, 34,300 Miles, traded May 2019
2011 Timeless Black RTS-SE5, 15,180 Miles, traded April 2014
-
Active Member
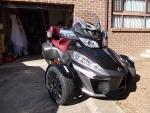

It doesn't matter if you go the magnet end or the worm wheel end as long as you take it steady and take your time It ends up with the same result, a safer better fitting arm that won't break like the OEM ones do.
Anyone with an RT should regularly (maybe while drying the bike after a wash) look out for the tell tale sign usually the crack. I went to one Spyder Rally and seen 11 RT's with a minor crack in the arm.
RT Spyder Bracket damaged.jpg
Last edited by noboot; 02-23-2017 at 12:37 AM.
-
SpyderLovers Sponsor


What a beautiful piece that Arm is! Just a nice hunk of billet, expertly machined. Thanks again! Joe
Last edited by Peter Aawen; 07-08-2023 at 02:15 AM.
Reason: Moved Post title into text - many only see Thread titles, and post titles mess with Searching! ;-)
Joe Meyer

Dealer for the Outlaw/ROLO laser Alignment system
-
Active Member
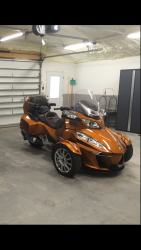

Where is everyone getting the replacement arm?
-
Very Active Member


 Originally Posted by Av8er

Where is everyone getting the replacement arm?
From noboot. A member and sponsor. Send him a PM.
Gary
 States visited by Bike
-
SpyderLovers Sponsor


Stock hardware is junk! The Phillips screws need to be Allen heads, for sure!
Works perfect!
If you have even a trace of a crack, replace it with one of these!
Ron, build matching support arms - this one makes those look shabby!
Love this thing! Thanks for a great piece! Joe
Last edited by Peter Aawen; 07-08-2023 at 02:15 AM.
Reason: Moved Post title into text - many only see Thread titles, and post titles mess with Searching! ;-)
Joe Meyer

Dealer for the Outlaw/ROLO laser Alignment system
-
Very Active Member


Placed my order today! 
-
Active Member


 Originally Posted by cptjam

Stock hardware is junk! The Phillips screws need to be Allen heads, for sure!
Works perfect!
If you have even a trace of a crack, replace it with one of these!
Ron, build matching support arms - this one makes those look shabby!
Love this thing! Thanks for a great piece! Joe
matching Support arms are currently on the drawing board and could become an item in the short term future.
-
Very Active Member


 Originally Posted by noboot

matching Support arms are currently on the drawing board and could become an item in the short term future.
Please post if if you do manufacture them
I would purchase them Especially if they are of the same quality (Whiich is more than likely)
of your middle arm
Thanks for the update
Eddie Sheppard
Poole Dorset UK
Get a Spyder - See the World

-

Has anyone tried wd40 to loosen up the stubborn screws? It works well on some super glues. Might be worth a try.
Sent from my iPhone using Tapatalk
Mark in GA
2014 Cognac Spyder RT Limited - SOLD
2014 Cognac RT-622 Trailer - SOLD
-
Very Active Member

Mine will be here tomorrow.
What type of marker are y'all using to mark the components? Looks like a paint applicator.
2020- RT Limited
Chalk White, Can-Am rear passenger armrests, Comfort Seat, Grip puppies, RAM Cup Holders, Providence RAM Mount
FOBO2 TPMS
Aluma MCTXL trailer
BRP hitch
Big Bike Parts wiring harness
Permanent Smile!!!
 
-
Very Active Member


 Originally Posted by OverHillAndDale

Mine will be here tomorrow.
What type of marker are y'all using to mark the components? Looks like a paint applicator.
I used a white paint pen
Eddie Sheppard
Poole Dorset UK
Get a Spyder - See the World

-
Very Active Member


And I used a Sharpie "Metallic Silver" permanent which seems to work as well as white.
OverHillAndDale: Good luck. As I posted in my thread on this, heat seemed to help get the Phillips heads out. Let us all know how it goes.
Gary
 States visited by Bike
-

 Originally Posted by SpyderCruiser

Hello Spyder Friends,
Meg and I are heading to Valcourt this year, as many of you are. And we hope to meet many of you there.
I am the type that is always concerned about what issues with the Spyder can ruin a trip like this. Our Spyder has been flawless and has never let us down, but doo doo happens!  The one flaw I keep coming back to is the windshield arm.
Many of you have had that arm break as many as 2 times, and it would really suck if it were to break on a trip like this. I had purchased the windshield arm from noboot (Ron), just to have in case mine ever broke. Then I started thinking of the interstate speeds we will be traveling at, and the stress on that arm. The thought of Spydering down the road with a windshield on my lap did not appeal to either one of us. And we always ride with it fully up, so mine has been stressed since new. With that thought in mind, we decided to change it yesterday, and have one less thing to worry about.
Ron provides great written instructions with the arm, but has an excellent video here
Followed all the steps in the video and all went well until it came time to remove that little screw from the end of the gear. Being a electronics guy, I have every type and size of screwdriver imaginable. A pozidriv Philips seemed to fit the screw well without slipping. The issue I experienced was that the screw was starting to break apart before loosening.  No doubt caused by the copious amounts of Loctite BRP uses on all their screws. Could not use heat to free the Loctite, as the plastic gear would melt. Rather then break the head off of the screw, decided to remove the magnet end. We marked the magnet well so after reassembly it would still be in the proper place.
We used a bearing separator from harbor freight, and placed it under the magnet.

We then flipped it over and used 2 screw drivers to pry the old arm and shaft up out of the magnet.

We would up using larger screwdrivers then shown, it initially was really stuck on there. Meg was holding the gear on top as I pried. I expected it to come off slowly, but it let go and moved quickly when free.
You can see from the paint marks, the plastic is engaged rather deeply on the shaft.

Installed the new arm following the steps in the video. Installed the magnet back in the bearing separator like this.

Gently used a rubber mallet tapping the gear and shaft back into the magnet.

Everything went back together well and worked fine. I would recommend using some tef-gel http://www.tefgel.com/contain.php?param=tefgel_infor as I did on the bushings that are in the aluminum windshield frame. The bushings are brass and the frame is aluminum and they were a little tough to get out due to corrosion from dissimilar metals.
Hope this is helpful, Take Care, Louie and Meg 
Thanks for your video, very helpful. At times I'd be sunk without guys like you puting videos here. Cheers. 
I don't see that it matters if the screw on the gear wheel is broken, the gear is on a hex shaft and its position on shaft does not matter, only the magnet end matters. Without the screw and the unit in position with the caps on, where is it going to go, it's not a constantly rotating machine, it's an occasional 1/2 turn in each direction once or twice a day. My screw is broken and it's not going back, no Locktite either. Important thing is to grease all the bushing parts on the way back.
Thanks again,
Alex
Last edited by Peter Aawen; 07-08-2023 at 02:18 AM.
Reason: Moved Post title into text - many only see Thread titles, and post titles mess with Searching! ;-)
2014 RT Std
Floor and Highway Boards
50$ GPS connected to oem loom
Trunk & Frunk Liners and lights
Frunk and dashboard power outlets
Front supension LEDS
Cup holders
Glovebox light
Turn signal LEDs in mirrors
12 volt coffee maker
Passenger hangrip muffs
Ignition lock light
Windscreen wiper/ baguette holder

If I wasn't so cleverI wouldn't need to be so good looking.
-

I have a new one for sale, don't have a RT anymore & never put it on.
$125.00 includes shipping to the US 48.
-
Active Member
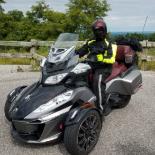

Ok, I have everything out but can't get the gear or the magnet off of the shaft. Help!!
2015 RT S , None Tried one, but took it off. Didn't like it Black and Silver
 Posting Permissions
- You may not post new threads
- You may not post replies
- You may not post attachments
- You may not edit your posts
-
Forum Rules
|
The one flaw I keep coming back to is the windshield arm.
No doubt caused by the copious amounts of Loctite BRP uses on all their screws. Could not use heat to free the Loctite, as the plastic gear would melt. Rather then break the head off of the screw, decided to remove the magnet end. We marked the magnet well so after reassembly it would still be in the proper place.


 Reply With Quote
 ...... and yours had SCREWS??? .....mine were tension type pins!!!! I just tapped them out with a small nail ........... Mike


 .... In 2014 right after I bought my 14 RT, I took my entire WINDSHIELD ARM assembly off and took it apart .... I removed the OE (crappy) Arm and made a steel cover for it from 3/64" sheet stock ... I now see that Phillips Screw at the Gear End .... I had to drill the end off to get the Gear Wheel off ..... I then took the Magnet End off and discovered it was FOUR times as easy .... So I have been telling folks to do the Magnet end ever since ...... Then a year later "Noboot" made the aluminum copy.
 States visited by Bike


