|
-
Active Member

 Electrical wiring questions Electrical wiring questions
So, I've read some of the posts...still have questions, please.
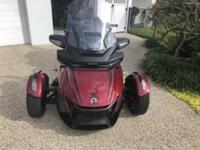
I have a 2016 F3T that I'm getting ready to modify and get in over my head...Lamonster made me do it.
I have 3 handlebar electronics I'd like to wire to a switched source:
- Where should I run the wire from/to? Up through the hole for the handlebar?
- Where should I tap into the electrical system...and is that difficult? (I'm hoping I don't need a fuze block, I'm running out of $$!)
Thanks!
-
Very Active Member


Neil,
Try this as a starting point.....it's the Lamonster power plate install video. He discusses power sources, shows where to route cables etc etc.
https://m.youtube.com/watch?v=OBfC9JzV93Q
Pete
Harrington, Australia
2021 RT Limited
Setup for Tall & Big.... 200cm/6'7", 140kg/300lbs, 37"inleg.
HeliBars Handlebars
Brake rubber removed to lower pedal for easier long leg/Size 15 EEEEW boot access.
Ikon (Aussie) shocks all round.
Russell Daylong seat 2” taller than stock (in Sunbrella for Aussie heat & water resistance)
Goodyear Duragrip 165/60 fronts (18psi) - provides extra 1/2” ground clearance.
Kenda Kanine rear.
2021 RT Limited , Brake pedal rubber removed for ease of accessing pedal with size 15 boots. Red
-
Active Member


Thanks Pete! I did see that but I don't want to see that much wiring out on the tank all the time. However, I see now that I just need to complete the wiring below the top panel (service panel?) and fish it up by the steering column. Two of my items have a transformer built into the 12-volt car plug. That equals bulk!
-
Very Active Member

 FUSE- BLOCK FUSE- BLOCK
 Originally Posted by nealperkins

So, I've read some of the posts...still have questions, please.
I have a 2016 F3T that I'm getting ready to modify and get in over my head...Lamonster made me do it.
I have 3 handlebar electronics I'd like to wire to a switched source:
- Where should I run the wire from/to? Up through the hole for the handlebar?
- Where should I tap into the electrical system...and is that difficult? (I'm hoping I don't need a fuze block, I'm running out of $$!)
Thanks!
Look here .....Banggood.com ..... I bought a fuse-block for about $ 8.00 , they have quite a few to choose from .... and Heat Shrink Tubing ( for wire splicing ) very cheap ( 4 , 5 , 6 mm will cover most splices ) ............. Mike 
-
Very Active Member


Good luck Neal. Do you know where the "customer accessory" wires are behind the left side panels?
Harrington, Australia
2021 RT Limited
Setup for Tall & Big.... 200cm/6'7", 140kg/300lbs, 37"inleg.
HeliBars Handlebars
Brake rubber removed to lower pedal for easier long leg/Size 15 EEEEW boot access.
Ikon (Aussie) shocks all round.
Russell Daylong seat 2” taller than stock (in Sunbrella for Aussie heat & water resistance)
Goodyear Duragrip 165/60 fronts (18psi) - provides extra 1/2” ground clearance.
Kenda Kanine rear.
2021 RT Limited , Brake pedal rubber removed for ease of accessing pedal with size 15 boots. Red
-
Active Member


 Originally Posted by Peteoz

Good luck Neal. Do you know where the "customer accessory" wires are behind the left side panels?
I may if that is what appears in Lamont's video; otherwise, no (I did buy a shop manual though.) To date, I've not removed any Tupperware. That's about to change next week, or so, when I install several add-ons. I'm really hoping I don't turn my new toy into a basket case!!
-
Very Active Member


 Originally Posted by nealperkins

I may if that is what appears in Lamont's video; otherwise, no (I did buy a shop manual though.) To date, I've not removed any Tupperware. That's about to change next week, or so, when I install several add-ons. I'm really hoping I don't turn my new toy into a basket case!!
I'm sure you won't turn it into a basket case, Neal. It's pretty solid. I only asked that question as the two wires for the switched "customer accessory" circuit are a bit hard to find the first time. It's hidden behind the bodywork between the top inspection plastic and the side panel. It is usually wrapped in cloth tape and behind other wiring. It has a wax end on it. Seek and Ye shall find, but it may take a little while. If you are struggling to find it, you may have to take off all three top/side panels. That's not difficult, just a little time consuming.
There are a few threads on locating the accessory circuits that are easily found that will help.
Pete
Harrington, Australia
2021 RT Limited
Setup for Tall & Big.... 200cm/6'7", 140kg/300lbs, 37"inleg.
HeliBars Handlebars
Brake rubber removed to lower pedal for easier long leg/Size 15 EEEEW boot access.
Ikon (Aussie) shocks all round.
Russell Daylong seat 2” taller than stock (in Sunbrella for Aussie heat & water resistance)
Goodyear Duragrip 165/60 fronts (18psi) - provides extra 1/2” ground clearance.
Kenda Kanine rear.
2021 RT Limited , Brake pedal rubber removed for ease of accessing pedal with size 15 boots. Red
-
Active Member


Thanks Pete! I am about to install several items so all those panels have to come off. I am supremely confident I can get everything off. Not so much getting all back on!! I am awaiting delivery of a couple more items and then the big project. Lots of notes and photographs will be taken. Thanks for the help.
 Posting Permissions
- You may not post new threads
- You may not post replies
- You may not post attachments
- You may not edit your posts
-
Forum Rules
|


 Reply With Quote


