|
-
Very Active Member

 Dave's Comformax GEL-Foam Seat Pad Kit Dave's Comformax GEL-Foam Seat Pad Kit
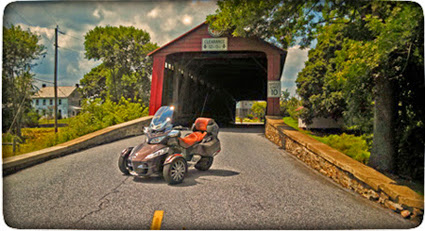
I wanted more comfort in my Comfort Seat, so today I installed Motorcycle Dave's Comformax GEL-Foam Seat Pad Kit. I've been using the AirHawk R seat cushion and I really liked that, but I've been looking for more comfort without the need for a separate cushion. Custom seats are expensive, and you never know exactly what you will get until after you pay for it. Also, I have the 2013 BRP tan colored seat to go with my brown RT, and those are hard to find among after-market seat makers. Also it's hard to find an after-market seat that gives you the full extra 2" of leg room that the BRP Comfort Seat does, unless you have it specially built. (I had previously tried the Ultimate Tall Boy seat at SpyderQuest, but it did not put be as far back as my Comfort Seat.) So, for all these reasons, I thought I'd try Motorcycle Dave's gel seat cushion, that you install INSIDE the seat, rather than on top of it.
 ....Pad shown upside down in this picture to show the gel. ....Pad shown upside down in this picture to show the gel.
I had previously set the pad on top of my seat to determine the "sweet spot" for me. Turned out that the perfect spot was 1.75" forward of the seat rise. (Most folks would want it a little further back, but I've got a big butt.  ) Since good ol' Al Gore just blessed Pennsylvanians with two days of February temperatures in the high 50's I figured I'd tackle the job yesterday and today. So yesterday, with Dave's kit in my garage, I took the seat off the Spyder. After turning it over I found almost 200 tiny stables under there holding the cover onto the plastic base. Not having an easy way to get all those little stables out, OR back in, I "chickened out" and took my seat and Dave's gel pad to an auto seat repair guy this morning. It took him less than two hours to, take the seat apart, cut out the seat foam to position the pad exactly where I wanted it, and put my seat back together. The job cost me just $150, which I thought was well worth it. ) Since good ol' Al Gore just blessed Pennsylvanians with two days of February temperatures in the high 50's I figured I'd tackle the job yesterday and today. So yesterday, with Dave's kit in my garage, I took the seat off the Spyder. After turning it over I found almost 200 tiny stables under there holding the cover onto the plastic base. Not having an easy way to get all those little stables out, OR back in, I "chickened out" and took my seat and Dave's gel pad to an auto seat repair guy this morning. It took him less than two hours to, take the seat apart, cut out the seat foam to position the pad exactly where I wanted it, and put my seat back together. The job cost me just $150, which I thought was well worth it.
For those DIY guys, the job is not hard to do yourself IF you have the correct tools (which is ALWAYS my problem). Dave's kit includes the medical grade gel pad, pre-matched with foam (the exact size as the pad), more thin foam for covering the pad and seat after it's installed, and a razor knife for cutting into the original foam. He also has instructions posted on his web site with pictures, and concise easy-to-follow, step-by-step instructions which (I would say) are very well written.
Here is the finished job...

My seat looks EXACTLY the same as it looked before the pad was installed (which is sort of the point). Dave's Comformax GEL-Foam pad may be invisible to the naked eye, but after a good long test ride today, I can tell you that MY BUTT KNOWS IT'S THERE. It feels GREAT. I cannot wait to test it on an all-day ride this Spring.
UPDATE (5/2/2016): Since originally writing this report, I've had an opportunity to make several all-day rides with this cushion installed. On the first trip, I took my Airhawk along in the trunk "just in case". After that I left it at home – I don't need it anymore. This gel/foam cushion is actually a lot more comfortable on rides lasting several hours. Kudos to Motorcycle Dave for coming up with this idea, and marketing it on his site
Last edited by robmorg; 05-02-2016 at 05:29 PM.
-
-
Very Active Member
Thanks, Bob. And I can say without much hesitation, that even your butt would likely know the difference. 
Last edited by robmorg; 02-22-2016 at 06:43 PM.
-
was that 150 total or just what you paid the upholstery guy? certainly cant tell anything was done to it.
-
Very Active Member
Hi, Tony. The $150 is what I paid to have an upholstery guy install it. I thought that was well worth the money, since I didn't have the tools to make the job easy, and he did. If you want more information about what these kits cost, just give Dave a call. His number is in the link in my post above. He sells these kits at just slightly above what it costs him to make them.  Dave is a great guy to work with (as Paul points out in the next message). Dave is a great guy to work with (as Paul points out in the next message).
Last edited by robmorg; 02-22-2016 at 07:36 PM.
-
Very Active Member

I added this same accessory last July in preparation for a trip to Sturgis. Although I have always worked on my bikes myself I had never done anything like this. So on a Saturday I tackled it.I got most of cover off when I ran into my 1st problem. I called Dave and he was in his shop and willing to take time to talk me thru my first problem. A little while later I called him again. Short visit, ask for help,do while on phone, hang up, move on. Called again a couple more time, always very friendly full of patience and help. Finally got it done and back together,took some pictures and sent them to Dave. My seat looks as good as it did before the mod and you can't tell it is there until you sit on it.Feels great. Again Dave thank you. I have never bought anything from anybody with so mach after the sale support.

Happy TRAils/NSD
Paul
2012 RT L
AMA 25 years Life Member
TRA
PGR
Rhino Riders Plate #83
Venturers #78
TOI

-
SpyderLovers Sponsor

HERE IS A GREAT BIG THANK YOU !!!!
I am so happy you like the new Gel seat you will only grow to like it more each day
and you butt will too...
Thanks again
Dave
 Originally Posted by robmorg

I wanted more comfort in my Comfort Seat, so today I installed Motorcycle Dave's Comformax GEL-Foam Seat Pad Kit. I've been using the AirHawk R seat cushion and I really liked that, but I've been looking for more comfort without the need for a separate cushion. Custom seats are expensive, and you never know exactly what you will get until after you pay for it. Also, I have the 2013 BRP tan colored seat to go with my brown RT, and those are hard to find among after-market seat makers. Also it's hard to find an after-market seat that gives you the full extra 2" of leg room that the BRP Comfort Seat does, unless you have it specially built. (I had previously tried the Ultimate Tall Boy seat at SpyderQuest, but it did not put be as far back as my Comfort Seat.) So, for all these reasons, I thought I'd try Motorcycle Dave's gel seat cushion, that you install INSIDE the seat, rather than on top of it.
....Pad shown upside down in this picture to show the gel.
I had previously set the pad on top of my seat to determine the "sweet spot" for me. Turned out that the perfect spot was 1.75" forward of the seat rise. (Most folks would want it a little further back, but I've got a big butt. ) Since good ol' Al Gore just blessed Pennsylvanians with two days of February temperatures in the high 50's I figured I'd tackle the job yesterday and today. So yesterday, with Dave's kit in my garage, I took the seat off the Spyder. After turning it over I found almost 200 tiny stables under there holding the cover onto the plastic base. Not having an easy way to get all those little stables out, OR back in, I "chickened out" and took my seat and Dave's gel pad to an auto seat repair guy this morning. It took him less than two hours to, take the seat apart, cut out the seat foam to position the pad exactly where I wanted it, and put my seat back together. The job cost me just $150, which I thought was well worth it.
For those DIY guys, the job is not hard to do yourself IF you have the correct tools (which is ALWAYS my problem). Dave's kit includes the medical grade gel pad, pre-matched with foam (the exact size as the pad), more thin foam for covering the pad and seat after it's installed, and a razor knife for cutting into the original foam. He also has instructions posted on his web site with pictures, and concise easy-to-follow, step-by-step instructions which (I would say) are very well written.
Here is the finished job...
My seat looks EXACTLY the same as it looked before the pad was installed (which is sort of the point). Dave's Comformax GEL-Foam pad may be invisible to the naked eye, but after a good long test ride today, I can tell you that MY BUTT KNOWS IT'S THERE. It feels GREAT. I cannot wait to test it on an all-day ride this Spring.
Kudos to Motorcycle Dave for coming up with this idea, and marketing it on his site.
-
Hmmmm..... might have to tackle this job... '
Love my Airhawk R but have to lock it up all the time so someone doesn't walk away with it..
Hmmmm.... And I would try to DIY it...
Hmmmm.......
Bob
-
Very Active Member
Go for it, Bob. If you have a way to re-staple the seat cover back onto the pan, you will NOT have a problem with this installation. I lacked both the tools and the patience to do the job myself. I'm guessing you probably have both.
-
I do... it's called a staple gun
Bob
-
Very Active Member
Originally Posted by finless
Hmmmm..... might have to tackle this job... '
Love my Airhawk R but have to lock it up all the time so someone doesn't walk away with it..
Hmmmm.... And I would try to DIY it...
Hmmmm.......
Bob
Hmmmmmmmm and you could do one of your famous videos Hmmmmmmm
Happy TRAils/NSD
Paul
2012 RT L
AMA 25 years Life Member
TRA
PGR
Rhino Riders Plate #83
Venturers #78
TOI
-
Very Active Member

FYI on staples
I remember looking to tackle my snowmobile seat and ended up running into an issue trying to find 1/4" staples for my pneumatic staple gun. I believe that is the standard upholstery size. I ended up taking to a local shop and he charged me $40.
For what it's worth, good luck with the project. I'm thinking this could be a nice add on to my seat as well.
2022 RT Limited Dark Hyper Silver
2014 RT-S Pearl White
2010 BRP 622 Trailer Pearl White

 Posting Permissions
- You may not post new threads
- You may not post replies
- You may not post attachments
- You may not edit your posts
-
Forum Rules
|


 Reply With Quote
 Thanks for the Great evaluation of this product!