|
-
Very Active Member

 installing seat installing seat
Well I was installing my new stock seat (removed the Ultimate Tall Boy which was comfortable to sit on but did not fit either one of us) and found it a pain to get the 2 bolts and nuts in the rear to mate up. I got one but could not get the drivers side (what does that mean on a bike) to mate. Anyone have any tips on this? Have a great day. Thanks, Mike
2014 RT Limited Matte Silver, Belt Guard, RT Dash Mount, Show Chrome Can-Am Spyder RT Passenger Arm Rest, Show Chrome Full Size Brake Pedal,Best shop manual, Spyder keycover with hole, Utopia drivers backrest, Showchrome trailor hitch, ShowChrome Acc Trailer Acc Rack, 2014 CA Spyder RT-RTS Master Collection-HDSv5, Airhawk Cushion, Spyderpops bumpskid, Ipod cable, Led lights, Driver Hiway pegs, Shorty Antenna, Pin Striping, ECU flash, TriAx adjustible handlebars,
Will it ever stop--NO
-

I just replaced my stock seat with the heated comfort seat last week. There is not a lot of room to work to say the least.
I used a flexible spring claw pick-up tool. I used it to grab the caged nut and then position it in place while I used my other hand to start the bolt into the nut. A lot of light helps as well so you can see the end of the bolt lining up with the caged nut.
-
Very Active Member


I also installed an aftermarket seat strut (mine did not have one when I got it) that has more psi in it and it seems to push the seat a little farther forward. It is the one referenced on the forum (http://www.spyderlovers.com/forums/s...ght=seat+strut).
Thanks,Mike
2014 RT Limited Matte Silver, Belt Guard, RT Dash Mount, Show Chrome Can-Am Spyder RT Passenger Arm Rest, Show Chrome Full Size Brake Pedal,Best shop manual, Spyder keycover with hole, Utopia drivers backrest, Showchrome trailor hitch, ShowChrome Acc Trailer Acc Rack, 2014 CA Spyder RT-RTS Master Collection-HDSv5, Airhawk Cushion, Spyderpops bumpskid, Ipod cable, Led lights, Driver Hiway pegs, Shorty Antenna, Pin Striping, ECU flash, TriAx adjustible handlebars,
Will it ever stop--NO
-

If you've already got one in: try using some Duct-Tape to hold the nut in place, and then run the bolt through to it. 
(It worked for me...)
-
Very Active Member


You did remove the passenger back rest to give you access to the bolts right?
-
Very Active Member

+1 on remove the backrest and be sure to put a rag or something in the black hole for when you drop a nut or bolt.

Happy TRAils/NSD
Paul
2012 RT L
AMA 25 years Life Member
TRA
PGR
Rhino Riders Plate #83
Venturers #78
TOI

-

There's actually at least THREE spots to cover up (If you don't want to lose stuff...)
All three sections around where the seat bolts up have designed to be great places for eating parts and tools
Plus, you've also got the normal cast of characters that are directly under where the seat ends up sitting...
 Proceed with caution! Proceed with caution!
-
Very Active Member


Thanks everyone. I put some white lithium grease on the nut so it wouldn't slide out and covered all 3 holes at the back (when I removed the seat I lost a bolt in the side hole in the middle--I just lost my GPS cover in the crack by the handlebars but was able to fish it out--one time while putting cams in my Virago I dropped a nut into the cylinder--this could go on and on and on). Yes I did remove the passenger seat back. I have small hands and it is still hard to do. I thought about sliding a small allen wrench or screwdriver into the hole to line it up bit it would probably fall into never-never land also. I also installed the ShowChrome Passenger Armrests and they rub up against the seat when you raise and lower it. Thanks, Mike
2014 RT Limited Matte Silver, Belt Guard, RT Dash Mount, Show Chrome Can-Am Spyder RT Passenger Arm Rest, Show Chrome Full Size Brake Pedal,Best shop manual, Spyder keycover with hole, Utopia drivers backrest, Showchrome trailor hitch, ShowChrome Acc Trailer Acc Rack, 2014 CA Spyder RT-RTS Master Collection-HDSv5, Airhawk Cushion, Spyderpops bumpskid, Ipod cable, Led lights, Driver Hiway pegs, Shorty Antenna, Pin Striping, ECU flash, TriAx adjustible handlebars,
Will it ever stop--NO
-
SpyderLovers Sponsor

 I AM SURE ..... I AM SURE .....
I am sure after owning, riding, servicing and in general
working on the Can Am Spyders all models so far....
I am sure they were designed by people who do NOT ever
or have ever had to work on any type of machines with
2 or more wheels. They seem like they have been conceived
by committee, people who are not mechanics or techs,
everything on them is hard to get to, just try replacing the
tail light bulbs on an RS some time, or changing out a seat
on an RT... everything takes more time than it should.
I have owned, ridden and repaired/serviced over 40 motorcycles
in my life and none of them inc. Goldwings are as hard to service.
All I can say is take your time don't try rushing things and be careful
not to loose nuts and bolts by dropping them in the holes under the seat
The Spyder seems to swallow them up never to be seen again..
Ride Safe
Dave
-
 Installing seat Installing seat
Along with removing the passenger backrest, covering the holes under the seat with blue painters tape, I put a small piece of tape over the nut and put a piece of wood against the frame to hold the seat up higher. I also used a rotating ratchet which made turning the bolt a lot quicker and easier.
-

 Originally Posted by jcthorne

You did remove the passenger back rest to give you access to the bolts right?
I was able to do it without taking off the passenger backrest. It was not that difficult using a spring loaded grab tool as I said.
-
Very Active Member

About losing those small tools in the black holes... A tip I got was to tape some fishing line to one end - used the tip and saved an Allen wrench.
Ryde, eat, sleep... Repeat
Ryde, eat, sleep.... repeat
2019 Spyder RT Limited Pearl White/Dark
LaMonster drink holder with X-Grip
LaMonster Belt Dampener
Lamonster USB cable with extension
Variously called Stormtrooper, Pearl, and Goober by wife and various (friends?)
-

 Originally Posted by BigGuy66

About losing those small tools in the black holes... A tip I got was to tape some fishing line to one end - used the tip and saved an Allen wrench.
Ryde, eat, sleep... Repeat
That's much easier than getting eight football players to turn your Spyder upside-down, and shake the pudding out of it! 
-
Active Member

 Originally Posted by wmh9680

Well I was installing my new stock seat (removed the Ultimate Tall Boy which was comfortable to sit on but did not fit either one of us) and found it a pain to get the 2 bolts and nuts in the rear to mate up. I got one but could not get the drivers side (what does that mean on a bike) to mate. Anyone have any tips on this? Have a great day. Thanks, Mike
I just finished installing the Show Chrome passenger arm rests. First I removed the passenger back rest. Then I stuffed rags into all of the black holes under the whole seat. I then disconnected the seat end of the gas strut. I removed the bolts that the seat hinges on. After installing the arm rests I smeared a little grease on the spacers so they would stay put. I slid one of the square nuts into it's slot and lined it up with a phillips screw driver. Holding the nut in place with one hand I passed the bolt through and got it started. I did the same thing on the other side and then I amused myself with a small box end wrench tightening the bolts 1/16th turn at a time. Needless to say I amused myself for quite a while. I didn't waste that time because I was able to figure out how to set the tension on the arms so they wouldn't swing out in a sharp turn dumping my first wife. It was all worth while because she likes them. 
-
Active Member

 installing seat installing seat
I got tired of the bs to remove or re-install mine so I just got 2 long bolts drilled a small hole in them for a spring clip, reach in behind seat or remove backrest as described previously if you like then pull the spring pins, pull the bolts and off in 5 min or less.Also don't forget to tape the holes to neverland as well. I did also have to drill a hole on each side through the plastic piece that the nut tightens up against and put a pin in it as a stop to keep the bolt from angling or turning or moving toward the seat [tightening the nut stops that on the original way] works great!
Baja Ron sway bar, Spyder Dock, Highway Brackets,Trident pegs, Spyder Decals, Signal Mirror led strips, Utopia backrest, 5 pc. Hopnel liner set, cargo nets side/rear doors. Mesh bag front trunk, foam grips, spare trunk key, passenger armrests/storage pouch's, ram mounts/GPS, Drink holder,Phone, Passenger clamp-on drink holder, rear trunk tap light, custom plate frame, spyder fastener bolts, adjustable lower mirror wind deflectors, F4 Customs windshield -wide,tall,clear,vent,Chrome Spyder grill.
-
-
Active Member


While the sear is on I silicone the nuts in place. Then wrap duct tape over the open edge and press it around the nut. Should keep it I. Lose
JIM EVANS
2014 RTL, cb,all panels color matched over 300 LEDs, pass armrests sat radio chrome WS brkt, larger w.s, more to come
-
Active Member
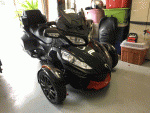

Is it OK to leave the tape, or whatever you use to cover the holes, on all the time? Are they air vents or just annoying holes that made me curse and jump up and down when I lost a nut?
NEW 2016 RT-S Special Series Triple Black - ready for new toys to add
OLD 2012 RT-S Pure Magnesium Metalic CB-Navigation-XM, Sway bar, Ultimate Tallboy
-
Very Active Member


 Originally Posted by Bob Denman

If you've already got one in: try using some Duct-Tape to hold the nut in place, and then run the bolt through to it. 
(It worked for me...)
Exactly what I do and......if/when you remove it the nuts stay in place and help hold the spacers.
-
Very Active Member


The first time I changed seats I did not remove the passenger back rest nor did I cover the holes in the back. After dropping one bolt and a wrench that both found those open holes I fished the bolt and wrench out with a magnet and blue taped up the three holes. I left the tape in place and it has stayed there through 6 seat changes.
For the nuts I slide a plastic cable tie under each nut and that holds it in place. I also now remove the back rest to provide more room to work.
2021 Sea To Sky, 2020 RTL
Isn't it weird that in AMERICA our flag and our culture offend so many people......
but our benefits don't?
-
Very Active Member

 LEAVING THE TAPE LEAVING THE TAPE
 Originally Posted by cmar157

Is it OK to leave the tape, or whatever you use to cover the holes, on all the time? Are they air vents or just annoying holes that made me curse and jump up and down when I lost a nut?
As others have stated I also have left the tape, however I did poke some small holes in them to allow water to eventually pass thru.....................jmho....... Mike 
-

I pulled that tape after I was done... but only because I had done such a sloppy job, when I was covering up those part-grabbing holes!
 Posting Permissions
- You may not post new threads
- You may not post replies
- You may not post attachments
- You may not edit your posts
-
Forum Rules
|


 Reply With Quote


 Proceed with caution!


