Results 1 to 7 of 7
  1. #1
    SpyderLovers Sponsor spidergreg's Avatar
    Join Date
    Sep 2015
    Location
    Jamestown, KY
    Posts
    67
    Spyder Garage
    0

    Default SpiderGreg's Mods

    Just noticed this area on the forum so moving my signature data to here.

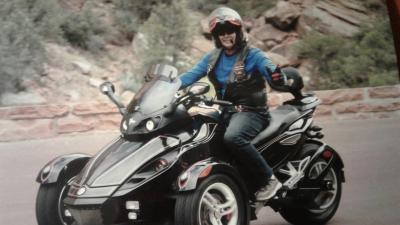
    2012 RTS purchased Aug 29 2015 with 920 miles on it.


    Since we purchased the Spyder...
    WGT LED Turn Wraps
    Two Brothers Exhaust
    Zumo 665 w/GXM40
    RBNS Hood for GPS
    F4 Customs Oversized Tinted Windshield with Vent
    SmoothSpyder Tensioner/Beltguard
    BajaRon Sway Bar w/Billet Aluminum Heim Joints
    Chrome LidLox
    Air Hawk 2
    TricLed Fender LED's
    Sena SMH10
    His and Her's Cup Holders
    NVB Highway Pegs
    XenonDepot LED Headlamp and Foglamp bulbs
    SpyderPops Skid Plate with LED's
    Two Vanity mirrors, one inside truck lid and one inside trunk
    Convex blind spot mirrors
    Battery Tender
    Cargo Netting inside of trunk and saddle bags
    Travel bags for the saddle bags
    BRP Air Scoops
    Custom Dynamics HMSL
    4 JBL 528s Speakers
    BRP Comfort Seat
    Elka Stage 1 Shocks
    Laser Alignment
    And of course a Spyder Decal
    Attached Images Attached Images
    Last edited by spidergreg; 05-02-2016 at 06:46 PM.

    Greg and Debbie 2012 RTS
    Our Mods


  2. #2
    Active Member Thump's Avatar
    Join Date
    Jul 2015
    Location
    Colorado Springs
    Posts
    45
    Spyder Garage
    0

    Default

    Looks Terrific! You didn't waste any time farkling!
    Love the blue color
    Now put some miles on it and enjoy
    Thanks for sharing
    Thump

  3. #3
    Very Active Member Chupaca's Avatar
    Join Date
    Oct 2012
    Location
    San Diego, CA.
    Posts
    31,097
    Spyder Garage
    1

    Default Very nice..!!

    well done... looks sharp so now you need some R&R..... rest and ryde...
    Gene and Ilana De Laney
    Mt. Helix, California

    ​2012 RS sm5
    2012 RS sm5 , 998cc V-Twin 106hp DIY brake and park brake Classic Black

  4. #4
    SpyderLovers Sponsor spidergreg's Avatar
    Join Date
    Sep 2015
    Location
    Jamestown, KY
    Posts
    67
    Spyder Garage
    0

    Default Thanks

    Thanks for the comments! After we picked up the Spyder, I joined SpyderLovers shortly after and started reading through some of the best Farkle's and just started in! This site is great for suggestions and knowing what needs to be done in just about any situation. And this site gave me the confidence to install all of the Farkles myself. This is a great site! We haven't taken it on a trip as of yet, but we now have close to 3,000 on her and looking to make an appointment for the 3,000 mile check up.

    Greg and Debbie 2012 RTS
    Our Mods


  5. #5
    Very Active Member Larry rt's Avatar
    Join Date
    Jul 2013
    Location
    Vestaburg Michigan
    Posts
    794
    Spyder Garage
    0

    Default

    How hard was it to install bumpskid, from Spyder pops?

  6. #6
    SpyderLovers Sponsor spidergreg's Avatar
    Join Date
    Sep 2015
    Location
    Jamestown, KY
    Posts
    67
    Spyder Garage
    0

    Default Not hard at all!

    Quote Originally Posted by Larry rt View Post
    How hard was it to install bumpskid, from Spyder pops?
    The bump skid was quite easy. Took less than an hour. Need to put the front of the Spyder up on some ramps so you have some room to move around under the front of the bike. The SpyderPops instructions were very good with clear directions. Take the existing bump skid off, then you place two "J" clips inside of the tupperware (this was the actual hardest part flexing the tupperware such that you can get to first two "J" clips in the proper location) and then screw on the SpyderPops bump skid with the two long screws. Using the bump skid itself as the template you then drill several hole in the bottom of the tupperware and two holes though the frame supports. Remove the bump skid and install "J" clips in all of the newly drilled holes, then reinstall the bumpskid in its final position. Run the wire up the A frame and it simply plugs between an existing connector for the running lights on the fenders. Everything you need to install is provided in the SpyderPops kit. Take you time and you will be fine!

    Greg and Debbie 2012 RTS
    Our Mods


  7. #7
    Very Active Member Larry rt's Avatar
    Join Date
    Jul 2013
    Location
    Vestaburg Michigan
    Posts
    794
    Spyder Garage
    0

    Default

    Tanks for info!

Posting Permissions

  • You may not post new threads
  • You may not post replies
  • You may not post attachments
  • You may not edit your posts
  •