|
-
Active Member

 USB and 12v Power - CnC Machines USB and 12v Power - CnC Machines
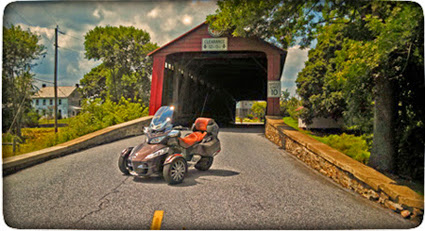
Today I installed the USB and 12v power unit from JT. The power unit goes on the dash mount, and looks really good and works great. The toughest part was getting the wires down to the battery compartment... had to take off a bunch of tupperware to fish the wires and conceal everything. In the end, and after sweating my nuggets off, it was worth the effort and I now have easy access to charge my phone and power the soon to be mounted navi system.
IMG_20150627_210422598.jpgIMG_20150627_210456711.jpgIMG_20150627_210535959.jpg
-
Active Member

Thanks Brian. Just ordered same from JT so I guess I too will sweat out the wiring install . I look ed at cheaper solutions but this has the best looks For me. . I look ed at cheaper solutions but this has the best looks For me.
Dan
2014 RT-S SE6, 2012 RT-622 trailer
-
Very Active Member

Brian,
I also just ordered the dash mount and the USP + 12 v from JT. Do you have any suggestions or helpful hints on how you routed your wires down to the battery. Also what panels really need to be taken off and which don't. Thanks for your help.
I own a 2015 RTS.

2017 F3 Limited in Intense Red Pearl
2008 Triumph Rocket (SOLD)
2002 Honda VTX 1800 C ( SOLD)
2014 Triumph Thunderbird Commander
-
Active Member
 Originally Posted by Ex-Rocket

Brian,
I also just ordered the dash mount and the USP + 12 v from JT. Do you have any suggestions or helpful hints on how you routed your wires down to the battery. Also what panels really need to be taken off and which don't. Thanks for your help.
I own a 2015 RTS.
I have the 2014 RT-S so nothing different when it comes to installation. I tried not to take anything off, and blindly fish or push wires...no luck on that concept. I decided to mount the power unit on the right side and route the wires down through the right side windshield arm opening, on the top side of the mounting bracket, so it wouldn't interfere with the windshield (so I think). Just with a hunch, I removed the instrument molding (4 screws) that allows you to remove the gas and temperature gauges. After removing that, I noticed the opening between the windshield arm and the temperature gauge...this allowed me to see where the wires were going down and fish through the plastic parts. But still needed more access, so I had to remove both mirrors, left and right side panels, and front panel surrounding the headlights. It gave me a reason to clean everything anyway. With the panels off and battery compartment open, I could easily see where the wires were going, and how to get them to the battery compartment. The power unit comes with enough length on the cord to get you to the battery and I tried to place it where it didn't have too much slack. I did not tie it down to anything or secure the wiring...I didn't see the need to do that. I have taken off the tupperware before so it was easy for me to do all this...pain in the fanny the first couple of times, but I think it's better to have this stuff out of the way. Now, I also tackled wiring up my new Stebel horn directly to the battery, which was very easy with everything out of the way. but I think it's better to have this stuff out of the way. Now, I also tackled wiring up my new Stebel horn directly to the battery, which was very easy with everything out of the way.  Hope this gives you a little guidance...sometimes hard to follow but I highly recommend just removing the tupperware and getting as much sun light to the spyder as possible. Good luck!!! Hope this gives you a little guidance...sometimes hard to follow but I highly recommend just removing the tupperware and getting as much sun light to the spyder as possible. Good luck!!!
-
Very Active Member
Did you happen to take any pictures during the install?
2017 F3 Limited in Intense Red Pearl
2008 Triumph Rocket (SOLD)
2002 Honda VTX 1800 C ( SOLD)
2014 Triumph Thunderbird Commander
-
Active Member
Originally Posted by Ex-Rocket
Did you happen to take any pictures during the install?
Sorry, I didn't take any pictures. During the install I tried to minimize removing panels and such... In hind sight I would have just removed everything first and then started. Trying to take pictures of the wires and location would have been pointless (in my opinion) because you're trying to fish them down to the battery through small openings or gaps. The only thing i didn't remove was the frunk... I have heard it's easy to do and probably would have made wiring to the battery a little easier, but i managed to do it with my sausage fingers with the frunk in place.
Brian Kay - Kennesaw, GA
2014 RT-S SM6 Pearl White (KHAOS)
TricLED 3rd and 4th Brake Lights - TricLED Turn Signals - TricLED Side Fender Lights - Airhawk R Seat Pad - Smoothspyder Belt Tensioner - JT's Dash Mount - JT's USB and 12v Power Unit - Stebel 139dB Multi Sound Horn - Lamonster NBV Highway Pegs - BRP Adjustable Wind Deflectors - Cal-Sci Stock Extra Wide Windshield - Baja Ron Sway Bar - WrapMySpyder 1330 Triple decals - Ultimate Tallboy Seat - BRP Sat Radio - ELKA Stage 2 Front Shocks
-
Brian,
I bought the dual USB + 12V from JT (left mount bracket is in the mail) and if I have the time this weekend, I will install it. Meanwhile, I have been thinking of ways to run the power cable from the dash without it being too obvious. Do you have a picture of that area fro install? Thanks
John
-
Active Member
Originally Posted by jmurray
Brian,
I bought the dual USB + 12V from JT (left mount bracket is in the mail) and if I have the time this weekend, I will install it. Meanwhile, I have been thinking of ways to run the power cable from the dash without it being too obvious. Do you have a picture of that area fro install? Thanks
John
John,
I fished the wires down through the windshield mounting bracket hole/opening on the right side (either side would work) and through the maze of internal parts and such, to the battery. I just couldn't find a way to get the wires down to the battery, externally or in a hidden fashion without going down through the front end. Hopefully my posts above help explain what I did. No pictures, because I just couldn't get a good enough picture that would make any sense or give any detail.
Brian Kay - Kennesaw, GA
2014 RT-S SM6 Pearl White (KHAOS)
TricLED 3rd and 4th Brake Lights - TricLED Turn Signals - TricLED Side Fender Lights - Airhawk R Seat Pad - Smoothspyder Belt Tensioner - JT's Dash Mount - JT's USB and 12v Power Unit - Stebel 139dB Multi Sound Horn - Lamonster NBV Highway Pegs - BRP Adjustable Wind Deflectors - Cal-Sci Stock Extra Wide Windshield - Baja Ron Sway Bar - WrapMySpyder 1330 Triple decals - Ultimate Tallboy Seat - BRP Sat Radio - ELKA Stage 2 Front Shocks
-
Very Active Member

Originally Posted by Brian Kay
Today I installed the USB and 12v power unit from JT. The power unit goes on the dash mount, and looks really good and works great. The toughest part was getting the wires down to the battery compartment... had to take off a bunch of tupperware to fish the wires and conceal everything. In the end, and after sweating my nuggets off, it was worth the effort and I now have easy access to charge my phone and power the soon to be mounted navi system.
Looking good Brian!
JT
-
Active Member
Update
A little update for my peeps, check out this setup...
Android phone
Garmin zumo 660lm
USB + 12v power supply
IMG_20150704_114120032.jpgIMG_20150704_114424805.jpg
Brian Kay - Kennesaw, GA
2014 RT-S SM6 Pearl White (KHAOS)
TricLED 3rd and 4th Brake Lights - TricLED Turn Signals - TricLED Side Fender Lights - Airhawk R Seat Pad - Smoothspyder Belt Tensioner - JT's Dash Mount - JT's USB and 12v Power Unit - Stebel 139dB Multi Sound Horn - Lamonster NBV Highway Pegs - BRP Adjustable Wind Deflectors - Cal-Sci Stock Extra Wide Windshield - Baja Ron Sway Bar - WrapMySpyder 1330 Triple decals - Ultimate Tallboy Seat - BRP Sat Radio - ELKA Stage 2 Front Shocks
-
Active Member
And another update
With the suggestion from SL member iSpyder, I made a mounting bracket from 1/2" aluminum, drilled two holes, bent it 90°, and mounted the new Stebel horn in place of the meep meep horn. Since I purchased the wiring kit and installed the wiring harness while doing the USB +12v power supply it made for a very easy job. I now have the new horn wired directly to the battery and it works fabulous! I can't believe how loud it is and almost reminds me of a truck horn, with the deep sound. Makes me want to go blow my horn at random people lol.
Next on the farkle list are highway pegs.
Brian Kay - Kennesaw, GA
2014 RT-S SM6 Pearl White (KHAOS)
TricLED 3rd and 4th Brake Lights - TricLED Turn Signals - TricLED Side Fender Lights - Airhawk R Seat Pad - Smoothspyder Belt Tensioner - JT's Dash Mount - JT's USB and 12v Power Unit - Stebel 139dB Multi Sound Horn - Lamonster NBV Highway Pegs - BRP Adjustable Wind Deflectors - Cal-Sci Stock Extra Wide Windshield - Baja Ron Sway Bar - WrapMySpyder 1330 Triple decals - Ultimate Tallboy Seat - BRP Sat Radio - ELKA Stage 2 Front Shocks
-
Very Active Member
A Stebel horn is on my list of things to do. Which one did you get?
JT
-
Active Member

I ordered one of the first Dual's JT made. However, the USPO being the USPO it arrived in the mail the day after I left for vacation.
My after vacation project.
2014 RT Limited Black Currant, BaJaRon Anti-Sway Bar and Links, Show Chrome Luggage Rack, Rivco Trunk Mounted Double Flag Holder. More to Come.
08 Honda Aero - wife's
14 Kymco - wife's (Hmmmmm...i'm losing bikes)
-
Active Member

Questions
For those of you that have mounted devices on top of the dash, two questions.
1. Do you get dirt, bugs, or moisture on your devices through the windshield vent?
2. For those in hot climates, does your iPhone or other device overheat?
Worried here in arizona.
Thanks!!!
-
Active Member
Originally Posted by jthornton
A Stebel horn is on my list of things to do. Which one did you get?
JT
Oh my, totally missed this question. John, I got the
Stebel 11690019 - Nautilus Compact Mini Air Horn Black... It was $41 through amazon. And I bought the wiring kit too
Brian Kay - Kennesaw, GA
2014 RT-S SM6 Pearl White (KHAOS)
TricLED 3rd and 4th Brake Lights - TricLED Turn Signals - TricLED Side Fender Lights - Airhawk R Seat Pad - Smoothspyder Belt Tensioner - JT's Dash Mount - JT's USB and 12v Power Unit - Stebel 139dB Multi Sound Horn - Lamonster NBV Highway Pegs - BRP Adjustable Wind Deflectors - Cal-Sci Stock Extra Wide Windshield - Baja Ron Sway Bar - WrapMySpyder 1330 Triple decals - Ultimate Tallboy Seat - BRP Sat Radio - ELKA Stage 2 Front Shocks
-
Active Member
Originally Posted by Rawhide kid
For those of you that have mounted devices on top of the dash, two questions.
1. Do you get dirt, bugs, or moisture on your devices through the windshield vent?
2. For those in hot climates, does your iPhone or other device overheat?
Worried here in arizona.
Thanks!!!
I'm in hot-Atlanta and I haven't had any issues with dirt, bugs, moisture, etc. The plugs have rubber covers over them for water proofing.
We are not that dusty in the south, unless you park next to a construction site. But all in all, I really enjoy having the dash mount and accessories... All from JT's
Brian Kay - Kennesaw, GA
2014 RT-S SM6 Pearl White (KHAOS)
TricLED 3rd and 4th Brake Lights - TricLED Turn Signals - TricLED Side Fender Lights - Airhawk R Seat Pad - Smoothspyder Belt Tensioner - JT's Dash Mount - JT's USB and 12v Power Unit - Stebel 139dB Multi Sound Horn - Lamonster NBV Highway Pegs - BRP Adjustable Wind Deflectors - Cal-Sci Stock Extra Wide Windshield - Baja Ron Sway Bar - WrapMySpyder 1330 Triple decals - Ultimate Tallboy Seat - BRP Sat Radio - ELKA Stage 2 Front Shocks
-
Very Active Member
Originally Posted by Brian Kay
Oh my, totally missed this question. John, I got the
Stebel 11690019 - Nautilus Compact Mini Air Horn Black... It was $41 through amazon. And I bought the wiring kit too
Brian,
Thanks for the part number, I have one on the way. Can't wait to get rid of my prius eeep eeep horn.
JT
-
Very Active Member

I have JT's accessory bar on my RT, but for power, I just bought the waterproof 12v Battery Tender cigarette plug adaptor, and fastened that to JT's accessory bar up on the glare shield, using two black plastic wire ties.
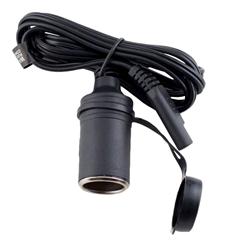 ..... .....
The other end of the wire plugs into the Battery Tender fused pigtail that attaches to the battery. I use this cigarette lighter adaptor to keep the battery charged with the Battery Tender. While riding, I just plug in a duel 2a USB charger to keep my phone and whatever else charged. From Amazon, I bought a couple of coiled USB charging cables with 90° ends, which keeps everything tidy up on top of the glare shield. I like this setup because it keeps all the charging wires up on top of the glare shield and not down around the dash and handlebar area. When not in use, I just keep the rubber cap on the end of the adaptor to keep out any water. (The cap fits on with or without the USB charger inserted.)
Fishing the wire down to the battery wasn't that difficult. I removed the left mirror, the left lower air deflector, and just enough screws on the front headlight fascia panel to slide the wire in behind it from the side. From there, I routed it into the left side utility compartment (where all the battery connections are), and fished it alongside the wires from there, on down into the battery area. I was just careful not to pinch or crimp it anywhere along the way.
Last edited by robmorg; 08-13-2015 at 10:12 PM.
-
Very Active Member

-
Very Active Member

Originally Posted by eddieshep999
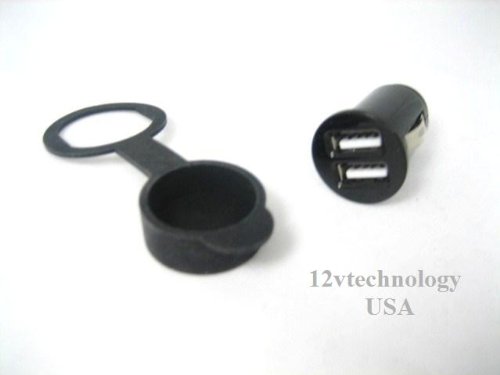
This is what I use to give me 2 x USB Power to my Spyder RT 2015 SE6 Model
CARCHET® Car 3.1A Dual USB Socket Charger Power Adapter Blue LED pour Phone PDA Tablet PC
Very clean looking install. How did you wire it in? That socket is available on Amazon and I have a couple of open spaces as well.
Trb-- (Roger)
2014 Cognac STL:Ultimate Seat, Nelson Rigg Tail Pack, Nelson Rigg RS/ST Half Cover, TL fender lights, Squared Away Laser Alignment, BajaRon sway bar and links, Akropovic Sport Silencer
2022 White Pearl F3T
Gone but not forgotten: 2019 F3S Special Series Liquid Titanium
Spyder States Visited

-
Very Active Member
Originally Posted by Trbayth
Very clean looking install. How did you wire it in? That socket is available on Amazon and I have a couple of open spaces as well.
I Fitted an extra fuse box Rowe PDM60
http://www.rowe-electronics.com/modules
This allows up to 6 Circuits - I just use one of the Circuits to give power up to the switch cluster and a bridge to give + power from the
On/Off switch to the CARCHET® Car 3.1A Dual USB Socket Charger Power Adapter, therefore the switch once switched on passes power allowing
the USP to become live
See also my post
http://www.spyderlovers.com/forums/s...Switch-Cluster
Eddie Sheppard
Poole Dorset UK
Get a Spyder - See the World

 Posting Permissions
- You may not post new threads
- You may not post replies
- You may not post attachments
- You may not edit your posts
-
Forum Rules
|


 Reply With Quote