|
-
Mod Monster
 Phil's 2014 (neww) DARTH Mods Phil's 2014 (neww) DARTH Mods
Many of you know that I am in a 12 step program for LED addiction  This thread will chronicle the farkling of (new) DARTH that we picked up from Pitbull and Lamonster Garage at Spyderfest 2014. This thread will chronicle the farkling of (new) DARTH that we picked up from Pitbull and Lamonster Garage at Spyderfest 2014.
I searched for the latest LED technologies. The latest in super bright LEDs is a class called COB LEDs. Chips On Board. There are lots of small LED chips, densely packed into a confined area. The lumens output is really great. Right now, I only see them in white (several color temps).
II also wanted to use some old EL (electro luminescent) technologies. AND even some spotlight and projector technologies. Some of these have not yet been completed, but all of the wiring is in place and ready when the parts arrive from various parts of the globe.
My goal is NOT to be a light show that should be at a circus. My goal is to have a wow factor that is somewhat subtle. And, like past posts, show what CAN be done with a few hundred feet of wire, solder, LED strips and more, lots of Posi-taps, and lots of planning and patience.
Here are some of the results pics with some description.....
I started by adding a Fuzeblok. It gives a single point from which to run wires and from which to chase problems, if you have any...

http://i1188.photobucket.com/albums/...b88f76406d.jpg
In another post I showed that I swapped out the halogen headlights for HID-


I also swapped the fog lights for LED. Now, before you write.... I have never used the fogs to light my way. I have only used thm for people to see me better. So I'm experimenting here.....


Here's the look of the results. The pic is deceiving. To the eye, the heads (which are 5000k) are much bluer than in this pic---

I then spent about 3 weeks with almost all of the tupperware off to get to the next level. I'm sorry that I didn't take the time to do detailed pics on all that I did, but ya know, SL now has such REALLY talented and great ryders and modyrs, I know you'll get it with little explaination.
Here's the way the front looks now...

There are few things of note. The MOB LED focused lights that I have added on the nose, pointed outward, are AMAZING. I had used these on old Darth as 'cornering' lights. They would come on when you hit your turn signal. I decided to add these guys and tie them through a relay, into the high beam circuit. So... when you hit the high beam button, the shudders go up, and these guys come on (as you can see in the pic). At night they light up both sides of the highway which in Texas is great to help spot deer as much in advance as possible! NEXT are the white light rings behind the Spyderpops KOTT screens. Now these are cool. They are white & amber leds inside a diffuser. It looks like neon, it is so smooth. When your signal is used, the proper one goes to amber and flashes with all the rest of the signals, then they automatically go back to white. Back behind the stock BRP grills, I have heavy RGB (red green blue) LED strips that reflect off of the radiators. This is the pink that you see.

Not too much special here. The under body glow is RGB. I added a 5000k white light above the license plate (for the plate, but also for the hitch). The SpyderIchthus is made from EL plastic and uses a special driver to illuminate it. Of course, you can see Reggy's run/stop ring too.
Here are a few views around DARTH..


This worked out very well. These are very bright white LED strips from Pep Boys. Made by Pilot (you can also get them on Amazon). They REALLY light up the trunk, side bags, and glove box.....
   
Here is some of the secret sauce. This is a 4 zone controller from SuperbrightLEDs.com I HAVE a different one, but ditched it when SBLED came out with this one that ALSO has a WiFi hot-spot so you can control all of the lights from a phone app!! And I do! The app is very similar to this controller. The color wheel is great to select just the color you want.
Zone 1 is the ground effect lighting
Zone 2 are all RGB lights above the ground so they can be dimmed down and color changes separately
Zone 3 - not yet used
Zone 4 - All of the white 'courtesy' lights (like the dash lights, puddle lights, frunk interior lights, and a couple of other minor lights).

Another front shot...

This gives an overall of the driver's perspective. You can also see the Providence power box. This is the DIY version. I added 2 switches to it. The green one, allows one button 'all dash lights bright' access. It bypasses the LED controller and makes them all 100% bright. The blue on the right, allows you to turn on all LEDs and other accessories that are on the added Fuzeblok, without turning on the key. IF you have pressed the super secret hidden kill everything switch!!

Like I said, there are more pics to come and more mods on the way. Stay tuned!!
Phil, Tyler TX- from my iPad 7.5 using Tapatalk HD
Last edited by Phil; 07-20-2014 at 09:55 PM.
____________________________
Phil - Tyler Texas
2010 RT-Premiere Edition (Named DARTH) | Timeless Black | All My Mods--- ARE HERE | Phil. 4:4
-
Very Active Member
-
Very Active Member


What are those pink led's on the air deflectors just below and to the outside of the windshield and where are they placed to get that edge lit effect?
Nice work by the way.
-
RT-S PE#0031


 Originally Posted by Phil

Many of you know that I am in a 12 step program for LED addiction 
FAIL!!!
(Darth looks awesome, but the 12 step program is a waste of time)
Mark & Mary Lou Lawson
Snellville, GA USA
'10 RT-S PE #0031
'10 RT-622 Trailer
'08 Yellow SM5 #2332
'01 Black GL1800A Goldwing #0930
"Remember in the darkness what you have learned in the light." - Joe Bayly
 
-
-

you sir are an inspiration to my love of LEDS...you are also the bane of my other half's bank accounts existence..lol
I started a few weeks ago on the LEDS for my bike. Unfortunately she has been a clever girl and has been very difficult for me. I am not a good soldering person so i went with butt connectors. Now my back lights dont display red bc i think the connector didn't get a good contact. Now to tear the bike back apart and redo all the wiring and learn to solder better. Also had issues with LED strips sticking where i wanted them so i used hot glue...mostly worked....except that one strip to light up the radiator fan which promptly melted after a 30 minute ride.
-
Mod Monster


 Originally Posted by jcthorne

What are those pink led's on the air deflectors just below and to the outside of the windshield and where are they placed to get that edge lit effect?
Nice work by the way.
Yes sir, they are edge lit. There is a company (I need to go back and research who since I bought them months ago) that makes a really narrow footprint 5050 RGB LED strip, and sells them along with plastic 'U' channel. Great guy. It requires some very fine soldering to get the wires attached. The gut that sells them designed them for office and store signs and can make up lengths that you want. But I bought a roll and made up the 3 that you see. They are pink because I tuned them (RGB) to pink.
The wind deflectors are mounted on the inside edges and for the windshield, it is on the bottom middle.
____________________________
Phil - Tyler Texas
2010 RT-Premiere Edition (Named DARTH) | Timeless Black | All My Mods--- ARE HERE | Phil. 4:4
-
Mod Monster

____________________________
Phil - Tyler Texas
2010 RT-Premiere Edition (Named DARTH) | Timeless Black | All My Mods--- ARE HERE | Phil. 4:4
-
Mod Monster


 Originally Posted by nikki.ullis

you sir are an inspiration to my love of LEDS...you are also the bane of my other half's bank accounts existence..lol
I started a few weeks ago on the LEDS for my bike. Unfortunately she has been a clever girl and has been very difficult for me. I am not a good soldering person so i went with butt connectors. Now my back lights dont display red bc i think the connector didn't get a good contact. Now to tear the bike back apart and redo all the wiring and learn to solder better. Also had issues with LED strips sticking where i wanted them so i used hot glue...mostly worked....except that one strip to light up the radiator fan which promptly melted after a 30 minute ride.
FULLY understand. Many times I have taken 4 steps forward and 3 back when I get in a hurry.
S
oldering is necessary when you make up LED strips the length that you want. Connecting wires... butt connectors and Posi-tap brand connectors are great and make like so much easier.
____________________________
Phil - Tyler Texas
2010 RT-Premiere Edition (Named DARTH) | Timeless Black | All My Mods--- ARE HERE | Phil. 4:4
-
Mod Monster


 Originally Posted by opiewhan

My Spyder is coming soon.. More lighting is towards the top of my to-do-list.. Live in Round Rock Texas and will be sure to find you in Tyler and possibly get me started on this addiction  ..I would guess sometime around march 2015..  Ill be in touch for sure..  looks great...
Round Rock is not that far. Feel free to reach out to me and/or to Eddie Chance in Palestine. Eddie is great and can do a lot for you too.
____________________________
Phil - Tyler Texas
2010 RT-Premiere Edition (Named DARTH) | Timeless Black | All My Mods--- ARE HERE | Phil. 4:4
-
Very Active Member


 Originally Posted by Phil

Yes sir, they are edge lit. There is a company (I need to go back and research who since I bought them months ago) that makes a really narrow footprint 5050 RGB LED strip, and sells them along with plastic 'U' channel. Great guy. It requires some very fine soldering to get the wires attached. The gut that sells them designed them for office and store signs and can make up lengths that you want. But I bought a roll and made up the 3 that you see. They are pink because I tuned them (RGB) to pink.
The wind deflectors are mounted on the inside edges and for the windshield, it is on the bottom middle.
Thanks, would really appreciate the source for the thin strips with U-channel for the edge lights. I'd really like some of these.
-

well originally my idea was to use http://www.amazon.com/HitLights-Conn...6G121F0DVDHE4N
and cut in the middle, use both sides for two strips to connect to wires then use butt connectors to make wires Y together (I have one main strip going down each side of the bike to the last strip and all strips in between Y into that main bus wire)
however, those connectors like to come off the strip. so my next idea was to hot glue the strip to the connect, which works but you still have the issue of not being able to lay the strip completely flat at the ends because of the connector plastic keeping it up off the bike. Enter more hot glue here. But then the hot air coming from the radiator fan melts the glue. SO... next idea is two part epoxy and some spagetti to protect the wires.
In low heat areas, those connectors work pretty good and got me out of soldering everything together.
-
Mod Monster


 Originally Posted by jcthorne

Thanks, would really appreciate the source for the thin strips with U-channel for the edge lights. I'd really like some of these.
I'm writing this from my iPhone at 34,000 feet so it's short!
lumenedge.com
____________________________
Phil - Tyler Texas
2010 RT-Premiere Edition (Named DARTH) | Timeless Black | All My Mods--- ARE HERE | Phil. 4:4
-
Registered Users


You have some amazing electronic skills Phil!! And quite some imaginative ideas to boot! I was beginning to think that near the end of your pictures you were going to pop a microwave out of trunk!
I was wondering what the final added current load was with everything on full effect? Also, aside from the fuse block where did you place all the control hardware and was the bundling and routing of cables overly difficult? I hope its not proprietary info but you are definitely seeing your circuit layouts along frame way better than most electronic technicians could do.
I am beginning to layout the electrical circuits for my '13 STL but with the heat problems I need to consider effective routing and/or shielding to avoid melting any cables and shorting the whole electrical system out.
Thanks,
Randy
-
Mod Monster


 Originally Posted by ranps1

You have some amazing electronic skills Phil!! And quite some imaginative ideas to boot! I was beginning to think that near the end of your pictures you were going to pop a microwave out of trunk!
I was wondering what the final added current load was with everything on full effect? Also, aside from the fuse block where did you place all the control hardware and was the bundling and routing of cables overly difficult? I hope its not proprietary info but you are definitely seeing your circuit layouts along frame way better than most electronic technicians could do.
I am beginning to layout the electrical circuits for my '13 STL but with the heat problems I need to consider effective routing and/or shielding to avoid melting any cables and shorting the whole electrical system out.
Thanks,
Randy
Hey Randy-
Nothing proprietary. I'm not in it for profit, only for fun so I'm HAPPY to share what I know.
The total extra drain is about 6-8 amps, total. I know that because of the fusing and the current measurements I made as I went along.
All of the LED controls are in the left saddle bag, tucked into the top back, mounted with velcro. I took a pic and decided not to post it because it's not that neat and I do like neatness. NOW.... there is sometimes a trade off in confined spaces! sometimes getting things to fit in the smallest spaces and allowing for future growth requires a bit of creating engineering  . I'll try to get a pic posted next week (after I get off this business trip). . I'll try to get a pic posted next week (after I get off this business trip).
Most of the wire buses are down the left side. I used about 150' of flat RGB wire and some in a sheath. Most all of it I put in tubing for protection, but some not. You can find lots of installation accessories here- http://www.superbrightleds.com/cat/p...es-and-cables/ The wire I mostly used is- http://www.superbrightleds.com/morei...-wire-/45/288/
I used plastic tubing and other wiring products from here--- http://www.waytekwire.com/products/ (they have high temp products)
Connectors (Deutsch from here--- http://www.wirecare.com/
Posi-Tap from here- http://www.posi-lock.com/index.html
You'll get there......
____________________________
Phil - Tyler Texas
2010 RT-Premiere Edition (Named DARTH) | Timeless Black | All My Mods--- ARE HERE | Phil. 4:4
-
Mod Monster


 Originally Posted by nikki.ullis

well originally my idea was to use http://www.amazon.com/HitLights-Conn...6G121F0DVDHE4N
and cut in the middle, use both sides for two strips to connect to wires then use butt connectors to make wires Y together (I have one main strip going down each side of the bike to the last strip and all strips in between Y into that main bus wire)
however, those connectors like to come off the strip. so my next idea was to hot glue the strip to the connect, which works but you still have the issue of not being able to lay the strip completely flat at the ends because of the connector plastic keeping it up off the bike. Enter more hot glue here. But then the hot air coming from the radiator fan melts the glue. SO... next idea is two part epoxy and some spagetti to protect the wires.
In low heat areas, those connectors work pretty good and got me out of soldering everything together.
Yeaaaaaa....... those will always give you problems. Soldering is really the only way. I hate to say it. You might find a Facebook or other friend near you to help. Or.... if all else fails- email me and maybe I can pitch in if you cut things the right length, ship to me and I'll solder and ship it back. genesis@genesisworld.com and we can work out details if you can't get some help.
____________________________
Phil - Tyler Texas
2010 RT-Premiere Edition (Named DARTH) | Timeless Black | All My Mods--- ARE HERE | Phil. 4:4
-
Registered Users


Many thanks Phil! It certainly gives me a good idea of how you went about putting this all together cohesively. And the links as well. You had to be a teacher either in this lifetime or another.
By the way. Its probably a coincidence but you answered my questions in about twelve basic statements and your text explanation breaks between your pictures counting your bookends is 12.
I'm sorry but I think you may be in the wrong recovery program...
Thanks again!
Randy
Last edited by ranps1; 07-22-2014 at 12:52 AM.
-
RT-S PE#0031


Hey everybody, Phil has a distinct advantage over the rest of us in numerous ways. His specialty is in electronics and the nature of his business is to think outside the box. As such, he obviously has thought about things you and I will likely never imagine. Also, for those who were blessed to see the building progress of the new Genesis location through his emails and links to photos, you know that Phil let his imagination run with that project. He has literally spent years thinking about LEDs & how to best use them to enhance life and work. While most all of it he would consider 'fun', Darth (I & II) has proven to be his 'no-harm-no-foul' sandbox. No business integrity & continuity riding on the outcome. We are fortunate to see him at work on this project and benefit from his willingness to share all he can.
Love that guy...
Mark & Mary Lou Lawson
Snellville, GA USA
'10 RT-S PE #0031
'10 RT-622 Trailer
'08 Yellow SM5 #2332
'01 Black GL1800A Goldwing #0930
"Remember in the darkness what you have learned in the light." - Joe Bayly
 
-
Mod Monster


RANPS1- Nope... I did NOT realize that!! How 'bout 'dat! Definately not planned.
MARK- blushing.
____________________________
Phil - Tyler Texas
2010 RT-Premiere Edition (Named DARTH) | Timeless Black | All My Mods--- ARE HERE | Phil. 4:4
-

next time I go to Texas I'm coming over to your house and just taking lessons from you in all things LED. I always want to learn more and I've been trying to do this whole project myself (granted, its a relatively simple project) and in one dang post you've managed to completely erase all my stumbling around and point me back into the right direction to get this done. You are not too far away from my hometown of Hurst, TX. My dad still lives out in Quinlan on the lake so thats prolly an hour maybe from ya in Tyler.
Doesn't help me that I'm pretty much convinced that all electricity is magic smoke...if you let the magic smoke out of something it doesn't work anymore!
Degreed in chemical engineering, so if this was a distillation column I would prolly be fine.
-

I didn't go to heb schools, went to bransford , Colleyville middle and grapevine high so it would be mustangs not blue Raiders. However, I did go to Texas Tech which are the red Raiders 
-
Mod Monster


I've had a few emails and FB PMs with questions. I'm traveling so I don't have all of the answers with me......
But from the questions, I decided to go ahead and post a pic that previously I said I didn't want to post. I'm not really happy at the organization as you see it in the pic. It was in process, and I'm leaving room for one more controller. AND, I made them where they each are removable for maintenance. The larger unit in the lower left is the WiFi hot spot device. With it, I can use the iPhone app to controll the lights within about a 300' radius. The hotspot is USB powered so I installed a 12vdc - 5vdc USB power converter (hardwired). It has a spare USB 2amp outlet so I've set it up for the future.
Here's all of the LED controllers....

All of the wires enter and exit from the upper left of the saddlebag. I drilled about a 3/4" hole there.It's exposure to wet is very low. This shot does give a good view of the while LED illuminating the bag.
Last edited by Phil; 07-24-2014 at 12:59 AM.
____________________________
Phil - Tyler Texas
2010 RT-Premiere Edition (Named DARTH) | Timeless Black | All My Mods--- ARE HERE | Phil. 4:4
-
Very Active Member
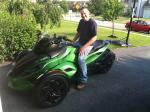

That looks pretty tough!
Great job

Bill
2013 RSS Neutron Green
BRP HID's and Fogs
Custom Belt Tension
2014 side panels
HMF Exhaust
K&N air filter
Bajaron sway bar and links
-
Very Active Member
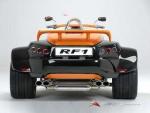

Looks awesome!! But your 12 step is a def. FAIL 
Rewaco RF-1 GT
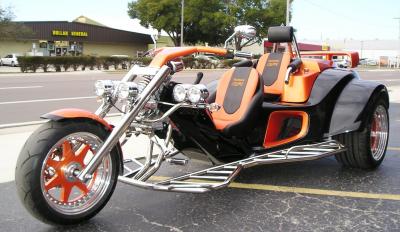
Inline 4 cylinder Ford Zetec with multi-port fuel inject, 140 HP
0-60mph: 5.8 seconds
5 speed sync manual with reverse, mechanical dry clutch.
Front suspension: Trapezoidal fork with center spring
Rear suspension: Independent with Bilstein gas shock absorbers
Brake System: Grimeca calipers, linked ventilated discs, with booster
10.57 gallons
-

ime stuck on stupid with LED light too lol.... But cn I get more info on how u installed lights in the compartments of the spyder?
 Posting Permissions
- You may not post new threads
- You may not post replies
- You may not post attachments
- You may not edit your posts
-
Forum Rules
|
This thread will chronicle the farkling of (new) DARTH that we picked up from Pitbull and Lamonster Garage at Spyderfest 2014.


 Reply With Quote




 ..I would guess sometime around march 2015..
  Ill be in touch for sure..
  looks great...
 . I'll try to get a pic posted next week (after I get off this business trip).


