|
-
Very Active Member

 My first farkle! My first farkle!
My first farkle.....
I am all about safety myself and the spyder could use some added safety farkle in my opinion.
This video explains....
Follow up showing my farkle in action!
Enjoy,
Bob
-
When life throws you curves, aim for the apex
Current stable: 09 Thruxton / 09 FZ6
Sold List: 97 Ninja500R, 03 SV650K3, 01 Ducati 750Sport Dark, 73 CB350/4, 03 F650GSA, 08 Gixxer600, 03 Gixxer600, 91 VFR750F, 09 KLX250, 06 Thruxton 900, 08 Spyder RS , 12 Street TripleR, 15 RC390, 02 VFR800, 09 KLX250S, 10 F650GS
JLohPhotos
... Motorcycles are kind of like Baskin Robbins... You're looking at 31 flavors of ice cream, don't you kind of want to know what they all taste like?...

-
Very Active Member

My first farkle!
That farkle rocks. 
Sent from my iPad using Tapatalk HD
-
Registered Users

Great video and great farkle idea.
2013 Pure Magnesium Spyder RS-SM5 Cal Sci medium clear windshield, R-35 hard sided saddlebags and fitments rack, 2013 Can-Am Spyder ST Limited Embroidered Stock Seat, Trunk opening spring, fire extinguisher, Passenger backrest and rack, Added side mirrors, Handlebar bag. 
-
Active Member

Great idea and inexpensive safety feature. Thanks for the info and video.

2012 Spyder RT Limited
Guardian Bell (gift from son)
Spyderpops bumpskid
ISCI hand brake
BajaRon Anti-Sway Bar
BRP Adjustable Wind Deflectors
-
That was a good idea and thank you. How did you slip the wires in there? I have'nt tried to remove my mirrors yet either. I like doing DIY too. I made my brake pedal (wider) mod and made my own floorboard too. I just can't able to post picture to share sorry.
2012 Spyder RT SE5 Brake pedal mod
-
Very Active Member

-
great job
where did you get the hot line from again under the Tupperware so you had to remove all of it on each side to install or just the mirror and the wires was their cant wait to see a follow up on another farkle thanks Rich
-
Very Active Member
Removing the mirrors is pretty easy. Scary to just quickly pull up on them to un-snap them from the body but that is in fact how you do it.
See these videos:
http://www.spyderlovers.com/forums/m...etails&mid=247
http://www.spyderlovers.com/forums/m...etails&mid=237
The bottom front snap can be a pain to get snapped back on. I had to do it a few times to get it to snap.
You will see in the first video Lamonster had a little problem getting it snapped back on too.
Now to feed the wire you have to take off the top and bottom front panels of the mirror and unscrew the light bulb fixture (4 screws). It's not as hard as it looks but prying with a screw driver to un-snap them might scare a few people! I was a little leery to do it but just went for it. Once you have the bulb unit out, you will see the pass-through hole under it. Plenty of clearance for a wire.
See this post here:
http://www.spyderlovers.com/forums/s...l=1#post475127
Only comment is breaking off the snap tabs that look like 1/2 arrow heads. I had no issue with them breaking while taking it apart. However when you go to snap it back together, MAKE SURE you have all of them aligned in the slots before trying to snap one in place! This I think is what breaks them. I almost made that mistake and almost broke one off because I missed getting one aligned.
Needless to say, if you ever burn out a light in one, you will need to do this take apart anyway or spend more bucks to have ti serviced.
Now, you might be able to fish a string or something by playing around with it. I tried a little and gave up hoping to find the hole and getting it behind the mirror. You might get lucky.
Also here is a post talking about other ways to do it without taking them apart. But you do need to drill a hole. See page 2.
http://www.spyderlovers.com/forums/s...ht=turn+signal
Bob
Last edited by finless; 06-25-2013 at 01:18 PM.
-
 Originally Posted by finless

Removing the mirrors is pretty easy. Scary to just quickly pull up on them to un-snap them from the body but that is in fact how you do it.
See these videos:
http://www.spyderlovers.com/forums/m...etails&mid=247
http://www.spyderlovers.com/forums/m...etails&mid=237
The bottom front snap can be a pain to get snapped back on. I had to do it a few times to get it to snap.
You will see in the first video Lamonster had a little problem getting it snapped back on too.
Now to feed the wire you have to take off the top and bottom front panels of the mirror and unscrew the light bulb fixture (4 screws). It's not as hard as it looks but prying with a screw driver to un-snap them might scare a few people! I was a little leery to do it but just went for it. Once you have the bulb unit out, you will see the pass-through hole under it. Plenty of clearance for a wire.
See this post here:
http://www.spyderlovers.com/forums/s...l=1#post475127
Only comment is breaking off the snap tabs that look like 1/2 arrow heads. I had no issue with them breaking while taking it apart. However when you go to snap it back together, MAKE SURE you have all of them aligned in the slots before trying to snap one in place! This I think is what breaks them. I almost made that mistake and almost broke one off because I missed getting one aligned.
Needless to say, if you ever burn out a light in one, you will need to do this take apart anyway or spend more bucks to have ti serviced.
Now, you might be able to fish a string or something by playing around with it. I tried a little and gave up hoping to find the hole and getting it behind the mirror. You might get lucky.
Also here is a post talking about other ways to do it without taking them apart. But you do need to drill a hole. See page 2.
http://www.spyderlovers.com/forums/s...ht=turn+signal
Bob
oh great you did not need to remove the side big Tupperware then just the mirror body parts thanks I,ll try it in two week to get my courage up
-
I want these, too. I'm going to keep Stoney Rodent busy this summer!
Last edited by PrairieSpyder; 06-25-2013 at 02:00 PM.
Reason: spelling
-
Very Active Member

Congrats..!!
great video, great farkel...now you opened the can of worms...good luck trying to stop the farkeling..!!
Gene and Ilana De Laney
Mt. Helix, California
 2012 RS sm5
2012 RS sm5 , 998cc V-Twin 106hp DIY brake and park brake Classic Black
-
Very Active Member
My 2nd Farkle!
Just posted my 2nd farkle add-on in the DIY forum. 
http://www.spyderlovers.com/forums/s...l-video-how-to
Bob
Last edited by finless; 06-26-2013 at 10:53 AM.
-
-
Isn't it great we're FINALLY getting some RT videos on here? 
-
Originally Posted by Bob Denman
Yes, and farkelosis is an addiction! Have added 23 things to my spyder since getting it last year and the addiction is still going strong!
-
Banged Up Member

Your videos are quite good. Voice quality is absolutely great. Easy to understand. Your delivery flows very well so that it keeps the viewer's attention. Your explanation is good (although I thought Video # 2 was better).
You ought to be in the tv or radio business. (or perhaps sales).
Please keep up the good work on your videos. Oh, I forgot to mention. The camera work is excellent. Very clear and you can see exactly what you are referrring to.
Again, please keep up the excellent work.
Chris
-
Very Active Member
Thank you for the comment.
But I should let you know I am not inexperienced on doing videos like this. I don't try to do them all pro and like to keep it raw and real. People seem to like that style. But I have done over 1,000 RC Helicopter how-too videos over the last 3-4 years.
Again thanks for nice comments and I do plan to keep it up as I like doing them and helping people when I can.
Bob
 Posting Permissions
- You may not post new threads
- You may not post replies
- You may not post attachments
- You may not edit your posts
-
Forum Rules
|


 Reply With Quote
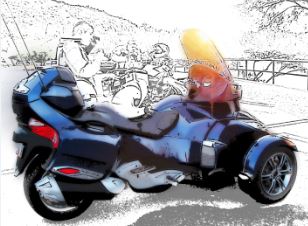


 Farkleosis has set in..


