|
-
 SpyderPops RT Bumpskid SpyderPops RT Bumpskid
Just installed one of 2 bumpskids on my RT. After I installed them I didn't like the looks and decided to remove it. What I didn't like was the gap between the skid and each wing on the sides. It looked to much like after market. Was wondering if anyone removed the nubs on the bottom of each wing so that the skid would mount flush. The skids may protect the underside but I'm not sold on the aftermarket looks.
-
Very Active Member
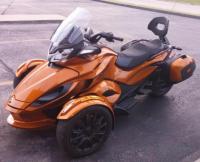
 SpyderPops RT Bumpskid SpyderPops RT Bumpskid
I think you may have done something wrong, can't say for sure without any pictures. The bumps kid definitely does not loo aftermarket when installed properly.
Kinggeek
Mandeville,LA
VERY HAPPY Spyder Ryder!
Where have we been on the Spyder? See below:
Can-Am Spyder ST-S SE5 in Congac

-

 Originally Posted by kinggeek

I think you may have done something wrong, can't say for sure without any pictures. The bumps kid definitely does not loo aftermarket when installed properly.
On yours is there a gap between the skid plate and the RT wings? Unless you remove the nubs on the underside of the wings the gap will be there. The nubs are on each side of the 4 plastic removable rivets.
-
Very Active Member

 SpyderPops RT Bumpskid SpyderPops RT Bumpskid
I do not see a gap. Did you remove the stock skid plate?
ImageUploadedByTapatalk1371421398.580075.jpg
Kinggeek
Mandeville,LA
VERY HAPPY Spyder Ryder!
Where have we been on the Spyder? See below:

Can-Am Spyder ST-S SE5 in Congac

-

[QUOTE=kinggeek;640790]I do not see a gap. Did you remove the stock skid plate?
ImageUploadedByTapatalk1371421398.580075.jpg[/
Thanks. I did remove the stock plate. Noticing your picture is the gap that I'm concerned about
-
 pm sent pm sent
let me know what you think I was thinking on getting one also
-
-
Registered Users


Number One: 2008 Yellow GS SM5. I love my Spyder.
Number Two: 2012 RT-S Limited (the poop colored RT) I still have Number One, but Some Girl made me buy Number Two...
-
Active Member

 Originally Posted by R30SHIRE

Just installed one of 2 bumpskids on my RT. After I installed them I didn't like the looks and decided to remove it. What I didn't like was the gap between the skid and each wing on the sides. It looked to much like after market. Was wondering if anyone removed the nubs on the bottom of each wing so that the skid would mount flush. The skids may protect the underside but I'm not sold on the aftermarket looks.
Just installed a Bumpskid this week. I have the slight gap caused by the plastic nubs but I don't find the looks a problem. The benefit over not having it is greater. Besides that very small gap is perfect place to install another Frakle , LED running trim lights. You got to get down on your knees to really see that gap anyway. I had a problem with the idea of drilling the 2 optional holes into the frame for the back of the plastic plate. Thinking BRP warranty excuse issues and skipped that optional step for now until I can confirm. The back holes for the frame mounting didn't align well and would have been another logistics problem to deal with. , LED running trim lights. You got to get down on your knees to really see that gap anyway. I had a problem with the idea of drilling the 2 optional holes into the frame for the back of the plastic plate. Thinking BRP warranty excuse issues and skipped that optional step for now until I can confirm. The back holes for the frame mounting didn't align well and would have been another logistics problem to deal with.
Last edited by condorflysu; 06-16-2013 at 09:57 PM.
-
Very Active Member


[QUOTE=R30SHIRE;640841]
 Originally Posted by kinggeek

I don't see a problem and love the look. Everyone is entitled to there opinion, your is different than mine. It never crossed my mind that the bumps kid looked aftermarket or had a gap as you say. I think it looks great and should have always been there from the factory.
Kinggeek
Mandeville,LA
VERY HAPPY Spyder Ryder!
Where have we been on the Spyder? See below:

Can-Am Spyder ST-S SE5 in Congac

-
Very Active Member
 Did the right side machine screw engage the metal clip? Did the right side machine screw engage the metal clip?
I had one or two bolts that did not match up when first attaching and also noted that the skid needed to be flexed up to start engaging the clip. I did also see the little plastic fins and being somethat overzealous, got my belt sander out and ground them down just a little to make them a little more flush with the plastic. I did scuff the finish a couple of places, so I am not sure it was worth it, but it was out of sight.
I did keep the stove bolts loosely attached until I got them all started, to allow a little wiggle room of the plate, as suggested before finally cinching them all up together with the 4 mm allen bit checked in my Black and Decker cordless drill on a #4 clutch setting.
-

 Originally Posted by AeroPilot

I had one or two bolts that did not match up when first attaching and also noted that the skid needed to be flexed up to start engaging the clip. I did also see the little plastic fins and being somethat overzealous, got my belt sander out and ground them down just a little to make them a little more flush with the plastic. I did scuff the finish a couple of places, so I am not sure it was worth it, but it was out of sight.
I did keep the stove bolts loosely attached until I got them all started, to allow a little wiggle room of the plate, as suggested before finally cinching them all up together with the 4 mm allen bit checked in my Black and Decker cordless drill on a #4 clutch setting.
Great Idea. I was thinking about grinding down the nubs so that the skid-plate would lay flat against the wings.
-
 skid plate skid plate
Can you bore holes in the skid plate so it will fit over nubs? Might be easier than grinding on Spyder.
-

 Originally Posted by Showie

Can you bore holes in the skid plate so it will fit over nubs? Might be easier than grinding on Spyder.
That is an option, I think I could counter sink the skid plate so the nubs will lay down into the plate. I'll check the thickness on both the nubs and the skid.
-

[QUOTE=kinggeek;641111][QUOTE=R30SHIRE;640841]
I don't see a problem and love the look. Everyone is entitled to there opinion, your is different than mine. It never crossed my mind that the bumps kid looked aftermarket or had a gap as you say. I think it looks great and should have always been there from the factory.[/QUOT
I agree 100% about opinions. I'm going to try counter sinking the skid to except the nubs. Hope it works.
Thanks,
-
 Bumpskid gap. Bumpskid gap.
After installing the Bumpskid, I too didn't like the gap. So I removed it and removed the nubs with a wood chisel. Reinstalled and it looks great. Also I think it improves the handling by smoothing the air flow underneath. I am very pleased with it. Have saved many scrapes from happening.
-
Active Member
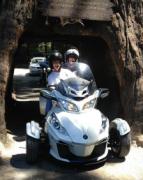
 Love it Love it
First thing I bought for my RT was the bumpskid. Saved me plenty a times. Looks ok to me for what it does.
-

Finished installing the skid. Ended up grinding down the nubs and now it fits like a glove. If you do this, tape off the area around the nubs with duct tape. That will save you from damaging the finish on the bottom of the wings. I installed one on my wife's Red RT and the black blends great. I also installed one on my Lava Bronze RT but I painted it with a chrome finish paint. That really turned out sweet.
Last edited by R30SHIRE; 06-19-2013 at 09:10 AM.
-
Very Active Member
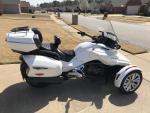

Glad you got the look you wanted, the Bump Skid is a much needed mod for any spyder to protect the front end. I love the look.
Cruzr Joe
2018 F3 Limited, BRP Driver Backrest, Spyderpops Lighted Bump Skid, Dual Spyclops Light, Mirror Turn Signals, Laser Alignment, Engine LEDs, Fog Lights With Halo's, Cushion Handgrips, BRT LEDs, and Under Lighting, Lamonster IPS, (with Clock), F4 25" Vented Windshield with Wings, Airhawk "R" Cushions. Position 4 Brake setting, Short reach Handlebars, Dash Mounted Voltmeter and 12 Volt Plug. Set of 3rd pegs. Extended Passenger Seat. Exterior BRP Connect setup, Ultimate Trailer
-
Active Member
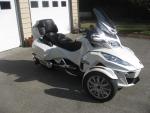

Installed the Bumpskid on my 2013 RT Limited. It took a little over one hour to install. Had a friend give a hand, it made the install much easier. Also on the wings I ground down a ridge that did not allow the bumpskid to be flush on the wings. Looks great! Lookout critters!
 Posting Permissions
- You may not post new threads
- You may not post replies
- You may not post attachments
- You may not edit your posts
-
Forum Rules
|


 Reply With Quote


 , LED running trim lights. You got to get down on your knees to really see that gap anyway. I had a problem with the idea of drilling the 2 optional holes into the frame for the back of the plastic plate. Thinking BRP warranty excuse issues and skipped that optional step for now until I can confirm. The back holes for the frame mounting didn't align well and would have been another logistics problem to deal with.

