|
-
Active Member

 Doing It Myself Doing It Myself
I have been feasting after floorboards for my  practically from the day I got it, but money is always a problem when you are retired. I've seen some floorboards that others did themselves and they inspired me to get to it. This past Sunday, I took practically from the day I got it, but money is always a problem when you are retired. I've seen some floorboards that others did themselves and they inspired me to get to it. This past Sunday, I took  to a shop I rent for storage and some woodworking. Moved things around and got the to a shop I rent for storage and some woodworking. Moved things around and got the  inside. I borrowed a lift from a neighboring shop and determined the balance point so I can lift my machine when I get my own lift. Harbor Freight has their 1500 lb ATV lift on a coupon deal for $59.99 and I expect I'll pick one up next week. inside. I borrowed a lift from a neighboring shop and determined the balance point so I can lift my machine when I get my own lift. Harbor Freight has their 1500 lb ATV lift on a coupon deal for $59.99 and I expect I'll pick one up next week.
I then stripped most of the tupperware off so I could remove the splash pans, I know Lamont has had his off forever, and if he's good with that, who am I to disagree. I pulled both pans left and right.Left Side Bare.jpgRight Side Bare.jpg
When I had the pans off, I began to see how I could mount floorboards without making major mods to  . I knew I wanted to use the drivers pegs to support the tail of the floorboards and the back edge of the cross frame member to support the front. With all the tupperware out of the way, I got some cardboard and determined the approximate size of the boards I want. Then I cut a couple of 1/4" plywood mockups and tried them for fit.Right Side Test Fit.jpg . I knew I wanted to use the drivers pegs to support the tail of the floorboards and the back edge of the cross frame member to support the front. With all the tupperware out of the way, I got some cardboard and determined the approximate size of the boards I want. Then I cut a couple of 1/4" plywood mockups and tried them for fit.Right Side Test Fit.jpg
When I knew the size I wanted, I had to locate a supplier. Fortunately, there is still one business in my town that stocks and fabricates custom metal products. I discussed my plans and determined certain limitations about working with aluminum diamond plate. My initial idea was to bend the rear of the floorboard and attach it to the foot pegs with bolts through holes I would need to drill in the foot pegs. The fabricator had indicated that there were issues with getting those bends. Back at the shop, I was looking at the foot pegs, and realized there were two holes in the pegs already. By using those holes, I simplified the boards to a 21" by 5" rectangle with a turned up lip on the long edges. This morning, I had them made out of 1/8" diamond plate, cost $52 + change had them in about 30 minutes.
The right side doesn't require any cutting, just three holes drilled to accept the mounting bolts. Right Side 1st Install.jpg
The left side needed to have a corner removed to sit the way I wanted it to. I used my mockup to mark the diamond plate and sawed away. After removing some additional, I am happy with the fit.
There is a bunch of finishing to do before the boards get final mount.
Wednesday 30 Nov 2011: Went to Ace Hardware for stainless steel machine screws to use when mounting the new boards. Those babies are pricey  $10.53 for the pieces I needed fit in one of those little paper bags Ace uses for screws and such lots of room. Back at the shop I located and drilled the required holes in the boards and used a 1/4 " drill to drill the rubber peg pads where the screws go. Also cut four pieces of 1/2 " PVC to use as spacer. Am still looking for suitable metal to use. I decided to use two 1/4 20 screws for each post with a connecter in the middle flat head on top and pan head on bottom. I think it makes a cleaner job. Put a 5/16 pan head screw through the frame hole to hold the front of the board. It took some futzing, but I got all four posts connected. Left Side 1st Install.jpg now I can locate and cut notches in the lower body panels. $10.53 for the pieces I needed fit in one of those little paper bags Ace uses for screws and such lots of room. Back at the shop I located and drilled the required holes in the boards and used a 1/4 " drill to drill the rubber peg pads where the screws go. Also cut four pieces of 1/2 " PVC to use as spacer. Am still looking for suitable metal to use. I decided to use two 1/4 20 screws for each post with a connecter in the middle flat head on top and pan head on bottom. I think it makes a cleaner job. Put a 5/16 pan head screw through the frame hole to hold the front of the board. It took some futzing, but I got all four posts connected. Left Side 1st Install.jpg now I can locate and cut notches in the lower body panels.
Then it all comes apart for finish and polish and final assembly. Since I live in Florida, every day in the shop is a day not riding, but this has been satisfying so far.
Last edited by Yeochief; 12-05-2011 at 04:25 PM.
Reason: Add pictures
2009 GS SE5 Silver

-
Registered Users


Looks good:
Corbin saddle
spyderpops block off plate, bump skid, belt guard
IPS
Tricled LED lights all around(too many to name here)
Smoothspyder belt tensioner
Custom Dynamics britesides
VTC floorboards, upper air vents, spoiler
BK car stuff HID upgrade
trailer hitch
Repainted rear fender, trunk latch assembly, switch cluster, gauge cluster
cell phone interface kit
travel cover that no longer fits due to the spoiler
New sway bar
New shock relocator
-

spyder15.jpgLooks good and simple as well. My solution to mounting was a little
more complicated. Good luck with your mods
-
Very Active Member

 good job good job
yours are similar to mine, nice work. and cheap too.
 it was fun while it lasted. 
-
Active Member

 Looks good! Similar design to the ones I made Looks good! Similar design to the ones I made
I had some floorboards made that are very similar, but have a bends on both of the edges to make them stronger. Instead of rehashing all of the details, it may just be easier to click on the link below. There is a lot more detail and photos. Congrats on a good job and a great value.
http://www.spyderlovers.com/forums/s...um-Floorboards
-
Very Active Member

 floor boards floor boards
i removed the rubber pad from my brake pedal, which basically '' lowers '' it about 3/8 or 1/2 inch. now i can brake with my heel when my feet are flat on the boards. works pretty good.
 it was fun while it lasted. 
-
Active Member

 Finished doing it myself Finished doing it myself
Finished the installation yesterday evening just as it was getting dark.
Pulled  out and found a place to take a couple of pictures of the finished job. out and found a place to take a couple of pictures of the finished job.
Left Side.jpg Right Side Done.jpg
I'm happy! 
2009 GS SE5 Silver

-
Active Member

 Added California Scientific Windscreen Added California Scientific Windscreen
After much research and penny pinching, I decided to replace the stock wind shield with a taller after market one. I finally decided on a California Scientific. Their website gave very good instructions on determining what height wind shield I might prefer. Using their guidance, I determined that I wanted a screen 12 inches taller than the stock screen. Ordered it on line, and it was shipped within 24 hours. Arrived via UPS ground yesterday and installed this morning. Went for a ride and I am a happy   ryder. ryder.
New Windscreen.jpg
2009 GS SE5 Silver

-
Active Member

 New "old" Seat New "old" Seat
I had my OEM seat reworked by a friend who does motorcycle seats. New Seat.jpg She added a gel pad and covered the seat in full grain real leather.
Her son designed the sitching. Seat Stiching.jpg This is on the back of the passenger part of the seat Spider.jpg
I wanted a way to get to the fuel filler without lifting the seat. This is what we came up with Gas Door.jpg You can see it in the first picture. Fuelling is not a problem, and there was no lost padding.
2009 GS SE5 Silver

-
Active Member
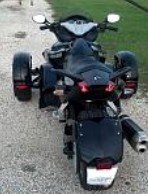

Cool beans! The red spyder and web looks really wicked!!! 
- Michael
Tags for this Thread
 Posting Permissions
- You may not post new threads
- You may not post replies
- You may not post attachments
- You may not edit your posts
-
Forum Rules
|
practically from the day I got it, but money is always a problem when you are retired. I've seen some floorboards that others did themselves and they inspired me to get to it. This past Sunday, I took
to a shop I rent for storage and some woodworking. Moved things around and got the
inside. I borrowed a lift from a neighboring shop and determined the balance point so I can lift my machine when I get my own lift. Harbor Freight has their 1500 lb ATV lift on a coupon deal for $59.99 and I expect I'll pick one up next week.
. I knew I wanted to use the drivers pegs to support the tail of the floorboards and the back edge of the cross frame member to support the front. With all the tupperware out of the way, I got some cardboard and determined the approximate size of the boards I want. Then I cut a couple of 1/4" plywood mockups and tried them for fit.Right Side Test Fit.jpg
$10.53 for the pieces I needed fit in one of those little paper bags Ace uses for screws and such lots of room. Back at the shop I located and drilled the required holes in the boards and used a 1/4 " drill to drill the rubber peg pads where the screws go. Also cut four pieces of 1/2 " PVC to use as spacer. Am still looking for suitable metal to use. I decided to use two 1/4 20 screws for each post with a connecter in the middle flat head on top and pan head on bottom. I think it makes a cleaner job. Put a 5/16 pan head screw through the frame hole to hold the front of the board. It took some futzing, but I got all four posts connected. Left Side 1st Install.jpg now I can locate and cut notches in the lower body panels.


 Reply With Quote
 it was fun while it lasted.


