|
-
SpyderLovers Founder

 What it takes to install chrome handlebars on the RT What it takes to install chrome handlebars on the RT
This is my second set I've done and I didn't remove anything I didn't have to this time. I didn't read the instructions because, well I just don't read instructions. 
-
-
-

Great vid.
-

 Originally Posted by Lamonster

I didn't read the instructions because, . 
you are a man and men don't read instructions.
2017 F3T-SM6 Squared Away Mirror Wedgies & Alignment
2014 RTS-SM6 123,600 miles Sold 11/2017
2014 RTL-SE6 8,600 miles
2011 RTS-SM5 5,000 miles
2013 RTS-SM5 burned up with 13,200 miles in 13 weeks
2010 RTS-SM5 59,148 miles
2010 RT- 622
-
SpyderLovers Founder


New video added 
-
Rockin Member


Too Scarey for me, I think I'll leave it to the pro's to do that kinda install. KUDOS TO YOU LAMONSTER!
---
I am here: http://maps.google.com/maps?ll=42.233197,-88.071623
2011 Pearl White RT Limited
HMT Brake Light, Fender Tips Kit, Mudflap Lights, GloRyders, Seal Floorboards, Powerlet 12V, Garage Door Momentary Button, Bump Skid, Elka's Stage 1, Ultimate Sea, Air Wings
 Member of the Woodstock Spyder Ryders (Illinois)
-
SpyderLovers Founder

-
Registered Users
-
-
SpyderLovers Founder

-
Blazing Member
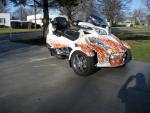

When I did my foot peg bracket I had to loosen the back trunk assembly so I could move the brake reservoir to get clearance and wiggle room with the master cylinder push rod. Also a good tip about cleaning out the screw holes.I played around for about 2 hours with one bolt that I couldn't get started and ended up pulling the Foot peg support off and made a small counter sink on the bracket so I could get the bolt into the hole and start to bite . I also see that you kept that long plastic strip that came with the ESI front marker lights that turn into turn signals. I use that thing all the time to fish wires in and around the Spider . I also agree with you about the Handle bar cover, it looks so simple until you keep taking more and more parts off and then trying to remember where everything goes back without having any extra bolts or screws left. Rerunning the wires for the GPS through the support certainly adds time to the install. All said and done it was very satisfying to have done the install myself.
I have the 2011 RTS Limited all chromed out with the Corbin seat,backrest and armrest . The Corbin seat will certainly finish your spyder off. I've been toying with different ideas to do something with all that white and after seeing what Pete did to yours gave me a few good ideas .
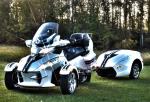
Spyder and Trailer looks awesome Lamont. Great job.
-
SpyderLovers Founder


 Originally Posted by fastfraser

When I did my foot peg bracket I had to loosen the back trunk assembly so I could move the brake reservoir to get clearance and wiggle room with the master cylinder push rod. Also a good tip about cleaning out the screw holes.I played around for about 2 hours with one bolt that I couldn't get started and ended up pulling the Foot peg support off and made a small counter sink on the bracket so I could get the bolt into the hole and start to bite . I also see that you kept that long plastic strip that came with the ESI front marker lights that turn into turn signals. I use that thing all the time to fish wires in and around the Spider . I also agree with you about the Handle bar cover, it looks so simple until you keep taking more and more parts off and then trying to remember where everything goes back without having any extra bolts or screws left. Rerunning the wires for the GPS through the support certainly adds time to the install. All said and done it was very satisfying to have done the install myself.
I have the 2011 RTS Limited all chromed out with the Corbin seat,backrest and armrest . The Corbin seat will certainly finish your spyder off. I've been toying with different ideas to do something with all that white and after seeing what Pete did to yours gave me a few good ideas .
Spyder and Trailer looks awesome Lamont. Great job. 
I have great respect for anyone like yourself who has tackled this job. I keep looking for better ways to do it and the only thing I can think of is have them do it at the factory, how hard could that be 
-
Blazing Member


 Originally Posted by Lamonster

I have great respect for anyone like yourself who has tackled this job. I keep looking for better ways to do it and the only thing I can think of is have them do it at the factory, how hard could that be 
I agree. I would think if you could get your Spyder chromed out from the factory as an option,you would have to think more owners would go that route . Only negative I can see is the dealers would loose out in parts sales and installs .
-
Active Member

 Originally Posted by Lamonster

This is my second set I've done and I didn't remove anything I didn't have to this time. I didn't read the instructions because, well I just don't read instructions. 
Just finished installing the Chrome Handlebar. Took me all day and guess what...Thanks Lamonster, it is a good thing to check the holes on the chrome handlebar before installing because 4 of them (for the middle black cover) had no treads at all...They forgot to do them ! I followed the BRP instructions and it went very well.
-
Very Active Member
 Cant take credit but.. Cant take credit but..
I had chrome handle bars installed at the dealer for about $100.. labor so I can't take credit for it. I was a little shocked how easy they
made it look. Did you know there are four bolts that hold that hole dash on? This picture shows it on the floor.
IMG_0311.jpg
Once removed it was very open and easily accessible. It was interesting to watch and a real learning experience for me. Even though I cant take credit for the install but for the money it was a no brainier for me.
States Judy and I have visited so far on the 

-
SpyderLovers Founder


 Originally Posted by rcdurango

I had chrome handle bars installed at the dealer for about $100.. labor so I can't take credit for it. I was a little shocked how easy they
made it look. Did you know there are four bolts that hold that hole dash on? This picture shows it on the floor.
IMG_0311.jpg
Once removed it was very open and easily accessible. It was interesting to watch and a real learning experience for me. Even though I cant take credit for the install but for the money it was a no brainier for me.
If they did it for a $100 bucks you got the service deal of a lifetime. 
-
Blazing Member


Wow .100 bucks to install the chrome handle bars. Whats your dealers shop rate 25 bucks an hour . Man it took me the better part of 4 - 5 hours . I have a RTS and it took an extra 30-45 mins to route the GPS wires . Man it took me the better part of 4 - 5 hours . I have a RTS and it took an extra 30-45 mins to route the GPS wires .
-
Very Active Member

 I agree! I agree!
I couldn't agree with you more! I was having the control unit that has turn signals on it replaced because it was loose. Anyway after seeing all they had taken off to do this we began to bargin on what if I wanted the handle bars. That's when the 100.00 dollars came into play. Rerouting the GPS I did because I wanted it up higher. What I didn't know was how that dash came off in one piece. And something else the tech told me. The rear has four bolts that holds it on also. I have not seen that but if anybody has ever done that it would be an interesting thread and video. Maybe Lamont knows about this and can share his thoughts on it.
Last edited by rcdurango; 01-16-2012 at 05:58 PM.
States Judy and I have visited so far on the 

-
SpyderLovers Founder


 Originally Posted by rcdurango

I couldn't agree with you more! I was having the control unit that has turn signals on it replaced because it was loose. Anyway after seeing all they had taken off to do this we began to bargin on what if I wanted the handle bars. That's when the 100.00 dollars came into play. Rerouting the GPS I did because I wanted it up higher. What I didn't know was how that dash came off in one piece. And something else the tech told me. The rear has four bolts that holds it on also. I have not seen that but if anybody has ever done that it would be an interesting thread and video. Maybe Lamont knows about this and can share his thoughts on it.
He know a trick I don't know. What does he do with the wiring?
-
Very Active Member

 Not sure Not sure
Not sure on that, but if it's anything like the front it was just unplugged. He said removing the bolts and sliding it back off the frame would remove side bags and trunk at one time. I'm just guessing there could be a master plug or more that can be undone that allows it to do so. Next time I'm in there I going to pick his brain a little more. He just returned from BRP's tech school last week so he's bound to be much smarted now.
States Judy and I have visited so far on the 

-
SpyderLovers Founder


 Originally Posted by rcdurango

Not sure on that, but if it's anything like the front it was just unplugged. He said removing the bolts and sliding it back off the frame would remove side bags and trunk at one time. I'm just guessing there could be a master plug or more that can be undone that allows it to do so. Next time I'm in there I going to pick his brain a little more. He just returned from BRP's tech school last week so he's bound to be much smarted now.
I went through the BRP advance Spyder tech school and that was not part of the class.
I know the back comes off like that and that's what BRP tells you to do when removing it but there's a lot more to the front than it. 
-
Very Active Member

 not really. not really.
You have to take off the normal plastic. Then remove front glove box and lay it to the side of bike. I know that being there is a cable attached to it. Look in near the speakers and you should see two bolts. One on each side. Remove those, then there are two up front under the headlight area. Unplug the harnesses by the oil fill. You then should be able to pull that unit forward off the frame. But then it leaves that whole handle bars unit exposed. Not sure about one thing, if you unplug these you may have to put it on the BUDS to clear codes? Man! now I wished I video tape it when he put it back together. But it's kinda one of those things where not sure he would have liked it.
Last edited by rcdurango; 01-16-2012 at 05:59 PM.
States Judy and I have visited so far on the 

-
MOgang Member & Pyro-Man

Instructions are just someone else's opinion 
“Dream as if you'll live forever, live as if you'll die tomorrow.”
―James Dean
 Posting Permissions
- You may not post new threads
- You may not post replies
- You may not post attachments
- You may not edit your posts
-
Forum Rules
|

