|
-
SpyderLovers Founder

 RT panels off and on- video RT panels off and on- video
I had to do a little work on Freds RT so I thought this might be a good time to shoot a video of what it takes to get them off and on. 
-
RT-S PE#0031


I never noticed the little tabs on the bottom of the first panel you installed. I wonder if they're there & I just missed them (had both sides apart this past weekend), or if they were not on the 2010 model. There is no push pin on that same panel on the 2010.
Good videos. Thanks!
Mark & Mary Lou Lawson
Snellville, GA USA
'10 RT-S PE #0031
'10 RT-622 Trailer
'08 Yellow SM5 #2332
'01 Black GL1800A Goldwing #0930
"Remember in the darkness what you have learned in the light." - Joe Bayly
 
-
SpyderLovers Founder


 Originally Posted by MarkLawson

I never noticed the little tabs on the bottom of the first panel you installed. I wonder if they're there & I just missed them (had both sides apart this past weekend), or if they were not on the 2010 model. There is no push pin on that same panel on the 2010.
Good videos. Thanks!
They are on my 2010 RT and there is a push pin there too. Maybe yours is special. 
-

That was very helpful Lamont. I wish the audio on the first video had been better but a picture is worth a thousand words. 
-
SpyderLovers Founder

-
Blazing Member

The panels come off, and I thought my dealer had a special elf that just got in under the tupperware and fixed things.
Man do I know the panels come off ! Try and put some of the chrome stuff on without takeing panels off .
-
SpyderLovers Founder


 Originally Posted by fastfraser

The panels come off, and I thought my dealer had a special elf that just got in under the tupperware and fixed things. 
Man do I know the panels come off ! Try and put some of the chrome stuff on without takeing panels off .
It's a lot of fun isn't it. 
-
Registered Users
-
SpyderLovers Founder


 Originally Posted by Vyperyder

You da man!!!!  
I am going to have to pull most of the panels off to instal the CB and GPS and your vids have clarified a few things.
The mirrors are like the Beemer ones on the 1150RT...good to know. It's still a heart stopper when you first hit that mirror to release it. 
Even when you have the diagrams and the service manual I guess you just follow the panel around and remove what is obviously holding it down.
But the clips are good to know and the sequence is all important.
Thanks a heap. 
Cheers
Pete
Glad to help. It's like anything, the first time you do it you're not sure if you're going to break something but after that it's no big deal, plus it wasn't my RT so what do I care. 
-
Very Active Member

fun is putting all the panels on and finding ONE bolt left in the side trunk that bounced out into the hinge area... (that's where I put them to hold them when taking off the side panels...
eeek!!!
found one bolt .... had to take off the top two panels to get to the one bolt on the bottom side panel i forgot to put on ...
2013 Yellow ST-S SM5, Elka Stage1 Rear Shock, 2Brothers Exhaust, K&N Air Filter(soon), TricLED fnt fender LEDs, frnt LED daylight strips, 3rd Rear brake LED, ISCI Hand Brake, BajaRon Sway Bar&Links, Bullant Laser Aligned, Lamont's CAT ByPass, CALSCI Windshield, Works Performance Stage 5 Front Shocks
Previous = 2010 Blue RT-S Spyder SM5
-
Active Member

Our life verse:
 Jeremiah 29:11 Jeremiah 29:11
-
Registered Users


Lamont,
Just wanted to say thanks for all your great videos and tutorials. I'm not the most mechanically inclined person, but when I watch how easy you make it look I go from " I can do that.....?" to "I CAN DO THAT!" Keep up the great work that you do here and keep those videos coming! Some of us need the  ! !
-
Registered Users
-
Very Active Member


This was right on time!! I was going to have the dealer install my nuvo 660 today. They called and said that the mount kit does not have all the wires that is needed to do the install. So I will be installing it myself tonight so I can use it for the trip to Maggie Valley tomorrow!!!! Thanks for this!!!!!
Should Make This A STICKY!!!
Last edited by Hawk; 06-16-2011 at 06:37 PM.
-

Very helpful, but you make it look so simple.
-
RT-S PE#0031


 Originally Posted by Lamonster

They are on my 2010 RT and there is a push pin there too. Maybe yours is special. 
You're absolutely right! (Mine is special!)
Mark & Mary Lou Lawson
Snellville, GA USA
'10 RT-S PE #0031
'10 RT-622 Trailer
'08 Yellow SM5 #2332
'01 Black GL1800A Goldwing #0930
"Remember in the darkness what you have learned in the light." - Joe Bayly
 
-
Active Member


thanks for the how too
but i have a ? i just got my bike the 600 mile sevice and my left bottem panel is lose so i pulled it off it has 2 rubber gaskets that the pins go in
should it have 3?
what im trying to say theres 3 pins but my back pin theres no ruber there just a hole
did the dealer lose it or ?
the only reason i seen it was i read on the fourms here about people losing theres after a service so i checked and it was barlly hanging on
srry i type like sh.. hands to dam bigg
-
Registered Users


My biggest problem is getting the tabs on the front of the side panels in the right place. I was installing scuff guards yesterday and could not get the tabs to engage. Lamont, is there a trick to getting those side panels back on correctly, I do not want to lose one on the road.
-
SpyderLovers Founder


 Originally Posted by packbuckbrew

My biggest problem is getting the tabs on the front of the side panels in the right place. I was installing scuff guards yesterday and could not get the tabs to engage. Lamont, is there a trick to getting those side panels back on correctly, I do not want to lose one on the road. 
I would cut them off, they don't have them on the 2011 now I'm told.
-
Registered Users


 Originally Posted by Lamonster

I would cut them off, they don't have them on the 2011 now I'm told.
So I am not putting them on wrong if the tabs are not engaged to anything?
-
SpyderLovers Founder


 Originally Posted by packbuckbrew

So I am not putting them on wrong if the tabs are not engaged to anything?
I was told that the front tabs made it worst when they wern't locked in. I would remove them all together. I don't have any on mine and have yet to lose a panel.
-
Registered Users


 Originally Posted by Lamonster

I was told that the front tabs made it worst when they wern't locked in. I would remove them all together. I don't have any on mine and have yet to lose a panel.
Thanks Lamont, I will also add some Velcro as you have suggested.
-
-
Very Active Member
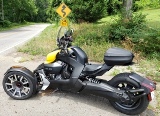

I lost the left panel in May after a service visit to the dealer when they did not set the tabs properly. And, this was after I had mounted them with Velcro, so I sure wouldnt count on that!
Fortunately, the dealer took responsibility and sent me a new cover.
Now my covers on both sides are seriously attached to the RT with tethers made from pic-hanging wire ...

-

There us one part that you made look awfully easy, that I had quite a bit of trouble with.
The two "prongs" that are held on the bottom edge of the top side panel gave me a lot of trouble - the front ones are bent at a wierd angle - the one on the right side was bent so much that I couldn't get it into the grommet when the rear one was in the grommet - the front one finally broke as I tried to bend it to go into the grommet - should they be bent?
Any tricks to getting the prongs into the grommets (or were my prongs bent too much by the dealer when assembling?
THX, Boyd
 Posting Permissions
- You may not post new threads
- You may not post replies
- You may not post attachments
- You may not edit your posts
-
Forum Rules
|

