|
-
MOgang Member & Monster Member

 Originally Posted by Macca

Love the Mods Steve
Thanks. Still a work in progress though. I'd hate to get complacent!
-
Rockin Member


Steve I can't tell by your pic. What color fender tips did you install? Amber or White LEDS?
2011 Pearl White RT Limited
HMT Brake Light, Fender Tips Kit, Mudflap Lights, GloRyders, Seal Floorboards, Powerlet 12V, Garage Door Momentary Button, Bump Skid, Elka's Stage 1, Ultimate Sea, Air Wings
 Member of the Woodstock Spyder Ryders (Illinois)
-
MOgang Member & Monster Member


 Originally Posted by Macca

Steve I can't tell by your pic. What color fender tips did you install? Amber or White LEDS?
I went with the amber. Primarily because I used the dual converter to make them signal lights also, and I felt that the flashing amber would be better than the clear. Had I not used the dual converter, I probably would have went with clear. 
-
MOgang Member & Monster Member

 BRP 9-pin Pigtail (710002029) to a Non-BRP Trailer 5 wire (4 light system) BRP 9-pin Pigtail (710002029) to a Non-BRP Trailer 5 wire (4 light system)
A lot of folks out there want to hook a non-BRP trailer to their spyder, but the project often hits a snag when they have to modify the BRP cable, which is a 9-pin 7-wire cable to a standard trailer lighting system.
The mod below will help you connect the factory BRP 710002029 cable to a 4-light 5-wire hook up, or a 2-light 5-wire hook up (If the brake and blinker use separate wires)
Common tools you may need:
- Side Cutters
- Soldering gun and solder
- Heat shrink tubing
- Electrical tape
- Heat source
The BRP 710002029 cable utilizes the following wire coding:
BLUE--------------Left Flash
ORANGE-----------Left Brake
BROWN------------Running/Marker
BLACK-------------Ground
YELLOW-----------Back Up
RED --------------Right Brake
GREEN------------Right Flash
The five wire plug in this application will use the following wire coding:
BLUE-------------Brakes (both)
YELLOW----------Left Flash
BROWN-----------Running/Marker
GREEN------------Right Flash
WHITE------------Ground
I utilized 4 LED lights which had the following wire coding:
Black-------------Running Marker
Red---------------Flash or Brake depending on whether inner or outer light
White-------------Ground
I have attached the PDF file below which has the complete wiring schematic to hook the 710002029 BRP Cable to a 4-light, 5-wire system in which the two "inner lights" will be the Running and Brake lights, and the two "outer lights" will be the Running and Flasher lights.
BRP 9-pin Pigtail _710002029_ to a Non-BRP Trailer 5 Plug …_1.pdf
There are some pics below of the tools, work in progress and final product.
I hope this helps some of you who have questions about how to connect your Spyder to a non-BRP trailer!
TrailerCable 0000.jpgTrailerCable 000.jpgTrailerCable 001.jpgTrailerCable 003.jpg
Last edited by SteveMac; 12-02-2011 at 10:07 PM.
-

I was wondering what I could use those old Xmas door mats for ....Thanks Steve for your help.. And what a great job on all of your Mods they look fantastic.. ....Thanks Steve for your help.. And what a great job on all of your Mods they look fantastic..
-
Very Active Member

 Originally Posted by SteveMac

Steve,
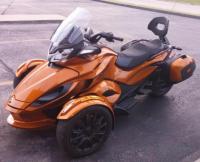
I am REALLY interested in getting one of these and am ready to pull the trigger but I see on TBR site and here there are issues wuth the trailer hitch hitting the canister. I have also seen where Len says no issues should be seen. My question to you is did Cowtown do anything special on the install to prevent these issues and if so what? Are you having issues with the canister hitting the hitch bolt? Hitch install looks standard, some hav suggested reversing the direction og the hitch bolt but yours is not that way.
Just want to make sure before I shell out $500-600 on an exhaust!
Kinggeek
Mandeville,LA
VERY HAPPY Spyder Ryder!
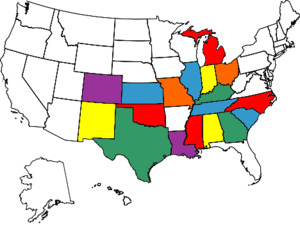
Where have we been on the Spyder? See below:
Can-Am Spyder ST-S SE5 in Congac

-
MOgang Member & Monster Member


Not sure if they do any thing "special" other than making sure the mounting bracket is attached in such a way as to prevent rubbing. I would assume that is the case. I have checked mine often and it is close, but no contact.
Last edited by SteveMac; 03-16-2012 at 07:06 AM.
-
MOgang Member & Monster Member

-
Very Active Member
 SpyderLady
-
MOgang Member
-
Active Member
 Looks good!! Looks good!!
Looks good behind the new paint job on the Spyder. Getting healed up enough to ride. Will give you a call or text
-
Registered Users

Wow, lots of cool mods here, thanks for sharing.
-
MOgang Member


Steve, I think that you should run at the back end of the pack for Durango.............with all the lights, it will help visability for all of us! 
 Spyder: 2011 RT Limited w/ RT-622 trailer
Mods: ESI Brightsides, RT Rear Brightsides, HMT Brake Light, Scuff Guards, Utopia Backrest, Chrome, and more Chrome, Pearl White Rear View Mirrors, Rear Fender, and Dashboard, Black Rear Wheel and Belt Assy, SpyderPops Heat Shields & Bump Skid, Elka Stage 1+ Shocks, 2012 SF Graphics, Silver Carbonfiber Dash, Corbin Arm Rests, Baker A.W., BRP Vented WindShield. BR's Sway Bar, Tricled White Halo Lights, BadBoy Air Horn, Spyder Legs Floor Boards
-
MOgang Member & Monster Member

-
MOgang Member & Monster Member


OK I have a few more mods to complete before Spyderfest 2012, and here we go!!! 
Today, my project is threefold. I installed the BumpSkid from Harvey Spyderpops, then began installing my Green Monster LEDs from Reggy at TricLed and finally my green GloRyders!!!   
The BumpSkid is one very heavy built product. Once installed it looks like it should have always been there and gave me a finishing touch and will help protect my new paint job. The instructions were easy to follow and the install was less than an hour. There really aren't any tips or tricks. It is pretty straight forward and anyone with decent tools and moderate wrenching skills can easily complete the job. Thanks Harvey for another fantastic product!
In speaking with Reggy from TricLed, he suggested that I use a router and cut a 1/2" wide by 1/8" deep channel in the bottom of the BumpSkid for the LEDs to nestle up into and be very protected. I did this and it worked out nicely. One tip here. I tried cutting the entire length of the channel in one pass and that was my mistake. If you choose to do this, I recommend setting the router on moderate-high speed and cut a channel about four inches long at a time. Then use a large flat head screwdriver to remove the plastic which will tend to melt and gum up your bit. This happened to me and I scuffed up my BumpSkid a little, but fortunately it is up under the RT and can't be seen (except for the photos below! ). All in all I am still very happy with the result. In one of the pics below, you can see that the LEDs fit nicely up into the channel, and are flush with the bottom of the BumpSkid. This offers great protection for the lights. ). All in all I am still very happy with the result. In one of the pics below, you can see that the LEDs fit nicely up into the channel, and are flush with the bottom of the BumpSkid. This offers great protection for the lights.
I dd get the LEDs installed, but didn't get around to finalizing the wiring nor did I get the GloRyders installed today. But that should be a short job tomorrow and I'll post pics of those projects and the lighting effect. And tomorrow will also bring a nice wax job getting ready for SpyderFest 2012!!!
But for now, I have posted some pics of the install of the BumpSkid. And I am VERY happy with it. It really finishes off the front end. Now I can push possums with Lamont!!   
Getting ready!

Before!
 . .
Before!
 . .
Preparing you use a router to cut the groove for the LEDs

LEDs fit flush. LOVE it!

See my boo boo?

Be sure the threaded nut portion of the clips provided go up! And a quick test fit.

The Finished product!!!

LOVE the BumpSkid! Looks great In my opinion.

And finally the GloRyders are done too!
 
Last edited by SteveMac; 04-09-2012 at 09:09 PM.
-
Mod Monster


Lookin REALLY great Steve!!!
Phil, Tyler TX- from my iPad3.5 using Tapatalk HD
____________________________
Phil - Tyler Texas
2010 RT-Premiere Edition (Named DARTH) | Timeless Black | All My Mods--- ARE HERE | Phil. 4:4
-
MOgang Member & Monster Member


 Originally Posted by Phil

Lookin REALLY great Steve!!!
Phil, Tyler TX- from my iPad3.5 using Tapatalk HD
Thanks Phil. See you in a couple of weeks I hope!!
-
MOgang Member & Pyro-Man

Steve, I didn't think of using a router to channel out my under lighting. That gives me a great excuse for going to HD or Lowe's to get a new DeWALT plunge router. I installed Pop's skid as well, but had an issue with getting the two inboard holes to line up. I have several of Reggy's lighting mods, but went with something that had the RGB color wheel that would give me a little more control of the color and effect. I'm hoping to get it on before SF. Helpful hint on the GloRyders: Use an Emery cloth to clean out the powder coat on your new wheels. You are going to scratch some of the black or green powder coat taking off the dust caps, but the GR's will cover any small damage that was done. I can walk you through what I did to Spyder Linda's wheels when I installed her GR's.
The bike looks awesome! Can't wait to see it at night.
PS - Don't touch the - post for jumping to attach to your LED power supply. See previous posts on that nightmare.
“Dream as if you'll live forever, live as if you'll die tomorrow.”
―James Dean
-
MOgang Member & Monster Member

-
MOgang Member & Monster Member

-
MOgang Member & Monster Member


My final Project this past weekend was to rework my highway pegs for the third and final time,, I hope!
I already had the ISCI mounts and risers, but regular pegs put my feet too far apart and at a bad angle. It put a lot of pressure on my bad hip and the steel pins in that hip screamed in discomfort.
So I put on a set of highway boards (see post above). And while the boards were at a good angle and not too far apart, they were much too flat and they were flimsy metal too. So I began searching for something that would be much more sturdy, at the correct width and foot angle and would look close to factory. But what would that be??
I found the answer when a member here had their old aluminum boards and pegs off an RT for sale. I bought these and began making my plans.
First, I tried the boards, but they were just too big and didn't look like what I wanted. So, I chose to use the factory pegs.
I removed the two 10mm head bolts holding the rubber to the peg. I discarded the damping weight and the long bolts. I then took the ISCI risers and ground them down until they fit up into the cavity of the peg. Then I put the risers in a drill press and drilled a hole length ways through the entire length of the riser and also drilled a hole in the peg base. I used a 3/8 x 8 stove bolt through both securing the peg and riser to the ISCI mounts. I did have to extend the mounting bracket a couple of inches in order to get the pegs into the position that I wanted.
I bolted it all together using nylock nuts and then cut off any excess threads off the bolts. Wiped all down ith paint thinner and shot some satin black on it.
The result is a set of highway pegs that are super sturdy, are the correct width and angle for me, and even look like a factory item.
I LOVE em and now I am ready for trips to Spyderfest, Durango and Lamont's BBQ!!
   
-
Mod Monster


MR Mac----
I am jealous of your metal working abilities. VERY nice work. Oh, and... Like anyone BELIEVES that is your last mod   Maybe I'm reading that wrong.... Hummmm. Maybe I'm reading that wrong.... Hummmm.
Phil, Tyler TX- from my iPad3.5 using Tapatalk HD
____________________________
Phil - Tyler Texas
2010 RT-Premiere Edition (Named DARTH) | Timeless Black | All My Mods--- ARE HERE | Phil. 4:4
-
MOgang Member & Monster Member


 Originally Posted by Phil

MR Mac----
I am jealous of your metal working abilities. VERY nice work. Oh, and... Like anyone BELIEVES that is your last mod   Maybe I'm reading that wrong.... Hummmm.
Phil, Tyler TX- from my iPad3.5 using Tapatalk HD
LOL. 
No my friend it won't be the last mod I am sure, but I hope it is the last time I rework these pegs! Having them setup right is all about the feel and they are finally right "for me"! You will have to check them out at Spyderfest whilst I will be checking out the awesome LEDs on Darth!
-
MOgang Member & Monster Member


Well, I got to ride to work the last couple of days and all I can say is WOW the rework of the pegs is winner winner chicken dinner. Very comfy and sturdy!
I am SO ready for the trips this year!
-
MOgang Member


Steve, hope to see all the new mods this comming Saturday at the Spyderfest meeting................but, the way the weather forecast looks we might not be ryding the Spyders! Bummer! Bummer!
 Spyder: 2011 RT Limited w/ RT-622 trailer
Mods: ESI Brightsides, RT Rear Brightsides, HMT Brake Light, Scuff Guards, Utopia Backrest, Chrome, and more Chrome, Pearl White Rear View Mirrors, Rear Fender, and Dashboard, Black Rear Wheel and Belt Assy, SpyderPops Heat Shields & Bump Skid, Elka Stage 1+ Shocks, 2012 SF Graphics, Silver Carbonfiber Dash, Corbin Arm Rests, Baker A.W., BRP Vented WindShield. BR's Sway Bar, Tricled White Halo Lights, BadBoy Air Horn, Spyder Legs Floor Boards
 Posting Permissions
- You may not post new threads
- You may not post replies
- You may not post attachments
- You may not edit your posts
-
Forum Rules
|

