|
-
RT-S PE#0391

 HMT Brake Light Install - Unexpected Surprises HMT Brake Light Install - Unexpected Surprises
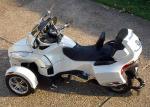
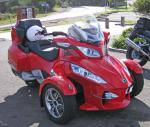
I (with the helpful extra hands/eyes of my nearby bud QASAMM) got my HMT Brake Light on today. Here's a twist: The ESI instructions have you doing everything on the right side of the Spyder. Makes sense ... the light cable hole drills in on the top-right of the outer trunk cover exterior panel ... the cable feeds in there, etc.
Well guess what! When I removed the upper fender trim (Step 6), and started looking for the harness ... It was on the LEFT side of the Spyder!?! That's right, the harness was on the opposite side from where the ESI instructions state the light cable is supposed to run. All there was on the right side was a deep hole. What this meant was that I had to route the light cable across and under the outer trunk cover and bring it down on the left side. Fortunately, there's enough cable to use the feed tool to get cable down through the left-side antenna cable channel (even though there's no antenna on the left (yet)). The BIGGEST challenge, however, is that electrical harness is a few inches down in there, very little 'give' or leeway to pull it close, and with only the fender trim off, one plays hell trying to (1) get ahold of it, (2) undo it and (3) snap in the HMT light harness. We ended up taking a long heavy-duty twist tie, making a 'noose' of sorts to get around the lower part of the existing harness connector so it wouldn't slip away. With that in place, we undid the existing connector. Then it took about 20 minutes to get one's hand in just the right position, while maintaining upward pull on the "noose" and at the same time pressing on the ESI connector. I finally heard/felt it snap into place. "Whew!" It had to work ... we were past the point of no return ... because if we couldn't get the ESI connector snapped on, we weren't going to get the stock connector back on either. Alas, it ended as a high-five for Sam and I.
So again, the lessons learned:
(1) Watch out ... because the tail light/brake light harness on your RT may be on either the right OR left of the machine. If on the left, you have to drill the hole as instructed, but run the cable to the left side, under the outer trunk cover.
(2) At least on my Spyder, getting a grip on and holding the existing harness connector was a B$#CH! Be prepared to exercise some ingenuity and caution to find a way of holding it in place, while disconnecting it, connecting in the ESI harness, etc. For a few minutes, Sam and I were thinking I might need to remove the RT side case (Thank goodness we didn't hafta).
(3) ... And just something extra: make sure you leave some slack for the light cable to tuck into the channel on the front side of the trunk hinge. It works real well that way, and once tucked in, you can't even see it. Before re-installing the fender trim, use some electrical tape/twist ties to secure the loose parts of the HMT harness to a nearby cable run.
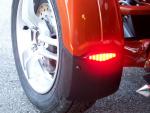
My previous post talked about incorporating a back-off module. Haven't done that yet. I want to get more information on grounding to make sure it won't throw an error/code. The HMT Brake light works great ... looks great; as many say, it looks like it should have been there in the first place. A dramatic visibility impact, when used just as a brake light (as with a car), back-off/pulse module or not.
Ride Safe!
~ Surfer
Last edited by SilverSurfer; 05-07-2011 at 07:25 PM.
-

Some time ago I installed the HMT on my 2010 RT. Like you I could see the connector on the left side but not on the right side but it is on both sides on my RT. I had to remove the right light assembly and it was tucked in on the lower left side of the right side light. I would never have found it without sliding the light out. The whole job was still fast and easy and I love the look and function of this light.
-
Very Active Member


I installed the HMT Brake light and my connector was on the right side but no way could I get hold of it. I ended up removing the right tail light. This made it much easier. ESI needs to modify their instructions to include removing the tail light. It would have saved me a lot of time (and cursing).
MODS: Elka Shocks, ESI RT HMT Brake Light, ESI RT Brightsides, ESI Fender TIPS, ESI RIPS, ESI RT Day Runners, Grip Puppies
AmerSeal Sealant, KewlMetal Kewlock, Scorpio I900 Security System, Stebel Nautilus air horn, KewlMetal Highway Brackets & ISO Wings
Corbin seat, trunkrest & driver backrest, Capt.Jim's Belt Tensioner, SpyderPops LaBlock, Cat Shields, Bumpskid & Belt Guard
Seal PUP Floorboards, BRP chrome, Ron's Anti-Sway Bar, Lamonster LED Head/Fog Lights & BRP Air Scoops 
-
Registered Users

-
Registered User


There is a tail light connector on each side of the RT because there is a tail light on each side!
The right side one is always there or your right tail light would not work!
Maybe it's not as easy to see as some of you might like BUT IT IS ALWAYS THERE.
There is also a left side tail light connector on the left side for that tail light too.
MM
[URL="http://www.esicycleproducts.com/"]
-
Very Active Member


 Originally Posted by Magic Man

There is a tail light connector on each side of the RT because there is a tail light on each side!
The right side one is always there or your right tail light would not work!
Maybe it's not as easy to see as some of you might like BUT IT IS ALWAYS THERE.
There is also a left side tail light connector on the left side for that tail light too.
MM
The HMT doesn't tap into the individual tail light connectors. It connects to the 5 wire tail light connector. That's the one that is hard to access.
MODS: Elka Shocks, ESI RT HMT Brake Light, ESI RT Brightsides, ESI Fender TIPS, ESI RIPS, ESI RT Day Runners, Grip Puppies
AmerSeal Sealant, KewlMetal Kewlock, Scorpio I900 Security System, Stebel Nautilus air horn, KewlMetal Highway Brackets & ISO Wings
Corbin seat, trunkrest & driver backrest, Capt.Jim's Belt Tensioner, SpyderPops LaBlock, Cat Shields, Bumpskid & Belt Guard
Seal PUP Floorboards, BRP chrome, Ron's Anti-Sway Bar, Lamonster LED Head/Fog Lights & BRP Air Scoops 
-
-
Very Active Member


 Originally Posted by Marker

I just received my HMT Brakelight and high mount third 2 into 1 unit on Friday It looks awesome and can hardly wait to find time to install. When I get it installed I will let everyone know how the install went  I am not a mechanic but handy so hoping being handy is enough to get the job done. 
Only advice I can give you is to make sure you have the LED assy in exact alignment before you press it in. You get one shot at it and if its not right you will need a crowbar to get it off. 
MODS: Elka Shocks, ESI RT HMT Brake Light, ESI RT Brightsides, ESI Fender TIPS, ESI RIPS, ESI RT Day Runners, Grip Puppies
AmerSeal Sealant, KewlMetal Kewlock, Scorpio I900 Security System, Stebel Nautilus air horn, KewlMetal Highway Brackets & ISO Wings
Corbin seat, trunkrest & driver backrest, Capt.Jim's Belt Tensioner, SpyderPops LaBlock, Cat Shields, Bumpskid & Belt Guard
Seal PUP Floorboards, BRP chrome, Ron's Anti-Sway Bar, Lamonster LED Head/Fog Lights & BRP Air Scoops 
-
RT-S PE#0391

 Interesting Responses Interesting Responses
Thanks for all the feedback. So there's a connector on both sides ... Okay, I believe it. I like ESI's instructions ... noting what to remove and what screws, etc. are involved. To echo YRider ... ESI needs to clarify those instructions, which indicate that the harness connector is visible by removal of the upper fender trim on the rear of the Spyder (which goes around the entirety of the rear on both sides). Unfortunately, the instructions didn't apply as written in my case. QASAMM and I were actually evaluating sliding out the tail light assembly to get better access to the harness on the side we saw it, but it seemed to be held in by more than the two screws visible, and I didn't have a schematic. We didn't want to go off into knowledge No-Man's Land. Alas, we got it all done with a clean job, and to reinforce others' observations, this is a phenomenal lighting accessory.
Last edited by SilverSurfer; 05-08-2011 at 09:21 PM.
 Posting Permissions
- You may not post new threads
- You may not post replies
- You may not post attachments
- You may not edit your posts
-
Forum Rules
|


 Reply With Quote


 I am not a mechanic but handy so hoping being handy is enough to get the job done.


