|
-
12-25-2011, 09:30 PM
#126
Mod Monster


 Originally Posted by cardboard

Hey Phil got a question for you.
Got a Sony Bluetooth adapter like you show in the picture.
A pair of Sena SMH10 bluetooth headsets.
Zumo 550 GPS.
Iphone
When I pair the Iphone with sena headset, then blue tooth sony adapter to the Sena headset.
I can listen to the Iphone music, when the phone rings I can answer the phone and it will return to the Iphone music.
But when I have the sony adapter hooked up to bluetooth on the radio and I get a phone call , I can answer the phone but it will not return to the music.
Friend has a Clear Sounds Bluetooth adapter that will.
Got any ideas what might be happening that it will not return to the music on the Sony
Thanks.
Hey Bro--- I read this an hour ago and have been thinking on it. Mostly trying to remember what my Sony does. And I can't remember (I'm on the road'. But you may be right and doing nothing wrong. I have gotten it back to music, but unconsciously I may be 'fiddling' with the Sena to get music back. Hummmmm. I'll check.
Sent from my iPhone7 using Tapatalk
____________________________
Phil - Tyler Texas
2010 RT-Premiere Edition (Named DARTH) | Timeless Black | All My Mods--- ARE HERE | Phil. 4:4
-
12-30-2011, 01:10 AM
#127
Mod Monster
More RT622 Trailer Mods
Actually, it's a continuation of 104-113--- http://www.spyderlovers.com/forums/s...l=1#post382934
The thought hit me that I might need light inside the trailer, if it is disconnected from the bike. I have the great halo of bright white LEDs, now how do I make that happen.....
STUFF:
1. Battery
2. Some simple way to take the battery in and out.
3. Diode to make sure the trailer battery is charged from the bike, but it doesn't power the bike!
I'm going to try to do a schematic of all this, but for now we'll use pics and description.
The trailer electrical is really very simple. Post #110 shows the 4 wires that we have. Of them, only the +12v and Ground are the ones we're concerned with. I started under the trailer to see where the wires entered the trailer body-

Not hard to see that here is where the wires transition into the trailer.
Peeling back the carpet, we see the entry point.

I also peeled back some of the plastic wire aromor so I could reveal the brown, +12v line. Remember that this is +12v that comes from the bike via the connector. Here you can also see that I've cut the brown +12v wire where I'm adding a diode.
Think of a diode as a one way valve. As in water, a one way valve only lets water flow one way, a diode allows electrons (electricity) to flow one way. Putting the diode right here, allows us to power the trailer from it's own battery and prevents that power from going back to the bike. At the same time, power from the bike will flow to the trailer to power the lights AND, if I want, charge the trailer battery. Good for safety and general good electrical principals. I left the wires long just to make things easier to see.....

Notice, I used an inline fuse holder. It really works well. Here's a closeup of the diode...

You can see I simply press fit it into the holder. If you do this, you'll want the white line on the diode on the 'output' side of the diode. Think of it like an arrow pointing to the direction of the electron flow. The diode is from Radio Shack and is good for about 3 amps. Here's an IMPORTANT STEP. Guaranteed you will forget that you have added a diode in a fuse holder! So, mark it....

Here's the pretty much finished diode project----

I've taped a spare diode in it's plastic bag next to the diode that's in use. Again... I'll forget and some day if I ever need a spare... there it is! The body of the trailer is fiberglass so it makes doing electrical work pretty easy, not having to worry about exposed wires, but still I try to use good practice to make sure everything is protected against wire chafing.
On to the battery.....
I selected this battery mostly because of its size. It's 12AH (meaning I can power all of my trailer LEDs, 2 amps) for about 6 hours without a recharge. I ALWAYS like to have a main fuse close to the battery. I also wanted a simple disconnect for the battery. AND... I wanted a way to hook it to a battery tender to top it off. Here's the result......

Notice, I've used heat shrink everywhere and I've removed stress from the battery terminals using a 'staycon pad' plus tie wrap. I've also terminated it in a female 12v accessory jack. Use the female jack here for several reasons: Safer since it's really hard to short the connection; makes it REALLY simple to connect to my existing battery tender; allows the rig to be used just like an accessory outlet, if needed.
Here's the finished project mounted in the trailer---

Notice on the left, plugged into the female accessory outlet is a male plug. Again, Radio Shack. The other end of the plug is attached to the main +12v line in the trailer and the Ground. That plug also has a switch and green LED. This is a simple master power and reminder! Keeping the battery in place is all Velcro. I've added a large section of the hook side to the bottom and the back of the battery. To make it even more snug, I added the strips that you see around the middle of the battery. It's rock solid!
Next, I'm going to add a separate hard switch to turn the white LEDs on/off without needing the remote. Easy to do, but I just didn't get to it yet  . .
Last edited by Phil; 12-30-2011 at 01:12 AM.
____________________________
Phil - Tyler Texas
2010 RT-Premiere Edition (Named DARTH) | Timeless Black | All My Mods--- ARE HERE | Phil. 4:4
-
12-30-2011, 02:38 AM
#128
Very Active Member

Did you melt your way through that wiring loom or outer cover to get to the wires?
Last edited by Arr MiHardies; 12-30-2011 at 02:48 AM.
-
12-30-2011, 09:50 AM
#129
Motorbike Professor

Very nice, Phil! I have considered doing this, even though I don't have any accessory lights. I'm assuming that by 12V+ you mean the running light circuit? There is no auxiliary power circuit on the RT-622 trailer. Owners contemplating this mod should also note that the 2010 trailer harness is different, using six wires. It still has a running light circuit, however, only the way the brakelights and turn signals work has changed.
A couple of questions...
1. With this setup it seems the running lights would stay on all the time, depleting the battery. Is there a master switch?
2. What happens when the battery is really low? Would the Spyder's trailer running light circuit be overwhelmed?
-Scotty
2011 Spyder RTS-SM5 (mine)
2000 BMW R1100RTP, motorized tricycle & 23 vintage bikes
2011 RT-622 trailer, Aspen Sentry popup camper, custom motorcycle trailer to pull behind the Spyder

Mutant Trikes Forever!
-
12-30-2011, 10:12 AM
#130
Mod Monster
Originally Posted by Arr MiHardies
Did you melt your way through that wiring loom or outer cover to get to the wires?
HA! Kinda looks like it, doesn't it ! !
No... I just peeled back some of the tape they use to bind the wires together. The black residue is just some of the sticky stuff from the tape. There was plenty of slack on that part of the harness. In fact, there is plenty of slack on all of the trailer harnesses.
____________________________
Phil - Tyler Texas
2010 RT-Premiere Edition (Named DARTH) | Timeless Black | All My Mods--- ARE HERE | Phil. 4:4
-
12-30-2011, 10:36 AM
#131
Mod Monster
Originally Posted by NancysToy
Very nice, Phil! I have considered doing this, even though I don't have any accessory lights. I'm assuming that by 12V+ you mean the running light circuit? There is no auxiliary power circuit on the RT-622 trailer. Owners contemplating this mod should also note that the 2010 trailer harness is different, using six wires. It still has a running light circuit, however, only the way the brakelights and turn signals work has changed.
A couple of questions...
1. With this setup it seems the running lights would stay on all the time, depleting the battery. Is there a master switch?
2. What happens when the battery is really low? Would the Spyder's trailer running light circuit be overwhelmed?
Scotty-
First, you're 100% correct, the circuit you use to get the +12v is the Running Light Circuit. It is powered when the key goes on. essentially it is like a switched +12v.
2. What happens when the battery is really low? Would the Spyder's trailer running light circuit be overwhelmed?
Good question but here's what I believe will happen. I have seen batteries, if very low, charge at a high rate. But generally batteries will only charge at a rate the current is supplied to them. This is the theory behind battery tenders. I'm not expecting the circuit to get overwhelmed. BUT... IF it would even try (like in the case that the battery might short internally), I have the 5amp fuse sitting right at the battery to take it off line. But again, great observation. I'll know in time! I've been running the battery off and on for some time now and today I'll hook everything to the bike and see if I can get a charge current reading.
1. With this setup it seems the running lights would stay on all the time, depleting the battery. Is there a master switch?
There actually IS a master switch. If you look at the plug, it has a switch built in with a small reminder LED on it. I think it will work well. It's located over the wheel well on the left as you open the back hatch.

____________________________
Phil - Tyler Texas
2010 RT-Premiere Edition (Named DARTH) | Timeless Black | All My Mods--- ARE HERE | Phil. 4:4
-
12-30-2011, 11:06 AM
#132
Registered Users

Thanks Phil
Great advice, my plan is to get one of the camping trailers probably a leesure lite and adding lighting to that and maybe some kind of 12v heating device for the colder weather. I have been thinking about using one of the larger gel batteries to power it all and charging from both the bike and a solar pannel. Any advice?
Corbin saddle
spyderpops block off plate, bump skid, belt guard
IPS
Tricled LED lights all around(too many to name here)
Smoothspyder belt tensioner
Custom Dynamics britesides
VTC floorboards, upper air vents, spoiler
BK car stuff HID upgrade
trailer hitch
Repainted rear fender, trunk latch assembly, switch cluster, gauge cluster
cell phone interface kit
travel cover that no longer fits due to the spoiler
New sway bar
New shock relocator
-
12-30-2011, 11:25 AM
#133
Motorbike Professor
Originally Posted by JCSMOKE
Great advice, my plan is to get one of the camping trailers probably a leesure lite and adding lighting to that and maybe some kind of 12v heating device for the colder weather. I have been thinking about using one of the larger gel batteries to power it all and charging from both the bike and a solar pannel. Any advice?
To get a usable amount of heat requires a lot of wattage...at least 1,200-1,500, I'd say. You would need a huge battery to power that overnight. I'd stick with a propane unit, if I were you. We use a small propane heater for our Aspen Sentry camper, and a battery operated fan to move the air.
-Scotty
2011 Spyder RTS-SM5 (mine)
2000 BMW R1100RTP, motorized tricycle & 23 vintage bikes
2011 RT-622 trailer, Aspen Sentry popup camper, custom motorcycle trailer to pull behind the Spyder
Mutant Trikes Forever!
-
12-30-2011, 11:37 AM
#134
Registered Users
Thanks
Originally Posted by NancysToy
To get a usable amount of heat requires a lot of wattage...at least 1,200-1,500, I'd say. You would need a huge battery to power that overnight. I'd stick with a propane unit, if I were you. We use a small propane heater for our Aspen Sentry camper, and a battery operated fan to move the air.
I will keep that in mind and look for other options.
Corbin saddle
spyderpops block off plate, bump skid, belt guard
IPS
Tricled LED lights all around(too many to name here)
Smoothspyder belt tensioner
Custom Dynamics britesides
VTC floorboards, upper air vents, spoiler
BK car stuff HID upgrade
trailer hitch
Repainted rear fender, trunk latch assembly, switch cluster, gauge cluster
cell phone interface kit
travel cover that no longer fits due to the spoiler
New sway bar
New shock relocator
-
12-30-2011, 12:11 PM
#135
MOgang Member & Monster Member

Great write up as usual Phil! You da man bro. 
-
12-30-2011, 11:22 PM
#136
Registered Users

Sway bar
Originally Posted by Phil
I'm editing this first post to put the full list of mods, for ease of finding them:
___________________________
Phils Spyder Mods
======================
Additional front fuse panel
Mud Flap Lights
BrightSides front and rear
Kewlmetal Run-Turn-Brake light
Double Play Unit
12vdc dash convenience outlet
AEM Voltage Meter
TricLed TricFenderz - Amber / Red
Front DayRunners
RTGloRyder
Custom Various Stingerz LED sticks (Purple)
Black Magic Remote LED Control
DRL Cornering Lights with TDR control
Puddle Lights & switch
Master Accessory Power Switch & relay
LED Licenseplate light
LED Frunk Surround
LED Fendertip lights
LED Seatglow light
LED Trunk lights
LED Glove Box light
LED Under Dash light
Dimmers for Dash & TricFenderz lights
~~new 07/23/11~~
HID Headlights
LEDs under rear fender
-------------------------------
Bluetooth Receivers
Bluetooth Transmitter
4 Channel Audio Mixer
---------------------------
Extra WAGO LeverNuts
Billet Axel Covers Front end Dressup Kit
Green Filter
Swaybar
Elka Shocks (7/2011)
Utopia Backrest (6/2011)
Fog HIDs
Gizmo Mount Bracket
Küryakyn Widow Pegs
BRP Chrome Mirror Accents
BRP Chrome Exhaust Accent
~~~~~NEW 11/11 RT622 Trailer~~~~~~
Interior while LED halo of light
Front and back lid halo of Purple LEDs
GloRyders for trailer wheels (DIY, not stock)
================================================
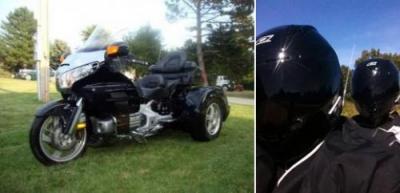
Here's a pic of my RT SE5 PE as it looked when I started the mods:


Some of the things I'm working on: - Redo the power distribution to power the current and additional LEDs.
- Adding quick disconnect so frunk can be easily removed, even with all the extra LEDs.
- Redo mounting of the Fog HID ballasts
- Add many more purple LEDs to frunk
- Add purple LED that accents fog housing
- Add master on off switch & relay for new power buss (see #1)
- Add TricFenderz LEDs
- Add mud flap LEDs (wire into turn signals)
- Add dimmer for TricFenderz
- Add white LED strips in glove box and under dash
- Add dimmer for glove box and dash lights
- Add 'puddle lights' under mirrors
- Add wiring and separate switch for puddle lights
- Add RunBrakeTurn LED strip to back of bike
- Redo previous Bluetooth work to 'mix' audio from all Bluetooth sources rather than having them fight for supremacy order.
- Seems like there'd something else??!!!
I'm fortunate to be one of the guys to have a heated garage with good working lighting and tool boxes. Took me a bunch of years to get tot this point, but I'm very blessed. So, I can take my time and do things the right way.
Stay tuned....
Heck of a list. Congratulations on the dedication of time and the bike looks great. I'm very happy with my new ELKA shocks. I noticed you mention a sway bar on your list. Did you purchase an after market one and would you do it again? I've been led to believe it wasn't necessary, but would appreciate your thoughts on one. I'm an old geezer and don't go over the speed limit much, but sure like the W. NC. E TN and N GA areas for hills, small mountains and great bike roads.

Thanks
Tuck
-
12-31-2011, 01:26 AM
#137
Mod Monster
Originally Posted by TuckMiddle
Heck of a list. Congratulations on the dedication of time and the bike looks great. I'm very happy with my new ELKA shocks. I noticed you mention a sway bar on your list. Did you purchase an after market one and would you do it again? I've been led to believe it wasn't necessary, but would appreciate your thoughts on one. I'm an old geezer and don't go over the speed limit much, but sure like the W. NC. E TN and N GA areas for hills, small mountains and great bike roads.
Thanks
Tuck
Hey there Tuck!! Thanks for the note.
Swaybar-- it was after market. I have a 2010 that was famous for having a wonky stock front end. The swaybar swap came before the ELKAs. I noticed a MARKED improvement. Then came the shocks a few months later. Adding the shocks made a HUGE difference. Now... There's no way to say if adding the swaybar AFTER doing the shocks if the change would be that noticeable.
So... Sure, I'd do it again.... In the same order. I know that's not much of an answer.....
Sent from my iPhone7 using Tapatalk
____________________________
Phil - Tyler Texas
2010 RT-Premiere Edition (Named DARTH) | Timeless Black | All My Mods--- ARE HERE | Phil. 4:4
-
01-07-2012, 04:57 PM
#138
Very Active Member

HID Fog Lights
Phil, I know you did detailed coverage on installation of the HID headlights on the RT, but I'm not sure if there is anything on the HID foglight install.
If there is anything around on this, I am interested. Even a simple checklist of whats involved would be helpful.
Thanks,
Jack
-
01-07-2012, 11:59 PM
#139
Mod Monster
Hey Jack-
I did HIDs on the fogs back when I had no clue what I was doing and didn't write about it . FUNDAMENTALLY it's about the same. I do have pics of the results, viewed from the back of the frunk in one of the earlier posts (#14).
The only real difference is that there is much more room to work with the fogs. I HIGHLY recommend removing the frunk to work on the fogs. I did it without removing and it was hard and I did a lousy job. A bit like wiring on a spark plug through the exhaust pipe .
The halogen bulb removal is the same. The dust cover is about the same and the wire up is just about the same. I found a spot for each ballast in a void between the fog housing and the frunk plastic.
I know that's not much. Sorry  . .
Sent from my iPhone7 using Tapatalk
Last edited by Phil; 01-08-2012 at 12:06 AM.
____________________________
Phil - Tyler Texas
2010 RT-Premiere Edition (Named DARTH) | Timeless Black | All My Mods--- ARE HERE | Phil. 4:4
-
01-21-2012, 02:31 PM
#140
Very Active Member
Thanks Phil... that helped to get me started on the foglights. I did them removing only the RT side panels and it got tedious but I managed without removing the Frunk. I used the XenonDepot foglight kit and it worked fine but the only thing I can see that is better than the $40. eBay kits is the nice rubber grommet and the nice pair of gloves. The installation instructions were as skimpy as the eBay kits. While I was installing these, the plastic base of one of the bulbs crumbled in my hand when I was twisting it into the socket. Now needing a replacement, I called the seller, KBCarStuff.com, and they declined to cover it under warranty, plus did not have any replacements in stock. They placed an order for one for $21+ with delivery expected in Feb!
At this point I decided to look around and found replacements on Ebay where I ordered a pair that was delivered in 3 days for $11. So much for good deals and service from XenonDepot.
Here is a pic of the XenonDepot kit ready to install, and also a pic of the OEM bulb with metal base and the new HIDs showing the flimsy plastic base.
RT-ZenonFogLight.jpg 3-bulbs.jpg
Last edited by cjackg; 01-21-2012 at 07:42 PM.
-
01-21-2012, 10:48 PM
#141
Mod Monster
Originally Posted by cjackg
Thanks Phil... that helped to get me started on the foglights. I did them removing only the RT side panels and it got tedious but I managed without removing the Frunk. I used the XenonDepot foglight kit and it worked fine but the only thing I can see that is better than the $40. eBay kits is the nice rubber grommet and the nice pair of gloves. The installation instructions were as skimpy as the eBay kits. While I was installing these, the plastic base of one of the bulbs crumbled in my hand when I was twisting it into the socket. Now needing a replacement, I called the seller, KBCarStuff.com, and they declined to cover it under warranty, plus did not have any replacements in stock. They placed an order for one for $21+ with delivery expected in Feb!
At this point I decided to look around and found replacements on Ebay where I ordered a pair that was delivered in 3 days for $11. So much for good deals and service from XenonDepot.
First- congrats on doing the operation without removing the frunk. As I said, it's possible, but easier with removal. I'm impressed!
Eeeeeeoooowwww. SORRY to hear about the no warranty replacement issue. I had several emails with XD (Mike I think) when I did mine. No issues, just chatting. Anyway, I got the feeling that they would be more flexible than THAT! Most of us know they are a little more expensive, but I'm TOTALLY willing to pay extra to KNOW they are there for me if I have a problem. Bummer.
The pic is VERY clear and in my mind there is no WAY that would have happened in the natural course of insert/twist.
I'm hoping they read this and change the way they're handling your situation.
____________________________
Phil - Tyler Texas
2010 RT-Premiere Edition (Named DARTH) | Timeless Black | All My Mods--- ARE HERE | Phil. 4:4
-
01-22-2012, 02:57 PM
#142
Registered Users

cjackg,
Unless I am mistaken, did you not try to install the HID bulb with the opaque spacer that holds the bulb in the packaging?
Steve
-
01-22-2012, 03:00 PM
#143
RT-S PE#0412

-
01-22-2012, 03:23 PM
#144
Very Active Member
Originally Posted by XenonDepot
cjackg,
Unless I am mistaken, did you not try to install the HID bulb with the opaque spacer that holds the bulb in the packaging?
Steve
No, that was not the case, just as I told your rep on the Tel when I first reported this problem.
Both of the bulbs were tight when hand twisted into the socket, but the 2nd one broke in my hand just as I twisted it.
The replacements I bought later fit easily with no problems!
Last edited by cjackg; 01-22-2012 at 03:25 PM.
-
01-22-2012, 10:57 PM
#145
 Just totally awesome Just totally awesome
Phil, I sat here and read every thread and comment. I'm amazed at the work and results. It's really refreshing to see people share every little detail to keep another from getting into a pickle. I missed the Woodville ride, but did hear several thumbs up on your ride.. One day soon I hope I'll be able to gaze upon the masterpiece you have created. .. ..
-
01-22-2012, 11:43 PM
#146
Mod Monster
Originally Posted by Schnauzer
Phil, I sat here and read every thread and comment. I'm amazed at the work and results. It's really refreshing to see people share every little detail to keep another from getting into a pickle. I missed the Woodville ride, but did hear several thumbs up on your ride.. One day soon I hope I'll be able to gaze upon the masterpiece you have created. ..
TapaTalk doesn't have all of the emoticons (that I can see). But if I could, I'd put a bow-down with a humble looking smiley face.. Thanks so much.......
=============================
Phil - Tyler TX
Sent from my iPad4 using Tapatalk
____________________________
Phil - Tyler Texas
2010 RT-Premiere Edition (Named DARTH) | Timeless Black | All My Mods--- ARE HERE | Phil. 4:4
-
01-22-2012, 11:45 PM
#147
Mod Monster
Originally Posted by TicketBait
Still in awe, of all you have done Phil
Hey man.... I learned from guys like you!!!
=============================
Phil - Tyler TX
Sent from my iPad4 using Tapatalk
____________________________
Phil - Tyler Texas
2010 RT-Premiere Edition (Named DARTH) | Timeless Black | All My Mods--- ARE HERE | Phil. 4:4
-
01-24-2012, 07:00 PM
#148
MOgang Member & Pyro-Man

Hey Phil, I loved your 12v battery/diode addition to the RT-622 trailer for charging and being able to disconnect and still have 6 hrs +/- of light to see by. I plan on doing that to mine. I can do basic AC wiring around the house, but I'm not very experienced in DC. I see several threads on adding fuse boxes in order to run all the extras.
Almost all of my main mod plans this year are lighting. Do think that it's wise that I go ahead and install an extra fuse box now and avoid having to pull all the panels and relocate the wiring and connections once I reach the breaking point, or am I already there right out of the gate?
This year's mod plans for lighting:
Bright sides (F and R)
Fender Tips, mud flaps, and LED amber to red fender strips
High Level Brake lamp with running light and brake kit
RT-622 stock harness
Under bike accent lighting (to come later)
Other accent lighting (to come later)
RT-622 Trailer 12v accents (lights to come later)
Thanks for all the time and help in advance, Phil ")
-
01-24-2012, 11:36 PM
#149
Mod Monster
Hey Kev!
You'll be a natural with DC. Like wiring a house these days, run hot and neutral everywhere. Unlike AC, you can use a single fuse for all the LED work you've listed. Just like you add up loads to size a breaker, do the same on the LEDs and put your fuse value north of that. Estimating the LED loads is fine. Or take my approach, eyeball it then put in a 3amp and see if it holds well. If not, move it to a 5. Guaranteed the load will be small...
Good question on the fuse panel. I took the approach to get all the Tupperware off and while it was off, I did the fuse panel and the first set of LEDs all at one time. The real idea on the extra fuse panel is just like a large house wiring where you might add a sub panel to sort of isolate loads I'm case there 's any problem. I HIGHLY suggest getting 4 or 6 of the LeverLock things. I have a picture of them somewhere in this monster post. They make tying bunches of LEDs together much easier.
Do run a 'feeder' to some place on the back of the bike. I have a total of 3 feeders. Left front, right front and rear. Hence 6 of the LeverLocks. Then home run your lights to one of those 3 places. Like a home, it makes troubleshooting much easier.
Do remember the elements will at some point dampen or corrode your connections. 33 tape is your friend  . I also have and use about 4 other kinds of tape for cosmetic to waterproofing. . I also have and use about 4 other kinds of tape for cosmetic to waterproofing.
Like I said at the start.... You'll do great! Make sure you post the results!!!!
Go Light Your Spyder World
=============================
Phil - Tyler TX
Sent from my iPad4 using Tapatalk
Last edited by Phil; 01-24-2012 at 11:44 PM.
____________________________
Phil - Tyler Texas
2010 RT-Premiere Edition (Named DARTH) | Timeless Black | All My Mods--- ARE HERE | Phil. 4:4
-
04-09-2012, 06:46 PM
#150
Mod Monster
Backup Camera
I was looking over some old posts and I realized that I forgot to post this 
When I added the 622 trailer, i wanted to figure out the best way to back up the thing. My 4 wheeler has a reall great 120 degree camera, so I wanted Darth to have one also. I watched things that Dave (CincySpyder & Teddy) had done. Props to ya bro! And it's amazing the stuff you can find on the Internet! So after quite a bit of research, I bought this-- http://www.tadibrothers.com/Catalog/...-Backup-System.
Here's the monitor, mounted high. I leave it on all the time. It acts as a rear view mirror!


Before you ask... .... I found that the monitor is not of the highest quality and thus the viewing angle is a bit picky. I had to angle it down. This was the fastest way to do that. The back sits on my toll tag, and the front is held by the industrial velcro. I've banged it around a bunch and it never has budged, so I think I'm good to go. I DO realize it may not be real weather proof and I need to figure out a solution for that part.

The camera mount is a magnet. a REALLY strong neodymium magnet. While this is not totally professional, it works. I found that I could wedge the magnet between the layers of tupperware on the back hatch. There are 2 magnets to give it a bigger shelf, and to help aim the camera down a bit.

With the help of another 90 degree small piece of metal, this is how the camera mounts (excuse the dust):

I wanted it to be magnetic so IF I wanted to remove it to hide it, it would be easy. I also did not do a great job on the cabling, but that is to make it VERY easy to disconnect and swap out if needed. All of the extra cable fits nicely in the slot to the left in the picture:

Sorry for the bad pic. There is a simple RCA connector video cable that goes from the back camera to the front monitor. Power for the camera comes from a switched +12v source in the back and the same in the front for the monitor. Here's how it looks in the "TaaaDaaaaah" picture:

Later tonight, I hope to put up the pics of Pete's Dash Kit That I did this weekend!! Here's a preview......

Later.......
Last edited by Phil; 02-16-2013 at 10:03 PM.
____________________________
Phil - Tyler Texas
2010 RT-Premiere Edition (Named DARTH) | Timeless Black | All My Mods--- ARE HERE | Phil. 4:4
 Posting Permissions
- You may not post new threads
- You may not post replies
- You may not post attachments
- You may not edit your posts
-
Forum Rules
|


 Reply With Quote