|
-
Registered Users

 Removing foot peg brackets Removing foot peg brackets
Hey all,
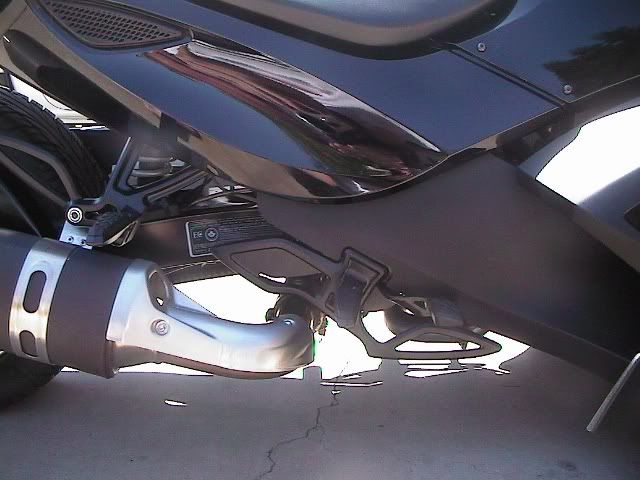
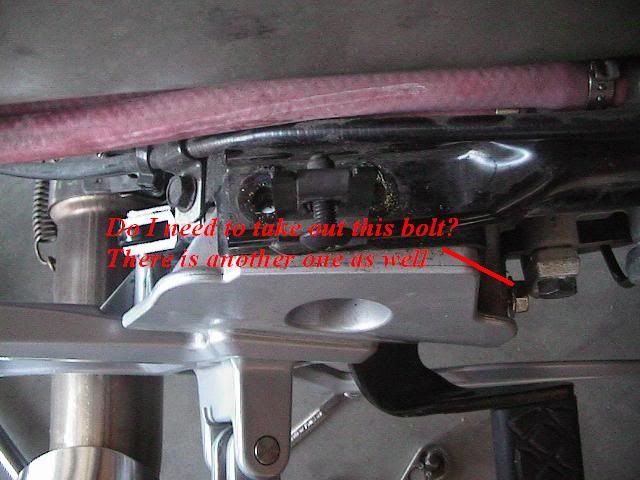
I am in the process of removing all my foot peg brackets so I can paint them or have them powder coated. (glossy black) I am having trouble removing the bracket connected to the brake pedal. I removed the two 13mm top bolts and the two smaller bolts on back, but the bracket still won't budge. There are two metal brake lines that go in the front and there are two 13mm bolts in front near them. Do I need to remove these? I hope I don't have to remove the entire foot-brake just to take off the footpeg bracket. Any help would be greatly appreciated.
Thanks in advance,
Golfman
-
Registered Users
Last edited by golfman; 08-11-2010 at 11:17 AM.
Reason: picture too big
-
Removing fot pegs
 Originally Posted by golfman

Hey all,
I am in the process of removing all my foot peg brackets so I can paint them or have them powder coated. (glossy black) I am having trouble removing the bracket connected to the brake pedal. I removed the two 13mm top bolts and the two smaller bolts on back, but the bracket still won't budge. There are two metal brake lines that go in the front and there are two 13mm bolts in front near them. Do I need to remove these? I hope I don't have to remove the entire foot-brake just to take off the footpeg bracket. Any help would be greatly appreciated.
Thanks in advance,
Golfman
Do you have the manual it shows how to do it. I think there is a small 10 mm bolt on the bottom that has to come out and the two 13mm next to the brake lines, its tough but can be done with patience and a couple of swivel attachments. When I did mine I had to disconnect the rod that goes into the master cylinder.after you get the parts back make sure you clean out all the thread holes with a tap or you may risk stripping the bolt or threads. The manual says you have to set the brakes back up with the computer but I was careful and didnt move anything out of adjustment so far so good.
Last edited by Badasz; 08-11-2010 at 11:17 AM.
-
Registered Users
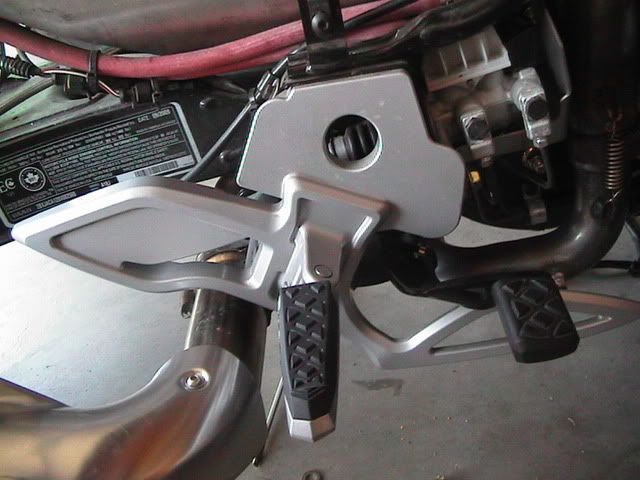
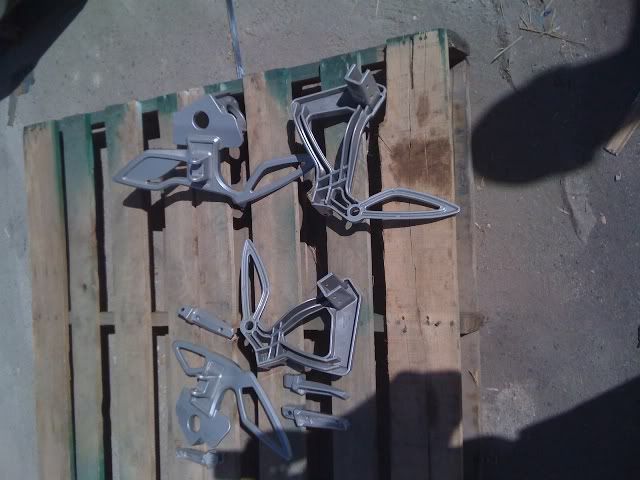
As you can see above, I have stripped off plastics and removed 3 of the 4 pegs and mounts. This is the peg and mount I am having trouble with. I have ordered the manual, but I have to wait for it to ship and I'm itching to work on my bike....
-
Registered Users
Originally Posted by Badasz
Do you have the manual it shows how to do it. I think there is a small 10 mm bolt on the bottom that has to come out and the two 13mm next to the brake lines, its tough but can be done with patience and a couple of swivel attachments. When I did mine I had to disconnect the rod that goes into the master cylinder.after you get the parts back make sure you clean out all the thread holes with a tap or you may risk stripping the bolt or threads. The manual says you have to set the brakes back up with the computer but I was careful and didnt move anything out of adjustment so far so good.
I bought the manual off e-bay yesterday, I have to wait for it to arrive though. I found the small bolt on the bottom and I will let you know if that works after I finish uploading pics.
-
Registered Users
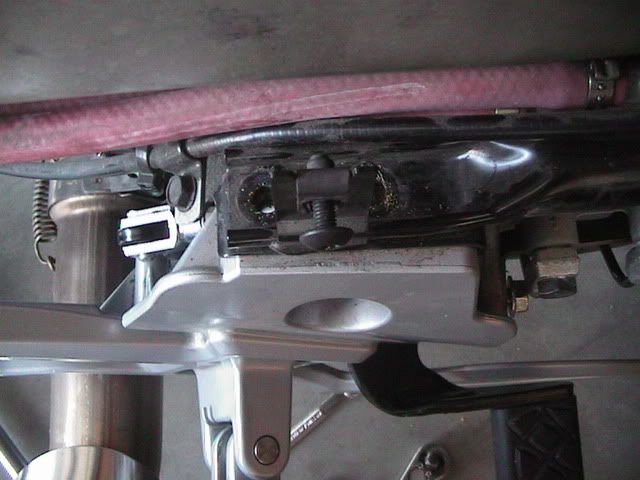
Removed top two bolts
-
Registered Users
And I removed two small bolts in back and the large one that holds the brake pedal assembly on.
-
SpyderLovers Founder

You can leave the brake lines hooked up but all the brake components have to be removed. Be careful with the piston on the master because it can fall out.
-
Registered Users
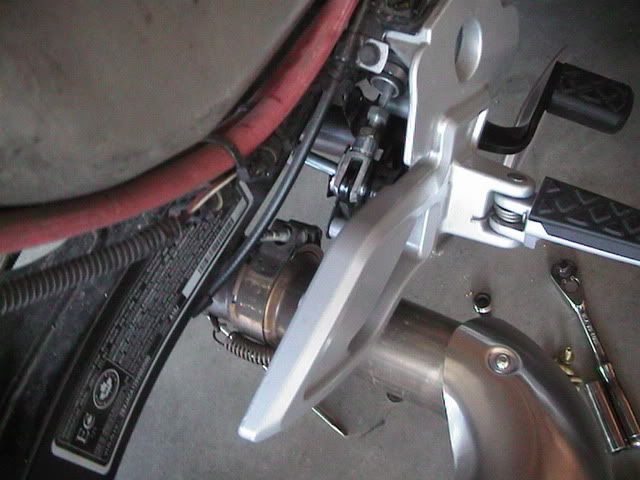
There are two bolts in front that seem to hold the brake assembly on. I guess they have to come off and then the footpeg assembly slides out backward? BTW the 10 mm bolt on bottom is out and it was what held the brake light switch.
-
Registered Users
Originally Posted by Badasz
Do you have the manual it shows how to do it. I think there is a small 10 mm bolt on the bottom that has to come out and the two 13mm next to the brake lines, its tough but can be done with patience and a couple of swivel attachments. When I did mine I had to disconnect the rod that goes into the master cylinder.after you get the parts back make sure you clean out all the thread holes with a tap or you may risk stripping the bolt or threads. The manual says you have to set the brakes back up with the computer but I was careful and didnt move anything out of adjustment so far so good.
LOL I didn't read your post very well...already states that I need to remove 13mm bolts next to the brake lines. I'm off to get a 3/8 swivel socket wrench. Thanx for your help guys!
-
-
Registered Users
Thanks all,
I will follow your advice to the tee! All the peg mounts are off. The swivel ratchet and a deep dish socket fit perfectly for the difficult bolt on the brakes.
I need to make a decision now. I was going to have the mounts powder coated black, but I want to make sure that will hold up as well as the stock paint. Are the peg mounts powder coated from the factory? I would really like to have the same coating that is on there only in black. After all the riding and passengers on my bike, those mounts look brand spanking new!
Another option is linex(sp) in black. One of the kids we ride the desert with just did several of the parts on his quad and he is very happy with the results.
-
Mod Maniac

Originally Posted by golfman
... but I want to make sure that will hold up as well as the stock paint...
.
Powder coating holds up very well... much better than paint IMHO. I had mine coated black and I'd bet they still look like new.
.
ata = allergic to asphalt
My mods: https://www.spyderlovers.com/forums/...ead.php?t=5753
.
There are two kinds of people: (1) those who can read, reason and apply the experiences of others; and (2) those who just have to pee on the electric fence. ataDude, 2009
My Spyder:

-
Very Active Member

"Life must be understood backward. But it must be lived forward."
 '09 Phantom GS (#14) (Gone but not forgotten) and 2010 RS-S
-
Registered Users
-
Very Active Member
"Life must be understood backward. But it must be lived forward."
'09 Phantom GS (#14) (Gone but not forgotten) and 2010 RS-S
-
Registered Users
-
Registered Users
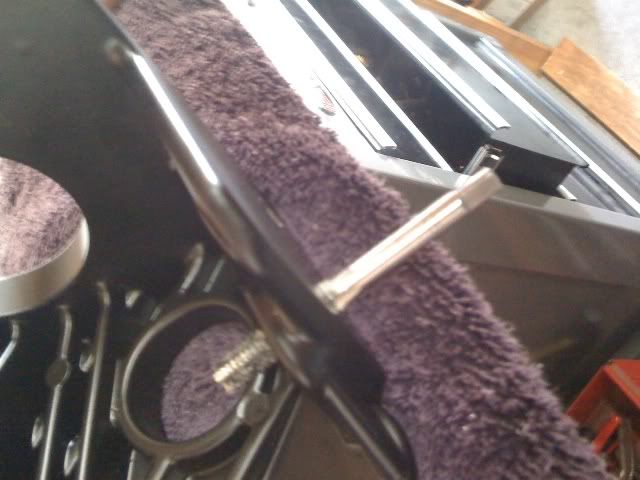
Tapping the holes after powdercoating. Two day turnaround....not bad!
-
Registered Users
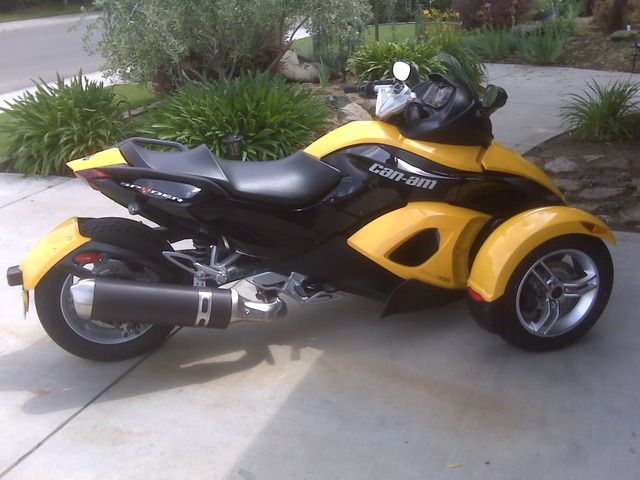
BTW this is how she started....
-
Registered Users
-
Registered Users
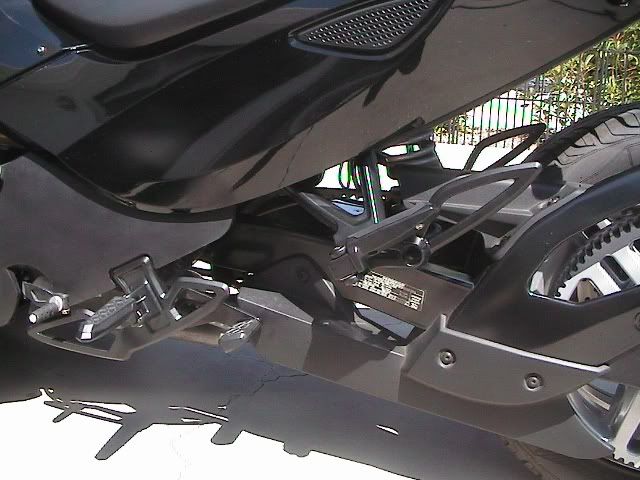
Even though the shop put plugs in all the screw holes, my son had to go through and re-tap everything. I used a drillbit to ream out the holes for the peg pins until I realized I was taking a little too much aluminum with along with the powdercoat. My son found a perfect little dremel bit and he patiently ground away just enough powdercoat to allow the peg pins to fit. I think the ones he did are tighter than stock!
-
Registered Users
I am going to take off the pipe today and paint all the brackets and the tip black as well. I will be using 1200 degree paint of course.
-
Very Active Member
Wow! Those peg mounts look fantastic! Much nicer in black. I think you made the right call ingoing flat black as well. Congratulations dude. You did well!! 
"Life must be understood backward. But it must be lived forward."
'09 Phantom GS (#14) (Gone but not forgotten) and 2010 RS-S
-
Very Helpful Member

Those look good.
Former Happy Spyder Owner
Just decided it was time to move onto other things.
-
Registered Users
Now I need to get the ignition cover painted glossy black along with the front rims. the back rim will be last. I will, of course paint the shock springs as I do each rim. this should leave me with a "symphony of black" on my bike.
 Posting Permissions
- You may not post new threads
- You may not post replies
- You may not post attachments
- You may not edit your posts
-
Forum Rules
|


 Reply With Quote


 I think now that you have put in this much effort (which is pretty cool, by the way!) Ithink powder coating will give you the best result. Great looks that will last a good long time. Just my opinion here but I don't think I'm alone in this... Good luck! You must snap some pics when you get the parts back!
 What is worse, is that I have already put thread lock on it so hopefully someone will clue me in before it drys. Picks coming in minutes.