|
-
Active Member

 I turned the sky blue ..... Replacing the battery I turned the sky blue ..... Replacing the battery
I got the old battery okay. Then I needed to replace the part above the battery that enables the hold down strap. Using a mirror and flashlight I could see one of the slots that one of the tabs go into. (How is that tab B into slot B). Well by using my fingers I could then get a better idea of getting the tab into the slot.
I finally managed to get both tabs into the slots. DANG I need to put the battery in first.
Okay got the battery in and connections made (with star washers). So here we go again in getting tab B into slot B, etc. Finally got it!!! DANG I noticed that i had the negative cable pinched under the hold down bracket.
After moving the negative cable I again go thru the frustrations of reinserting the tabs of the bracket into the tabs. WOW. finally done and all checks out.
So now you are asking why the sky turned blue ---------- Because of all the cuss words that I used!!!!!!!!!

Dean Secord AKA seaweed
Veteran: U.S. Air Force
2015 RT-S SE6
My Mods:
TricLed Turn Signal, Squared Away Sept, 2016,SpyderPops Bump Skid, SpyderPops Missing Rock Guard, ION camera, Show Chrome Back Rest,
Show Chrome Hitch. Leesure-lite trailer, Hopnel 850 Saddlebag Liners, Hopnel 3 piece lid netset - trunk and saddlebags
Magic Brake Strobe/Flasher, DIY LED light strips on upper and lower A frames, BlueKnight911 Magic Mirrors,
DIY superior grill, USB port, Hwy pegs, DIY Flag mounts for USA and US Air Force flags,
Method to open Frunk and seat without using key, LED headlights and LED fog lights, turn signal switch safety mod
-
Very Active Member


I have not yet had the pleasure of that experience. 
Greg Kamer
"It's better to be not riding and wishing you were than be riding and wishing you weren't."
USAF, 20 years, retired
Sheriff's Office, 23 years, retired

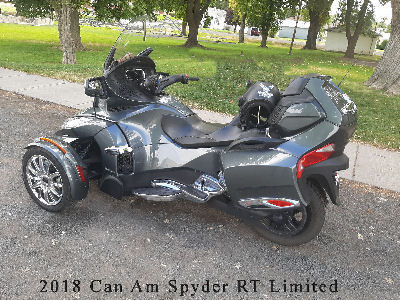
2018 Can Am Spyder RT-Limited
-
Very Active Member

-

Insert the hold-down with battery removed.
Hold it up with a twist-tie or similar.
Put battery in place.
Connect cables.
Secure battery in place with hold-down after removing twist tie.
2014 RTL Platinum

-
Ozzie Ozzie Ozzie


 Originally Posted by UtahPete

Insert the hold-down with battery removed.
Hold it up with a twist-tie or similar.
Put battery in place.
Connect cables.
Secure battery in place with hold-down after removing twist tie.
Good idea Pete, altho I have & use an alternative - Duct tape works too: - stick it up the back of the battery bay; over the tab with hold down in place; out & up the frunk wall an inch or 3... When the battery is in place, pull the tape off the frunk wall then down to let the hold down drop in place! Then, if you really feel the need, you can cut the bit that's left sticking out the front off flush with the front of the battery, leaving all the rest inside the battery bay as an extra form off buffer that'll ensure the tabs stay in place; or you can just stick the now released flap back onto itself & leave it there waiting to make the next removal even easier, AND protecting the battery & hold down juuust a tiny amount more while it's there! 
2013 RT Ltd Pearl White
Ryde More, Worry Less!
 Posting Permissions
- You may not post new threads
- You may not post replies
- You may not post attachments
- You may not edit your posts
-
Forum Rules
|


 Reply With Quote


