|
-
Active Member
 Fog light Fog light
On a 2015 RT Limited, does anyone have any tricks on replacing the left fog light bulb?
Update on replacing the left fog light. Thanks to two of my Spyder friends, we were able to get the job done by removing the frunk area. It was a lot easier, but still a pain in the butt. We were able to accomplish the external cleaning of the radiators while the frunk was off. Total time was about three hours. Very happy with the LED's we installed while it was apart.
Thanks to all who replied
Last edited by paulbrinker; 01-11-2018 at 11:32 AM.
-
Very Active Member
 its a bear...snorkel is in the way..small hands help its a bear...snorkel is in the way..small hands help
Sorry I don't have any links or pics. All I remember from a couple years ago was that patience and comfortable kneeling pads help. Seems like I had one hand under the wheel opening and one in between two panels. There may be some foglight installation videos that can give you some pics. Sorry my memory is not serving better
07 Shadows, Aero, Spirit gone but not forgotten
03 Harley Sportster, 07 RK moved on
11 RT- 76,000 mi, 15 RT-S- 44,000 mi, traded for current 15 base RT and 16 F3T
-
2014 RTL Platinum

-
Very Active Member
 Strong hands help. Strong hands help.
5 mins for the right side
I had to loosen the air intake hose on the left side and with a few choice words and skinned knuckles I got it to fit in.
Good luck,
Lew L
Kaos----- Gone but not forgotten. 
2014 RTS in Circuit Yellow, farkle-ing addiction down to once every few months. ECU FLASH IS GREAT. 
-

Here are a few tricks.
1. Remove the shock (there are some added issues if you do this but there are tricks to make it easy too).
2. Trim the lower tab on the cover. You can make it a bit smaller and it still functions properly. You need to get the lower tab in place then go to the top tab.
3. Use a really long flat tip screwdriver to pry the top catch out of the way. This is the piece that will keep you from getting the cover back on.
4. Find a helper with very strong but tiny hands
5. Bandaids and liquor may help relieve the pain.
2017 F3T-SM6 Squared Away Mirror Wedgies & Alignment
2014 RTS-SM6 123,600 miles Sold 11/2017
2014 RTL-SE6 8,600 miles
2011 RTS-SM5 5,000 miles
2013 RTS-SM5 burned up with 13,200 miles in 13 weeks
2010 RTS-SM5 59,148 miles
2010 RT- 622
-
Very Active Member
-
Active Member

 Remove the trunk Remove the trunk
Remove the front trunk. First time doing it is a challenge but it is a lot easier than all the suggestion so far.
-
Very Active Member
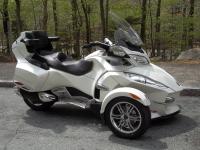

Was looking at some led bulbs for the headlights, and fogs, watch a u-tube clip, if I recall they went in from the right side top taking the mirror and popping the top panel toward the rear top so to open the back up enough to reach in and get to it. Didn't look like you had much room but you can pull the panel out enough to reach in and get the back side of the plug and not break the whole bike down to get to it. Wish I remembered where I found that clip, sorry! Maybe someone else has seen it! Good luck
-
Very Active Member


I had the dealer install my fog lights. I installed the headlights.
 2015 RTL, BajaRon Swaybar, LaMonster LED Headlights and Foglights, LaMonster Spydercuff, LaMonster LED mirror wrap, Magic Mirrors, HMT Brake Light
-

 Originally Posted by SpyderConvert

I had the dealer install my fog lights. I installed the headlights.
Now you know why they won't schedule you back in any more....
2014 RTL Platinum

-

 Originally Posted by Mikey

Was looking at some led bulbs for the headlights, and fogs, watch a u-tube clip, if I recall they went in from the right side top taking the mirror and popping the top panel toward the rear top so to open the back up enough to reach in and get to it. Didn't look like you had much room but you can pull the panel out enough to reach in and get the back side of the plug and not break the whole bike down to get to it. Wish I remembered where I found that clip, sorry! Maybe someone else has seen it! Good luck
The right side is easy, the left is a bear as there is a big intake snorkel in the way. Actually, installing the light isnít that hard it is reinstalling the cover that sucks.
2017 F3T-SM6 Squared Away Mirror Wedgies & Alignment
2014 RTS-SM6 123,600 miles Sold 11/2017
2014 RTL-SE6 8,600 miles
2011 RTS-SM5 5,000 miles
2013 RTS-SM5 burned up with 13,200 miles in 13 weeks
2010 RTS-SM5 59,148 miles
2010 RT- 622
-
Very Active Member

Kaos----- Gone but not forgotten. 
2014 RTS in Circuit Yellow, farkle-ing addiction down to once every few months. ECU FLASH IS GREAT. 
-
Very Active Member


 Originally Posted by SpyderAnn01

The right side is easy, the left is a bear as there is a big intake snorkel in the way. Actually, installing the light isnít that hard it is reinstalling the cover that sucks.
I meant right side sitting on the seat, left side looking at the nose. sorry
-
Blazing Member
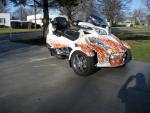

As stated the left side is the problem because of the air intake. Taking the dust cover off and changing the bulb is easy, getting the dust cover back on you should open the frunk and remove the small black service cover that is held in with 1 push pin and work with one hand at the back of the foglight and the other hand at the top where you removed the service cover. Shouldn't take more than a few minutes to get the dust cover back on .
-
Very Active Member


I bought some LED bulbs on a Black Friday sale for both sets of lights. I got the headlights installed; took me 3 hours, but I was taking my time and constantly reviewing the owner's manual and some videos via my Kindle.
For the fog lights, the owner's manual hands you off to the dealer (gee, thanks!). I found a video that showed the removal of some push-pins to crack open up those side panels a bit, but my panels still wouldn't budge. My 2014 RT-S seems to have some more (hidden) fasteners than the video suggests (plus, looking at the bike in the video, I think he was using an earlier model RT).
So, the next time my bike is in for maintenance/oil change, I'll just throw some money at the dealer. At least, if something goes wrong, they're responsible for making it good. 
-

I called my dealer about this today as per their tip, i had orderd the TricLED sets. Headlights were easy but per this thread, the fog lights are a bit of a nightmare. The service department helped me by telling me to go to the instructions.brp.com and input the part number of their fog light kit which is 219400579. That took me to a step-by-step instruction guide for installing which i then printed. here is the exact link to the instructions: http://instructions.brp.com/content/...mber=219400579
Hopefully the link above works but i know sometimes these forums don't like long URLs. if not, just go to instructions.brp.com like i said above and enter the part number. Good luck!
Reed
-
Very Active Member
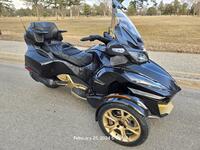
 RTFF RTFF
Safe Rides,
David and Sharon Goebel
Both Retired USAF Veterans
2018 Anniversary Edition RT Limited
Baja Ron ultimate swaybar. Vredestein tires, Baja Ron Front Shock Pre-load adjusters, Pedal Box, See my Spyder Garage
IBA 70020 |
 |
-

Yep, that looks like a bad dream I had recently! Yikes!
-
 Posting Permissions
- You may not post new threads
- You may not post replies
- You may not post attachments
- You may not edit your posts
-
Forum Rules
|




 Reply With Quote

 No easy solutions I'm afraid. Some people remove the frunk to gain better access.


 .
. 

 2015 RTL, BajaRon Swaybar, LaMonster LED Headlights and Foglights, LaMonster Spydercuff, LaMonster LED mirror wrap, Magic Mirrors, HMT Brake Light
 Happy
Happy  Owner
Owner
 D... You and I just think too much alike!!


