|
-
Very Active Member
 2014 RT rear brake pad replacement 2014 RT rear brake pad replacement
Has anyone done a step by step video on changing rear brake pads on a 2014RT Limited? If so, is there link to it? 
-
Very Active Member

 Don't know..... Don't know.....
Hard to find things here but ..... your best place to look is you tube or Google. In many cases they will refer you back here but they are better at finding things here...
Gene and Ilana De Laney
Mt. Helix, California
 2012 RS sm5
2012 RS sm5 , 998cc V-Twin 106hp DIY brake and park brake Classic Black
-
Very Active Member


 Originally Posted by Chupaca

Hard to find things here but ..... your best place to look is you tube or Google. In many cases they will refer you back here but they are better at finding things here... 
yeah, I did a few searches here with no luck; then did a search on Google and You Tube; also no luck. The problem I'm having isn't actually in replacing the pads but in getting them sufficiently separated to get back on the disc. It seems the outer one got out of it's track when I had the caliper off replacing the rear tire. It looks like it is sitting about 1/8" higher up than the inner one and I cannot figure out how to get it squeezed back down enough to slide into the track properly.
-
Active Member
 Brake pads Brake pads
You must rotate the parking brake lever so that it pulls the piston back in. Do not try to force piston back as you can damage calliper.
-
Very Active Member


 Originally Posted by SpyderJerry

You must rotate the parking brake lever so that it pulls the piston back in. Do not try to force piston back as you can damage calliper.
It's not against the piston yet. seems the outer pad slipped out of it's track and I'm just needing to "see" the proper way to install new pads as I'm pretty sure that procedure will get me to where I need to be. I'm being super cautious here because this is my first DIY on a Spyder and I don't want to screw anything up and then have to go to a st(d)ealer and pay outrageous rates. I've been turning wrenches on motorcycles and cars since 1968 and the BRP engineers seem to have done a very good job of designing things so as to discourage even the most skilled DIYer.
Being 160 miles to the nearest dealer is also a deterrent. 
-
Very Active Member

 2014 RT rear brakes 2014 RT rear brakes
take your caliper off the mounting points; use a heavy needle nose pliers in the 2 holes and turn clockwise until caliper piston is flush, reinsert pads and clips, put the one bolt back through the hole in the pads and remount the caliper with blue locktite and ~ 70 Ftlbs of torque on the bolts of the caliper. 
All the great movements in the world began with a cup of coffee!
2018 F3-T
My mods: Can am Trailer hitch, USB and 12 volt power outlets, Gustason windshield, Bead rider seat cushion, battery harness for electric gear and battery tender, Time out trailer.

-
SpyderLovers Sponsor

 Flat spring Flat spring
On the ends of the caliper is a flat piece of metal made of spring steel. Pry that up and the pad slips under, then goes in. As Al mentioned, use needlenose pliers to rotate the piston in flush on the caliper. Try that. If you get stuck, call me. Number below. Iíll walk you thru it. Joe
Joe Meyer

Dealer for the Outlaw/ROLO laser Alignment system
-
 rear brakes rear brakes
There IS A video on u tube for back brakes but I think its for a newer f3 however it is for the bembo brakes which the rt has the piston needs to be turned in with a pair of pliers I will be doing my brakes also when I get my pads not pushed in the pliers are for snap rings harbor freight has a kit u can buy also for the piston removal.
-
Very Active Member


OK, I've pushed on those pliars until I have permanent indentions in the palm of my hand-still can't get the piston to move. Gonna go for a little "beemer therapy" and try again in the morning.
-
Ozzie Ozzie Ozzie
2013 RT Ltd Pearl White
Ryde More, Worry Less!
-
Very Active Member


 Originally Posted by Peter Aawen

You aren't gonna get a Brembo piston on your Spyder rear brakes to move no matter how hard you PUSH - the pistons only move back in if you TURN!! ie, the Brembo piston used on the rear of these things will only SCREW back in!! 
Sounds like Captjam/Joe's offer of talking you thru the whole process if you call him might be worthwhile taking up? 
yeah, we've already visited. I actually was turning the pliars at the same time, just didn't say it that way. Unfortunately the piston still is not moving. I'm gonna start fresh in the morning with another suggestion from Joe, but not really holding my breath; not because of Joe's advice, but because I think I'm jinxed on this thing.
Right now, it's time to just kick back and think about it or maybe not think about it. 
Last edited by cruisinTX; 11-24-2017 at 10:14 PM.
-
Very Active Member

 TAHNK YOU--THANK YOU VERY MUCH!! TAHNK YOU--THANK YOU VERY MUCH!!
Big thanks to all for your guidance; the Spyder is back together and did well on a short test ride. Special thanks to Joe for his patience in multiple texts and a few phone calls in this ordeal. I ended up having to make a special tool to get the piston to retract far enough to get the pads back in. There was once a time when I might have had the strength to do it; 30 years ago when I was able to bench press 275 pounds, now at 63 I may have lost some strength. That's a whole 'nuther story tough. 
Once again; thank you all for your help.
klc
Last edited by cruisinTX; 11-29-2017 at 01:01 PM.
-
SpyderLovers Sponsor

 Yay! Yay!
I love a happy ending!!
glad to help😄😄
Joe Meyer

Dealer for the Outlaw/ROLO laser Alignment system
-
Very Active Member


Check this video out. Dude also has an excellent video on how to replace the front pads. Actually shows how to do it, which doesn't happen too much on Spyder videos.
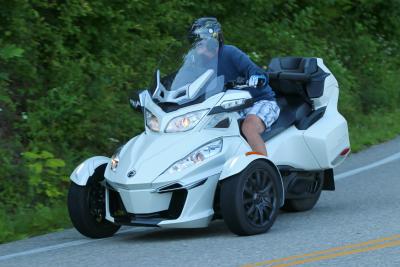
Current Ride
2015 RT-S SM6 Cocaine
Pearl White
Diamond R Web Armrests
Shorty Windshield
Previous Ride
2012 RT SM5 The Beast
Pure Magnesium Metallic
-
Very Active Member


 Originally Posted by Bam Bam and Pebbles

Check this video out. Dude also has an excellent video on how to replace the front pads. Actually shows how to do it, which doesn't happen too much on Spyder videos.
Wish I could have found that one a week ago. Thanks for sharing. 
-

Thanks for the posts I think the clips in the rear caliper on my Spyder may have gotten distorted because the pads went all the way down to metal. The new pads didn't fit right in place. I am going to get a spring clip kit for rear wheels to see if that helps. My son and I adjusted (tweaked) the clips to get pads in. I will take it for a ride to see how the brakes work.
-
Very Active Member
 New pads all around New pads all around
Did all 3 brake calipers last week. Pretty easy actually, looked at the videos. Sturdy needle nose pliers work fine. Broke in the pads with some easy ryding. Then a few hard stops with a cooling cycle in between. New pads DO provide more stopping power --- less pedal pressure. 24k miles on the RTS. Some pads were less than 1mm. But some weren't--- Just did them all and glad I did.
Going around Lake Tahoe with my wife today ( a yearly pilgrimage ) Plenty of up and down on that route.
Lew L
Kaos----- Gone but not forgotten. 
2014 RTS in Circuit Yellow, farkle-ing addiction down to once every few months. ECU FLASH IS GREAT. 
-
Very Active Member


Joe Meyer is absolutely Top Drawer when it comes to helping Spyder owners with problems. He has offered me sage advice and instructions on many of my maintenance exploits.
On a related hand we keep Bajaron busy and for those who purchase EBC brake pads and rotors from him the best tool to have in the inventory is his Brembo rear caliper piston retracting tool. The picture on the left is the business end of the tool and the one on the right is where you put the 3/8 drive ratchet with short extension. If you have two hands that's all you need to screw that piston clockwise all the way back with minimal effort. And you can't beat the price.
Bajaron Tool 2.jpgBajaron Tool 1.jpg
Artillery lends dignity to what would
otherwise be a vulgar brawl.
******************************
Cognac 2014 RT-S
-
SpyderLovers Sponsor


My pleasure, Jay. We love to ride, and want everyone else to love to ride, worry free. Knowledge replaces fear. Things break; so, fix it and keep on riding! Last week, I installed 3 seats 3 times, backrests on the 2020 RT countless times, fixed a fender light, installed Wedgies, scienced out trailer harnesses, and handlebars. Teaching a class on 3 wheels tomorrow, then getting busy next week with oil changes, tire replacement, services, and on and on. Fun!
Joe Meyer

Dealer for the Outlaw/ROLO laser Alignment system
-

My wife's brakes ('15 RT) started to make noise last week and the dealers are talking 3-4 weeks minimum if we leave it. Could someone give me an idea of how hard and what all is needed to change the rear brakes? Are there better pads that factory? If this is something that is complicated we may just have to wait or find an independent shop. I have worked on bikes in the past and my neighbor loves to work on them so I know he would help.
Thanks
Mark
-
Very Active Member


Question: when was the brake fluid last changed; are you doing it every two years as recommended in the schedule of service?
If you aren't due for a brake fluid change, you're fine for changing the pads. Buy EBC fully sintered pads from Bajaron along with his tool for retracting the rear piston, Post #18, a can of brake cleaner and a small bottle of fresh DOT 4 brake fluid. Read Ron's instructions in detail and follow them for the best results. Watch a couple of Youtube videos of a dude changing the front and rear pads on his F3, and have a six pack for you and your friend when the job's done. Don't let calipers hang by the brake fluid lines when you remove them from their mounting tabs. If you remove the rear wheel ABS speed sensor cable be certain to note the location of any shims and reinstall them in the same place. I clean the calipers and the rotors and mounting bolts with brake cleaner and a wire brush as necessary and use blue Loctite on the caliper bolts. Once you have replaced all the pads, pump the brake pedal several times to properly seat the pads BEFORE you turn on the ignition and then check the fluid level in the master cylinder reservoir to ensure it's full. Bed the pads in according to Ron's instructions and you're all set.
Artillery lends dignity to what would
otherwise be a vulgar brawl.
******************************
Cognac 2014 RT-S
-
Active Member
-
Very Active Member


The job is a good bit easier if you raise the rear wheel on some blocks as opposed to working within ground clearance.
Artillery lends dignity to what would
otherwise be a vulgar brawl.
******************************
Cognac 2014 RT-S
-

 Originally Posted by JayBros

Question: when was the brake fluid last changed; are you doing it every two years as recommended in the schedule of service?
If you aren't due for a brake fluid change, you're fine for changing the pads. Buy EBC fully sintered pads from Bajaron along with his tool for retracting the rear piston, Post #18, a can of brake cleaner and a small bottle of fresh DOT 4 brake fluid. Read Ron's instructions in detail and follow them for the best results. Watch a couple of Youtube videos of a dude changing the front and rear pads on his F3, and have a six pack for you and your friend when the job's done. Don't let calipers hang by the brake fluid lines when you remove them from their mounting tabs. If you remove the rear wheel ABS speed sensor cable be certain to note the location of any shims and reinstall them in the same place. I clean the calipers and the rotors and mounting bolts with brake cleaner and a wire brush as necessary and use blue Loctite on the caliper bolts. Once you have replaced all the pads, pump the brake pedal several times to properly seat the pads BEFORE you turn on the ignition and then check the fluid level in the master cylinder reservoir to ensure it's full. Bed the pads in according to Ron's instructions and you're all set.
The fluid was changed last year on dealers recommendation. It sounds like this shouldn't be too tough. Neighbor said he'd help. So now I'll look into ordering everything.
 Posting Permissions
- You may not post new threads
- You may not post replies
- You may not post attachments
- You may not edit your posts
-
Forum Rules
|


