|
-
Very Active Member

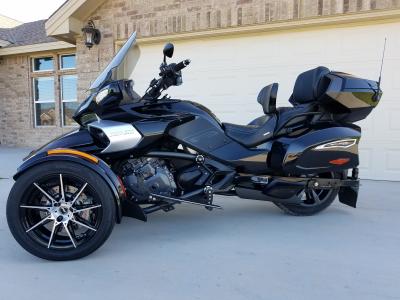
 BajaRon sway bar install details on a '16 F3-T BajaRon sway bar install details on a '16 F3-T
The instructions for the F3-T that came with the bar, though much better than most others, got a C+ grade. Why? Totally missing were: (a) remove the rain guard completely - four T25 and a Phillips body clip; (b) remove a SECOND 10mm bolt and nut with a sleeve in the frame as well as the one that holds the block ; (c) remove the T27 from the under frunk shield and move it out of the way with a bungee. The installation was, with those exceptions, well described. Because you need to remove both the 10mm bolts, the frame member will likely slip and need re-aligned with the frame channel (scratch-all does work but you have to yank a bit on the orange arms so make sure you are sturdy with your jack). You WILL NOT get that bar out or in with those bolts & sleeves in place using a jack.
If you just got your first set of tools for Mothers/Fathers day, get this done by someone else. I did most of the disassembly with the F3 on a steady ATV jack but found it necessary to let her down and raise the front with a full sized floor jack under the front frame to get clearance to R & R the bar. Adding a rubber 1-2 inch block to the jack cup would have helped a little as my jack topped out at just barely enough. The new blocks were a bit tough to get in so, again, make sure you are sturdy with your lifting equipment. I used a rubber hammer and a hunk of wood to tap them into the channel.
It was a bit of a sweaty chore to get it installed because of the extra steps. I read the instructions and decided to do it myself because I'm good with a wrench. However, had those steps been included, I might have gotten a helper or had it done at the dealer (I hate doing that). At the finish, it was a toss up that I made the right choice (not as young as I used to be). Pics show the extra steps left out of the instructions.
Now the meat:
PROs
Wheel bounce is greatly diminished.
Cornering is so much improved that I no longer need to do the monkey trick quite so much to ride the twisties. (see other post >CLICK ME<)
The start up from a traffic light turn (say turn left once the light changes) is miraculous! Shazam! Just GO!
Drifting is greatly diminished on uneven, bumpy Ohio roads.
Yaw on crowned roads is greatly reduced and wandering is nearly gone (I haven't aligned her yet).
Feels like it's on rails. Shyza!
CONs HUH?
Best addition thus far .... Recommended? You bet!


2016 F3-T SE6 Roadster , Extended brake pedal for which I drilled out the brake rod yolk to lower it and added spacers to lift it slightly Black/Grey
-
 Originally Posted by Rattlebars

The instructions for the F3-T that came with the bar, though much better than most others, got a C+ grade. Why? Totally missing were: (a) remove the rain guard completely - four T25 and a Phillips body clip; (b) remove a SECOND 10mm bolt and nut with a sleeve in the frame as well as the one that holds the block ; (c) remove the T27 from the under frunk shield and move it out of the way with a bungee. The installation was, with those exceptions, well described. Because you need to remove both the 10mm bolts, the frame member will likely slip and need re-aligned with the frame channel (scratch-all does work but you have to yank a bit on the orange arms so make sure you are sturdy with your jack). You WILL NOT get that bar out or in with those bolts & sleeves in place using a jack.
If you just got your first set of tools for Mothers/Fathers day, get this done by someone else. I did most of the disassembly with the F3 on a steady ATV jack but found it necessary to let her down and raise the front with a full sized floor jack under the front frame to get clearance to R & R the bar. Adding a rubber 1-2 inch block to the jack cup would have helped a little as my jack topped out at just barely enough. The new blocks were a bit tough to get in so, again, make sure you are sturdy with your lifting equipment. I used a rubber hammer and a hunk of wood to tap them into the channel.
It was a bit of a sweaty chore to get it installed because of the extra steps. I read the instructions and decided to do it myself because I'm good with a wrench. However, had those steps been included, I might have gotten a helper or had it done at the dealer (I hate doing that). At the finish, it was a toss up that I made the right choice (not as young as I used to be). Pics show the extra steps left out of the instructions.
Now the meat:
PROs
Wheel bounce is greatly diminished.
Cornering is so much improved that I no longer need to do the monkey trick quite so much to ride the twisties. (see other post >CLICK ME<)
The start up from a traffic light turn (say turn left once the light changes) is miraculous! Shazam! Just GO!
Drifting is greatly diminished on uneven, bumpy Ohio roads.
Yaw on crowned roads is greatly reduced and wandering is nearly gone (I haven't aligned her yet).
Feels like it's on rails. Shyza!
CONs HUH?
Best addition thus far .... Recommended? You bet!
Thanks for reporting back on your experience! I have the same Spyder as you and have an appointment with Netzley to do the swaybar install and a laser realignment.
A little voice in the back of my head has been wondering whether it'll all make a worthwhile difference. Your report back has quieted that little voice! 
-
Active Member

With all due respect for you doing you own swaybar install, the two pictures of what you took loose wasn't needed. I have installed 12 BajaRon sway bars total. 5 on RT's, 6 on F3T's and 1 on a a RS. The instructions for installing the swaybars and heim links from Ron are straight on.
www.sasspyders.com
2016 F3T
2015 Freedom Trailer
Sypderpops BumpSkid Plate
Lamonster ISP Key Cover
Lamonster F3 Bar Clamp and Power Port
Lamonster RIP floorboards and frame caps
Lamonster Chevron Highway Pegs
BajaRon Swaybar & Heim Links
F4 Custom 21" tinted windshield
BRP Cannonball Seat
BRP F3 Idler Pully
FOBO TPMS
LidLox (dual)
Garmin 660LM GPS
Cat Delete Performance Pipe
F3T Top Case
PPA Black Widow Wheels
Custom Frunk Wrap
-
I put a BajaRon swaybar on both my 2012 RS and my 2015 F3S but so far I have not found that my 2017 F3T needs one and I have hit some pretty serious twistees. Time will tell.
-
Very Active Member

Well you won't have to do it again. I put one on our 2016 F3L and I don't recall having any trouble. It is a known thing how high you have to get the newer spyders to get the bar out of and into the channel in the frame. 22".
2016 F3 Limited
2019 Ryker Rally
2014 Suzuki V Strom 650
2020 CSC TT 250
-
Very Active Member

Never work under the bike while its supported only by a jack.
-
Originally Posted by KJWEB
With all due respect for you doing you own swaybar install, the two pictures of what you took loose wasn't needed. I have installed 12 BajaRon sway bars total. 5 on RT's, 6 on F3T's and 1 on a a RS. The instructions for installing the swaybars and heim links from Ron are straight on.
Hello...
I have to agree with the original poster. I installed the Ron's ASB on my 2017 F3T. There were several steps needed to do the job that were not addressed in the instructions that I received with the ASB. I didn't take the time to document them, but they included having to remove the splash guards and the plastic shrouds on the underside of the spyder, to get at bolts. Been wrenching on motorcycles and cars for over 50yrs, including many frame off restorations. The additional items not described in the instructions definitely needed to be done to complete the job.
Regards,
Don
-
Originally Posted by dondje
Hello...
I have to agree with the original poster. I installed the Ron's ASB on my 2017 F3T. There were several steps needed to do the job that were not addressed in the instructions that I received with the ASB. I didn't take the time to document them, but they included having to remove the splash guards and the plastic shrouds on the underside of the spyder, to get at bolts. Been wrenching on motorcycles and cars for over 50yrs, including many frame off restorations. The additional items not described in the instructions definitely needed to be done to complete the job.
Regards,
Don
Did the job on F3s without any instructions. All is self apparent and quite easy. The hint about required lift height was helpful.
 Posting Permissions
- You may not post new threads
- You may not post replies
- You may not post attachments
- You may not edit your posts
-
Forum Rules
|


 Reply With Quote

